How to Inspect Your Own House, Part 9: The Air Conditioner
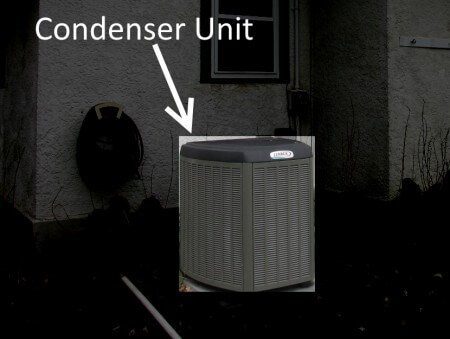
Most single-family homes in Minnesota have a split system air conditioner. This consists of a big boxy-looking thing with a fan that sits outside the house, which is connected to a box that sits on top of the furnace through two refrigerant lines; one line is small and will be warm to the touch, while the other is larger, insulated, and runs cold to the touch.
The big thing at the exterior contains the compressor, a fan, and a condensing coil. It’s sometimes referred to as the condenser unit, or the condensing coil.
Inspect the outside stuff
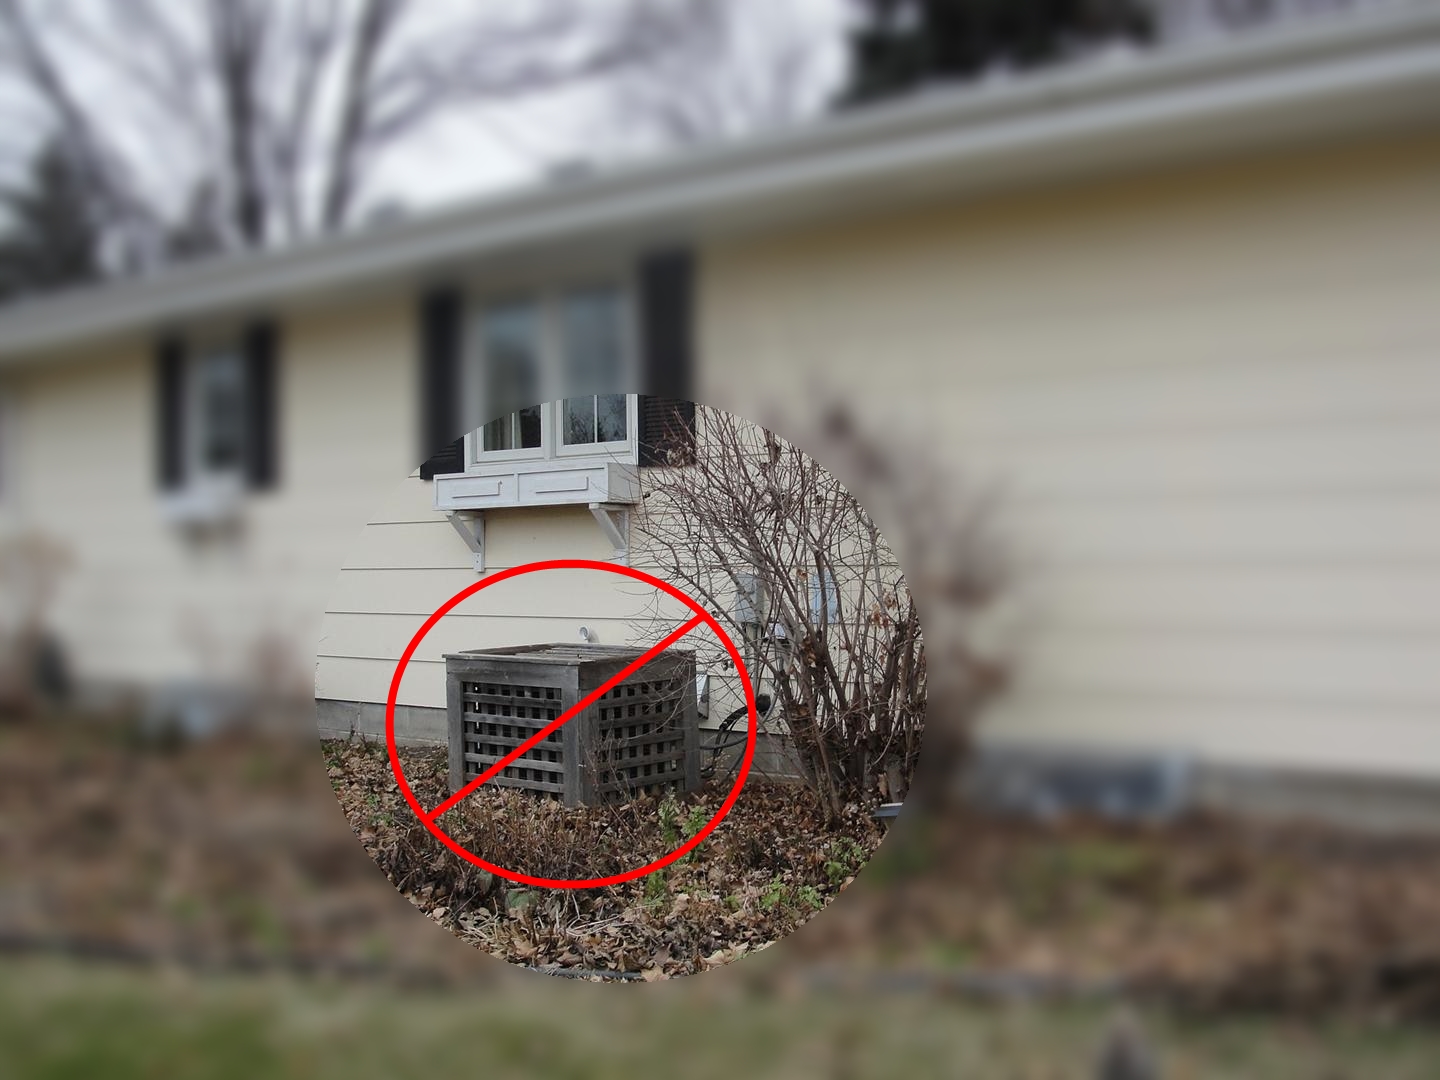
Start your inspection of the air conditioner by making sure that the exterior unit is clean and unobstructed. It dissipates heat by sucking in air on the sides; if it can’t do that, it won’t operate efficiently. This means no trellis attached to it, no ivy, no plants, etc.
Condensing coils also need to be cleaned regularly. When they’re covered with dirt, dust, grass clippings, dryer lint, cottonwood seeds, and other outdoor stuff, airflow can be severely hampered. Take the time to inspect all sides of the unit and clean the coils off if necessary. You can usually do this by spraying the unit down with a garden hose.
If the unit has protective grills that prevent access to the coils, the grills will need to be removed first. At that point, you might have to do a little bit of dismantling, and some homeowners might prefer to contact an HVAC tech to do the work.
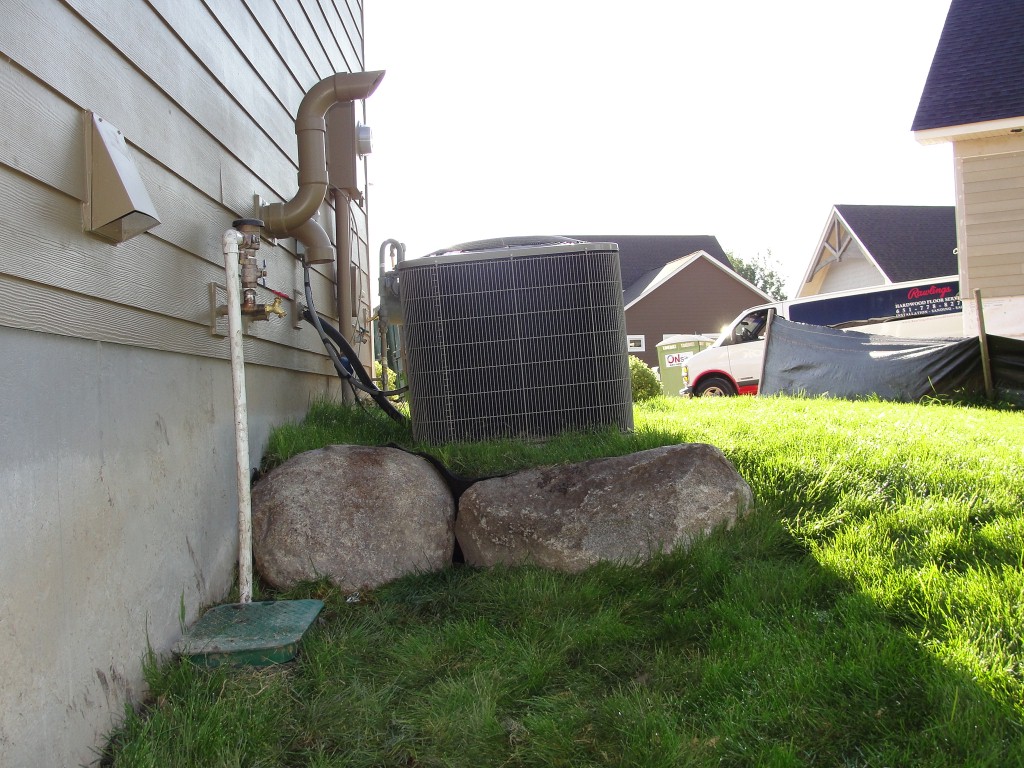
While inspecting the exterior portion of the unit, make sure it’s sitting on a level surface and that the refrigerant lines aren’t being stressed. The photos below show some nice examples of air conditioners on top of soils that had settled so much that the units were tipping and the refrigerant lines were being stressed.
This is typically a simple fix, as the portion at the outside is usually lighter than most people think, and there is rarely (if ever) anything holding it in place. Older installations typically had the condenser installed on a concrete or plastic pad right on the ground, but most units installed on new homes today are mounted to the side of the house. The helps them stay cleaner longer, and it usually prevents tipping of the units. Usually.
Turn it on
Next, turn your air conditioner on by switching the thermostat to “cool” if it’s not already there, and by setting the thermostat to a temperature about five degrees cooler than the current indoor temperature. This should get the air conditioner to kick on. To be sure the system is running, look outside and make sure the fan at the condenser unit is turning.
Warning: don’t do this test when it’s cold outside or you could damage your air conditioner. To err on the side of caution, make sure the outdoor temperature has been at least 65° fahrenheit for the last 24 hours.
If the system doesn’t turn on, here are a few things to check which are quite similar to my furnace troubleshooting list, but not identical:
Check the service switch for the furnace to make sure it’s on. This is usually a switch that looks identical to a light switch, and it’s usually attached to the side of the furnace or very close to it. The air conditioner won’t run if this is off.
Check the circuit breaker or fuse at the main panel.
Test or replace the batteries in the thermostat.
Make sure the blower fan cover is in place at the furnace.
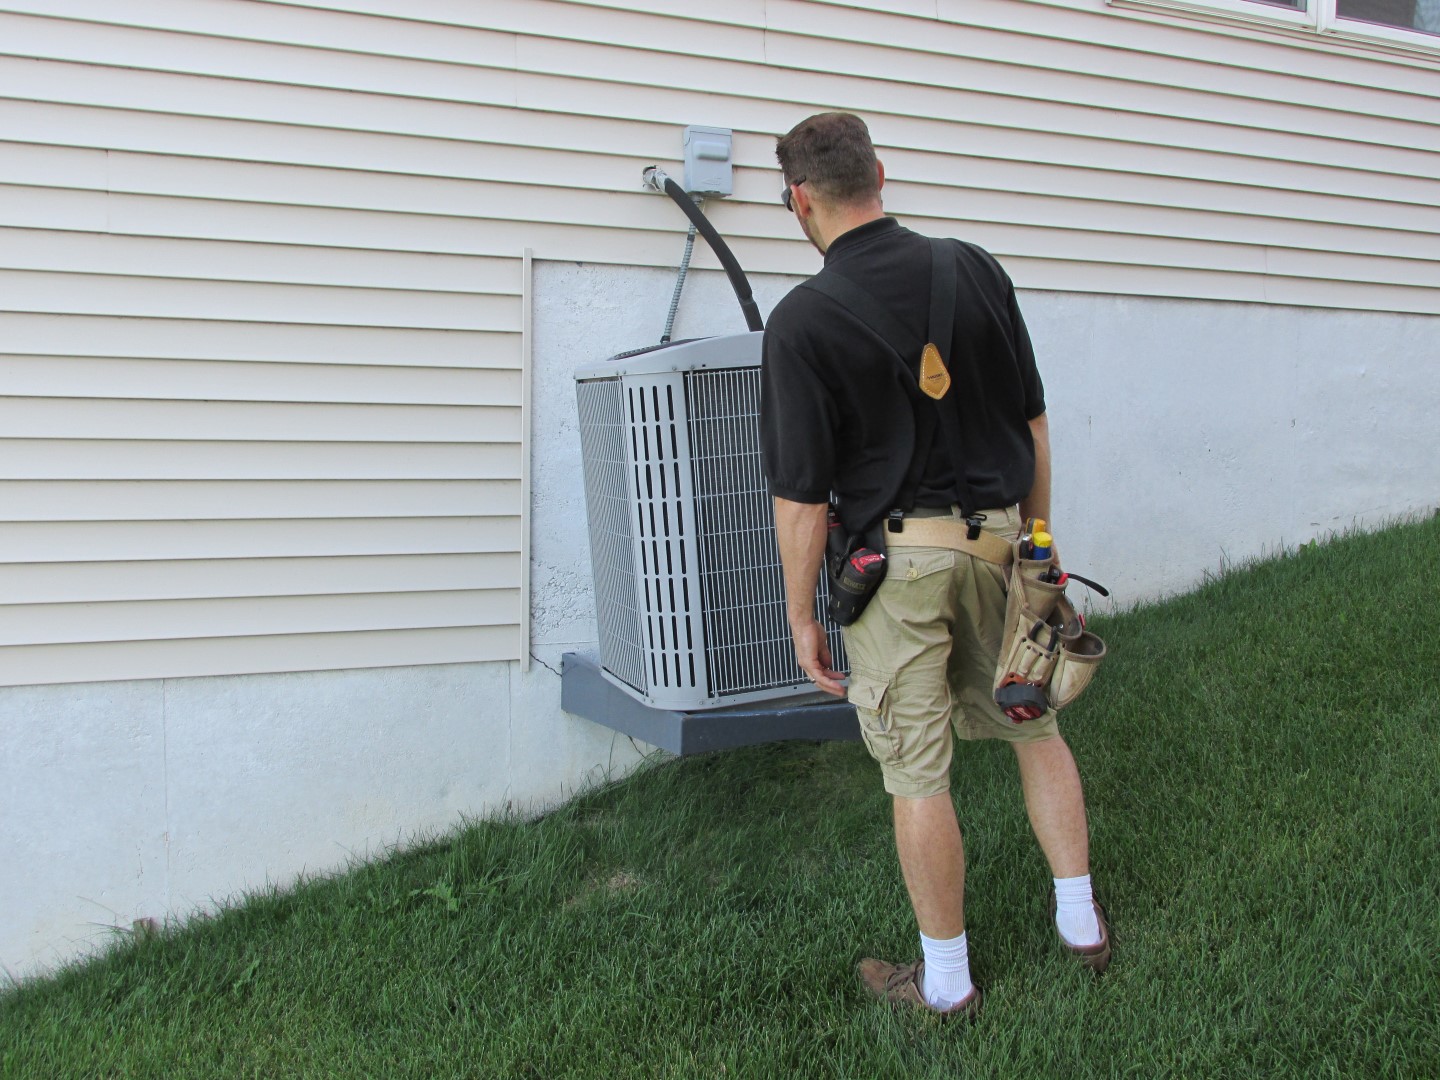
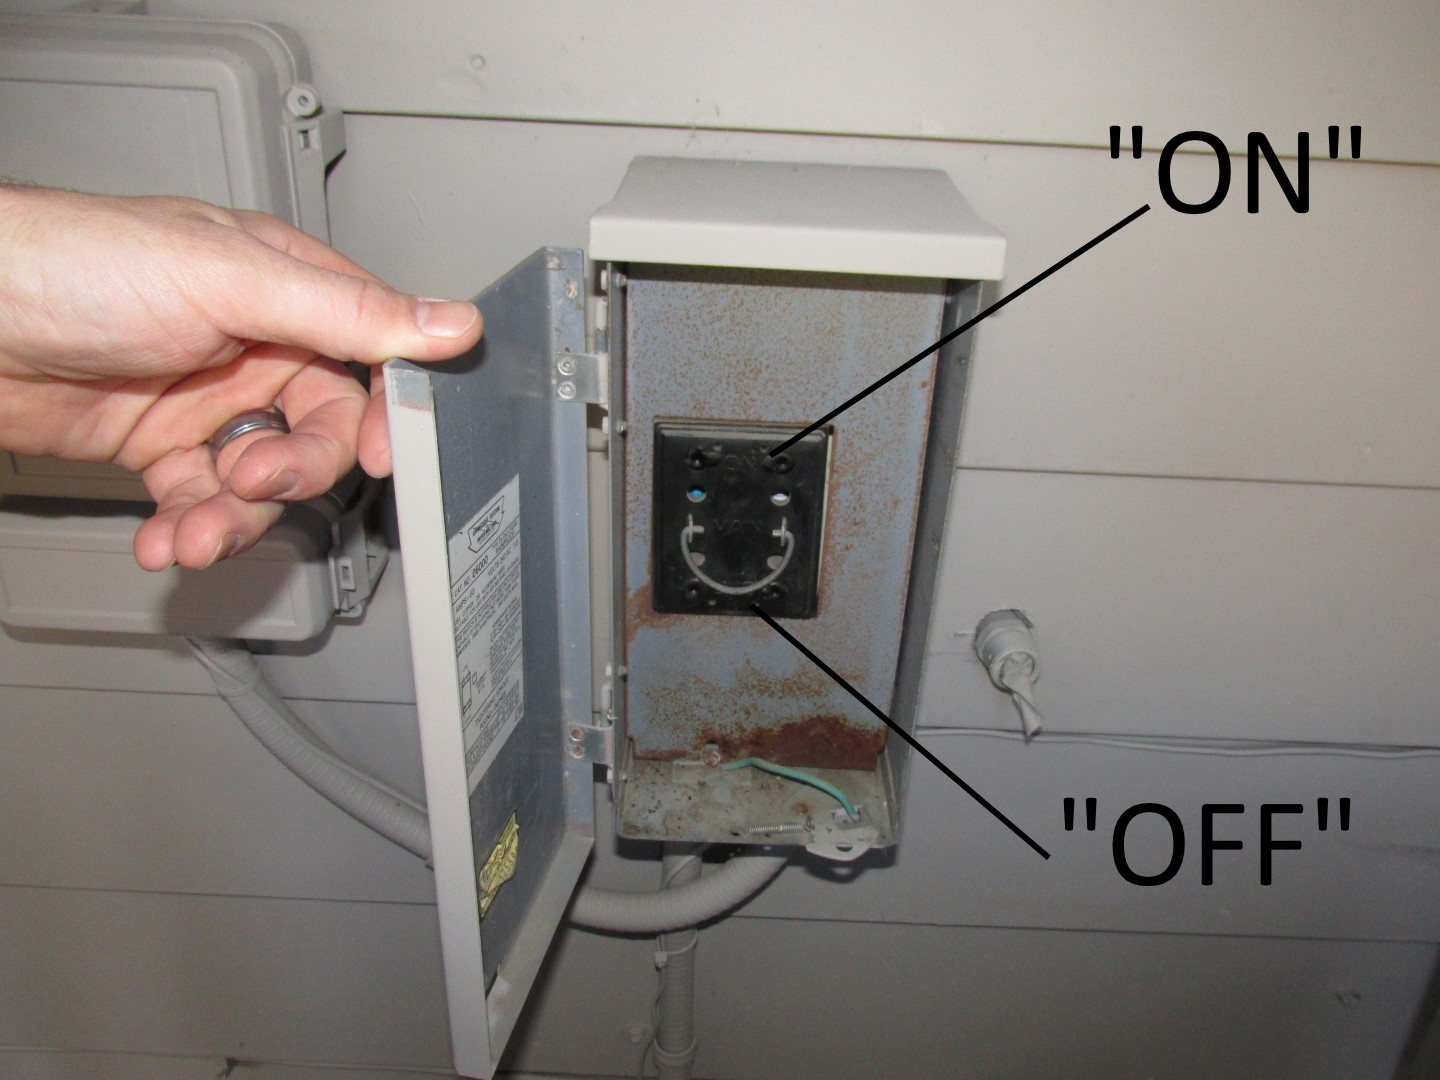
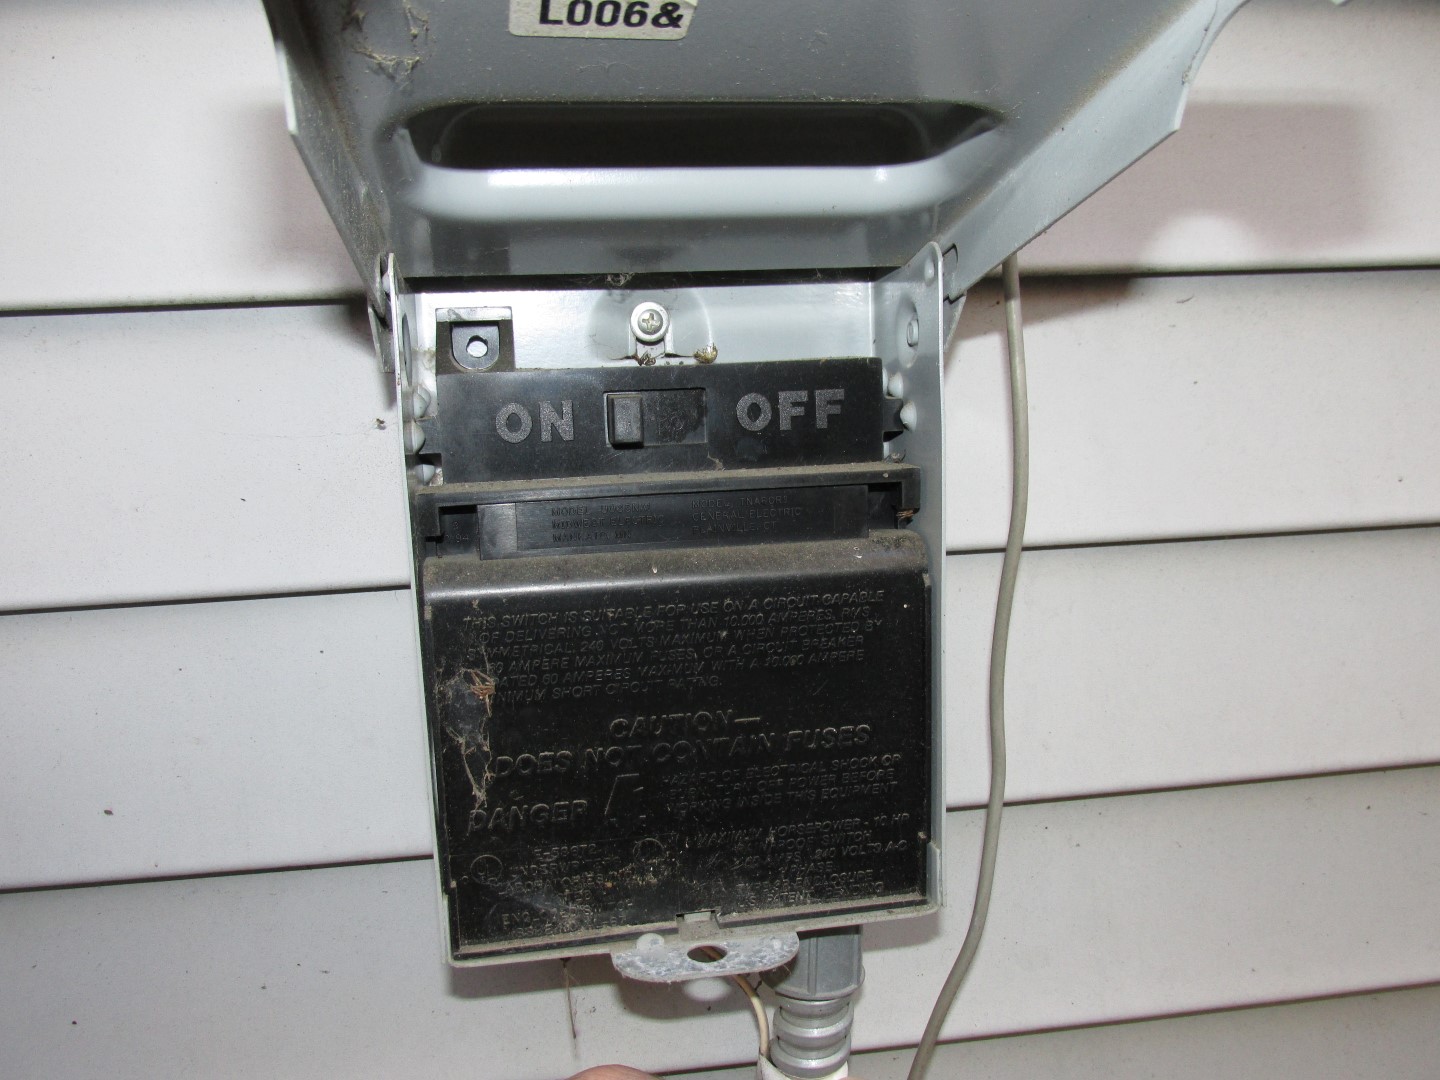
Check the disconnect at the exterior. Every air conditioner should have a disconnect at the exterior so the power can be safely turned off to the unit by a technician, and they shouldn’t have to worry about someone in a different part of the home accidentally turning the power back on while the technician is working with exposed electrical components. This was covered in my blog post about locks at circuit breakers.
If the disconnect has a pull-out block, make sure the pull-out is installed properly. Most of them can go in upside-down, which will prevent the unit from getting any power. When the pull-out is installed in the “on” position, you’ll see the word “on” at the top.
If the disconnect has a switch, make sure it’s on.
If the disconnect is a circuit breaker, make sure it’s on and not tripped or turned off.
If you have a load-management device, aka a “Saver Switch” is installed, check to see if it’s activated. Check out the video clip below for info on what these are and how to determine if they’re working.
If you go through that whole troubleshooting list and still can’t get your air conditioner to kick on, call a technician.
Once your air conditioner does turn on, go back outside and listen to it. A properly operating air conditioner will make a steady noise. If it makes a surging noise or any noises that seem ‘funny’, it could indicate a problem with the unit. That would be a good excuse to call a technician.
The Filter
The filter for your air conditioner is the same as the filter for your furnace, and you need to change it during the summer and winter. A dirty filter restricts airflow, which reduces efficiency and increases the potential for problems.
The Temperature
After your air conditioner has been running for about 15 minutes, check the temperature of the air coming out to make sure the unit is cooling properly. Air blowing out of registers always feels cool on your skin, so don’t trust the way it feels. Use a thermometer to verify the air conditioner is actually cooling. This will be similar to testing the temperature differential on a furnace; check out my blog post on that topic for more info: A DIY Test for Furnaces.
When checking the temperature differential, take your measurements as close to the air conditioner as possible. The difference in temperature between the air going in and the air coming out should usually be somewhere in the neighborhood of 15 – 20 degrees. If it’s much higher or much lower than that, it’s probably not cooling properly and it’s time to call in a pro.
The Condensate Line
An air conditioner’s two jobs are to remove heat and remove moisture from the air. To remove moisture, condensation occurs at the box that sits on top of the furnace. This box is called the evaporator coil, and it’s usually shaped like the letter “A”, so it’s often called an “A-coil”. There’s a concealed drain pan below this coil that connects to the condensate drain line. That’s where all the condensate, aka water, goes.
If the condensate line gets clogged or obstructed, you’ll end up with a big mess which could cause damage to the furnace, and possibly parts of the building. Keep the condensate line clean to help prevent this. To make sure there aren’t any hidden condensate leaks above the furnace, remove the blower door to your furnace and look inside that compartment for moisture. If you find moisture, you have a condensate leak, which is probably the result of a clogged line.
Note: if you have an air conditioner in an attic or any other place where a condensate leak could cause damage, carefully inspect the installation. Check out my blog post on that topic for the specific rules that need to followed when air air conditioner is installed in an attic or similar location: Air conditioners in attics and how to manage condensate.
If you’d like to try clearing a clogged condensate line yourself, or you enjoy squeezing blackheads and you’d like to do the equivalent for your air conditioner, check out this blog post with some great DIY advice: How to clean the AC condensate line. Just ignore the part about most units draining to the outdoors; most units here in Minnesota drain to a floor drain or a condensate pump.
That’s about all I can think of when it comes to homeowner inspections of the air conditioner, and that concludes this marathon 9-part series on how to inspect your house. Thanks for reading!
Click on any of the links below to see the past topics in this series:
[…] week’s blog post about inspecting air conditioners was all about traditional air conditioners, with an evaporator coil sitting on top of a furnace in […]
Air Conditioner Problems In Minneapolis
October 12, 2015, 9:32 pm
[…] How to Inspect Your Own House, Part 9: The Air Conditioner … – If you go through that whole troubleshooting list and still can’t get your air conditioner to kick on, call a technician. Once your air conditioner does turn on, go … […]
I recently had a home inspection on an Estate I am selling as Executor. The home inspectors came on day when the low temperature was 40 and the high temperature was 60. They set our air conditioning to cool from heat to 51 degrees and claim that it doesn’t work, because after running it for awhil,e it got down to 63 only instead of 51 degree. I have written to YORK, the manufacturer, to determine if the system is even designed to reach 51 degrees. I would be interested in your assessment of the practiced used by this home inspector. The system was new two years ago and installed by a trusted family friend Werner plumbing of Brigantine, NJ.
That’s a practice I’ve never heard of. The only method of testing an air conditioner during a home inspection, that I’ve ever heard of, is to verify that it produces cold air; not bring the temperature down into the 50s. Brr.
 Condensing coils also need to be cleaned regularly. When they’re covered with dirt, dust, grass clippings, dryer lint, cottonwood seeds, and other outdoor stuff, airflow can be severely hampered. Take the time to inspect all sides of the unit and clean the coils off if necessary. You can usually do this by spraying the unit down with a garden hose.

 If the unit has protective grills that prevent access to the coils, the grills will need to be removed first. At that point, you might have to do a little bit of dismantling, and some homeowners might prefer to contact an HVAC tech to do the work.
While inspecting the exterior portion of the unit, make sure it’s sitting on a level surface and that the refrigerant lines aren’t being stressed. The photos below show some nice examples of air conditioners on top of soils that had settled so much that the units were tipping and the refrigerant lines were being stressed.
If the unit has protective grills that prevent access to the coils, the grills will need to be removed first. At that point, you might have to do a little bit of dismantling, and some homeowners might prefer to contact an HVAC tech to do the work.
While inspecting the exterior portion of the unit, make sure it’s sitting on a level surface and that the refrigerant lines aren’t being stressed. The photos below show some nice examples of air conditioners on top of soils that had settled so much that the units were tipping and the refrigerant lines were being stressed.
 This is typically a simple fix, as the portion at the outside is usually lighter than most people think, and there is rarely (if ever) anything holding it in place. Older installations typically had the condenser installed on a concrete or plastic pad right on the ground, but most units installed on new homes today are mounted to the side of the house. The helps them stay cleaner longer, and it usually prevents tipping of the units. Usually.


Air conditioners in attics: leaks make a big mess | Structure Tech Home Inspections
August 11, 2015, 3:21 am
[…] week’s blog post about inspecting air conditioners was all about traditional air conditioners, with an evaporator coil sitting on top of a furnace in […]
Air Conditioner Problems In Minneapolis
October 12, 2015, 9:32 pm
[…] How to Inspect Your Own House, Part 9: The Air Conditioner … – If you go through that whole troubleshooting list and still can’t get your air conditioner to kick on, call a technician. Once your air conditioner does turn on, go … […]
Sally Turkavage
April 28, 2021, 5:52 am
I recently had a home inspection on an Estate I am selling as Executor. The home inspectors came on day when the low temperature was 40 and the high temperature was 60. They set our air conditioning to cool from heat to 51 degrees and claim that it doesn’t work, because after running it for awhil,e it got down to 63 only instead of 51 degree. I have written to YORK, the manufacturer, to determine if the system is even designed to reach 51 degrees. I would be interested in your assessment of the practiced used by this home inspector. The system was new two years ago and installed by a trusted family friend Werner plumbing of Brigantine, NJ.
Reuben Saltzman
April 28, 2021, 6:03 am
Hi Sally,
That’s a practice I’ve never heard of. The only method of testing an air conditioner during a home inspection, that I’ve ever heard of, is to verify that it produces cold air; not bring the temperature down into the 50s. Brr.