While a thorough furnace inspection is best left to a pro, there are a few basic things that homeowners can inspect to help prevent safety and operational problems.
To inspect your furnace, start by taking a look at the filter and replace it if it’s dirty. Religiously replacing the furnace filter is one of the easiest and most important things that you can do to help prevent problems with your furnace. The filter isn’t there to clean the air that you breathe; it’s there to keep the furnace clean. A dirty filter means restricted airflow, which means less heat being dissipated from the heat exchanger. This can cause the furnace to run hotter than it’s supposed to, which can lead to premature failure or complete shut-down of the furnace. This is very important.
Which filter to use?
Most heating systems in Minnesota have a slot for a 1” replaceable air filter. You have three basic options of filters, which some might call Good, Better, and Best. But I don’t. I call them Junk, Good, and Restrictive. Junk filters are typically blue fiberglass filters that are good for keeping tumbleweeds out of your furnace, and they need to be changed monthly. Don’t use these, as they allow too much to pass through. Good filters are the pleated style that should be changed at least every 90 days. These are the ones I use in my own house, and they have a MERV rating of between 5 and 8. The super-allergen filters have a much higher MERV rating, and I stay away from those. They get reduce airflow too much for my taste. For an in-depth discussion of the pros and cons of restrictive furnace filters, check out The Unintended Consequences of High-MERV Filters.
Combustion Air
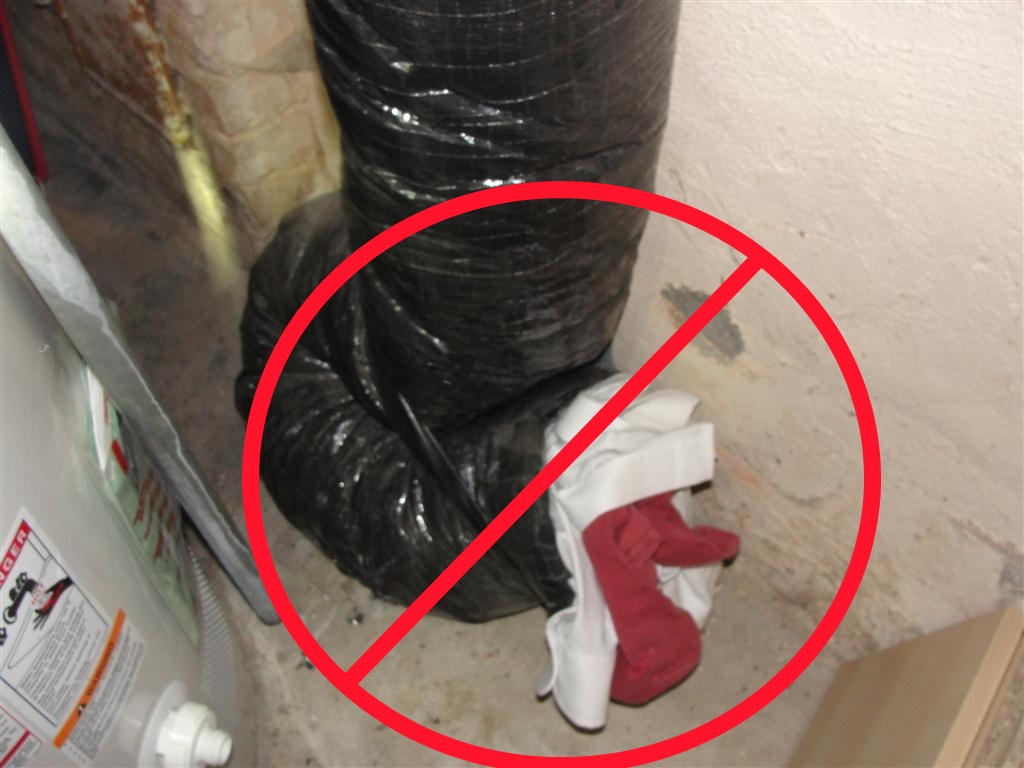
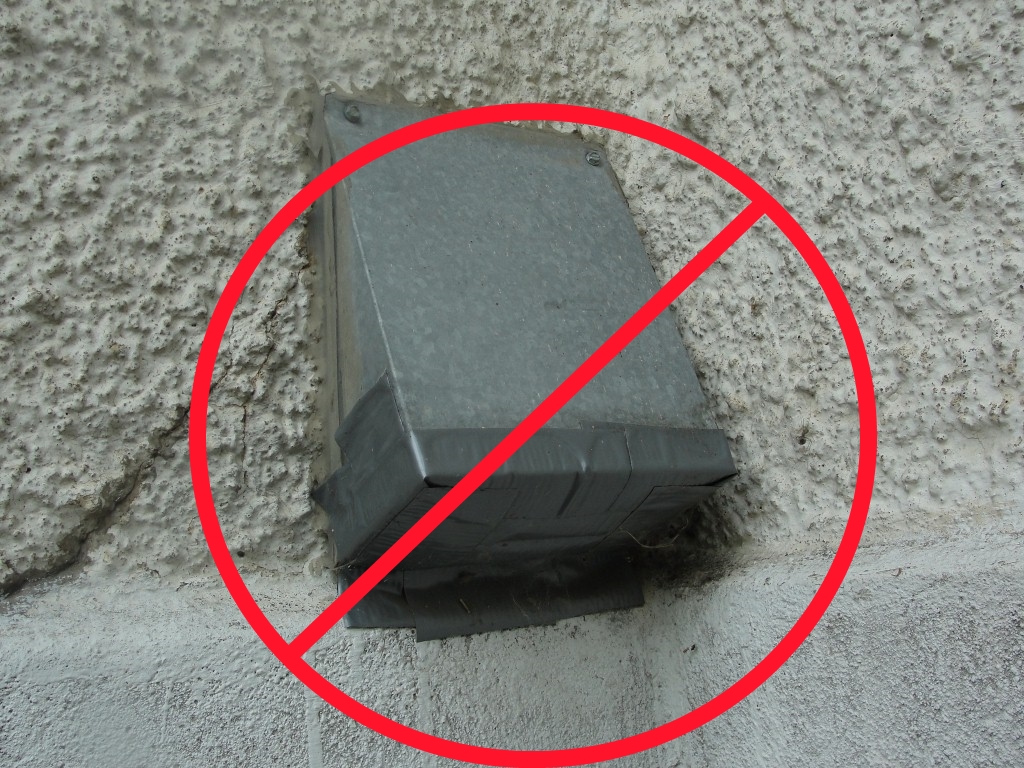
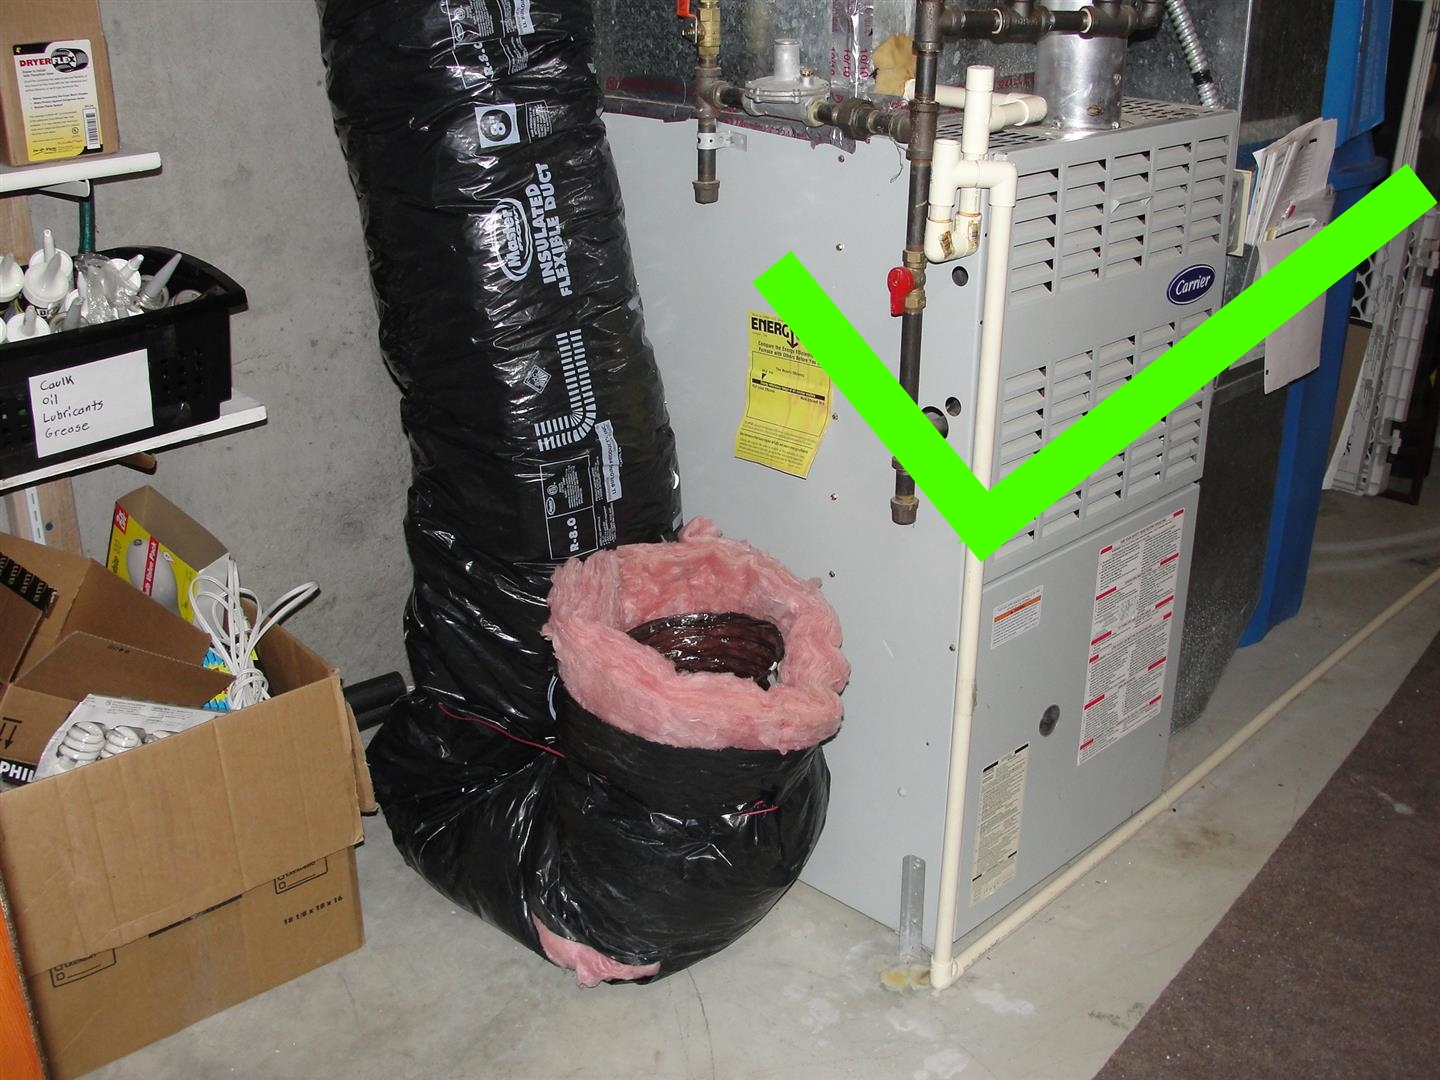
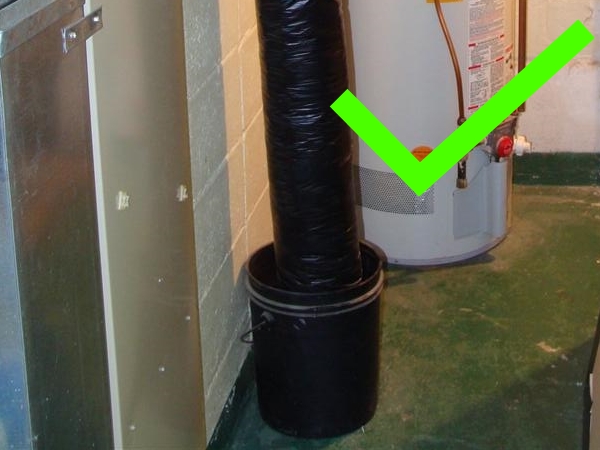
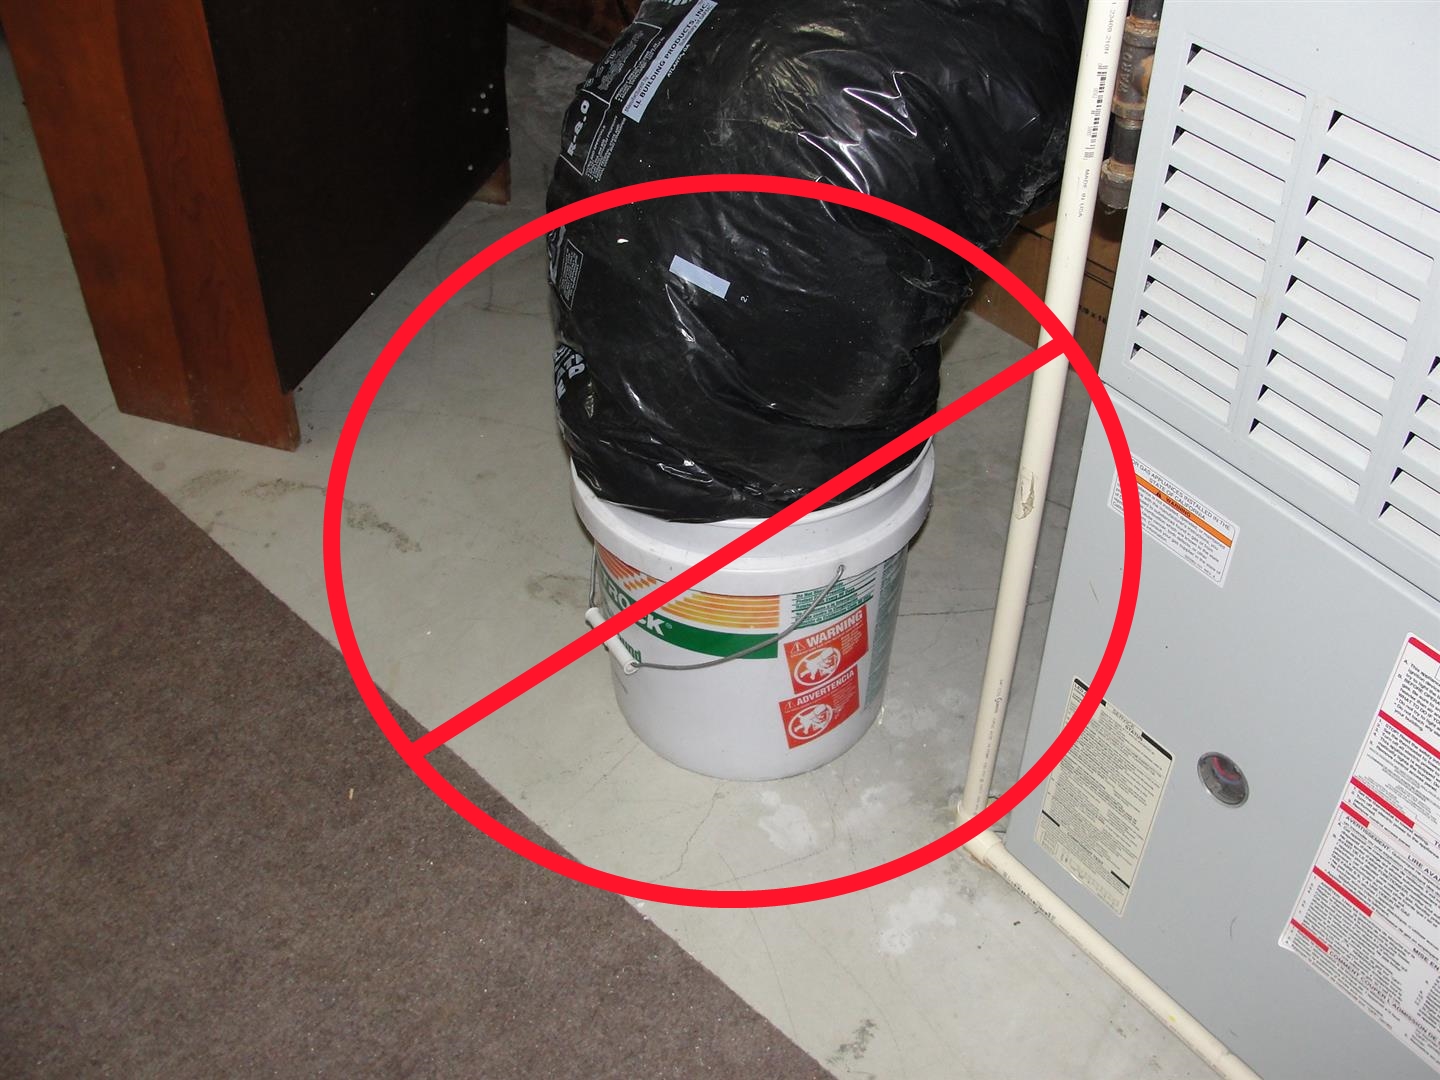
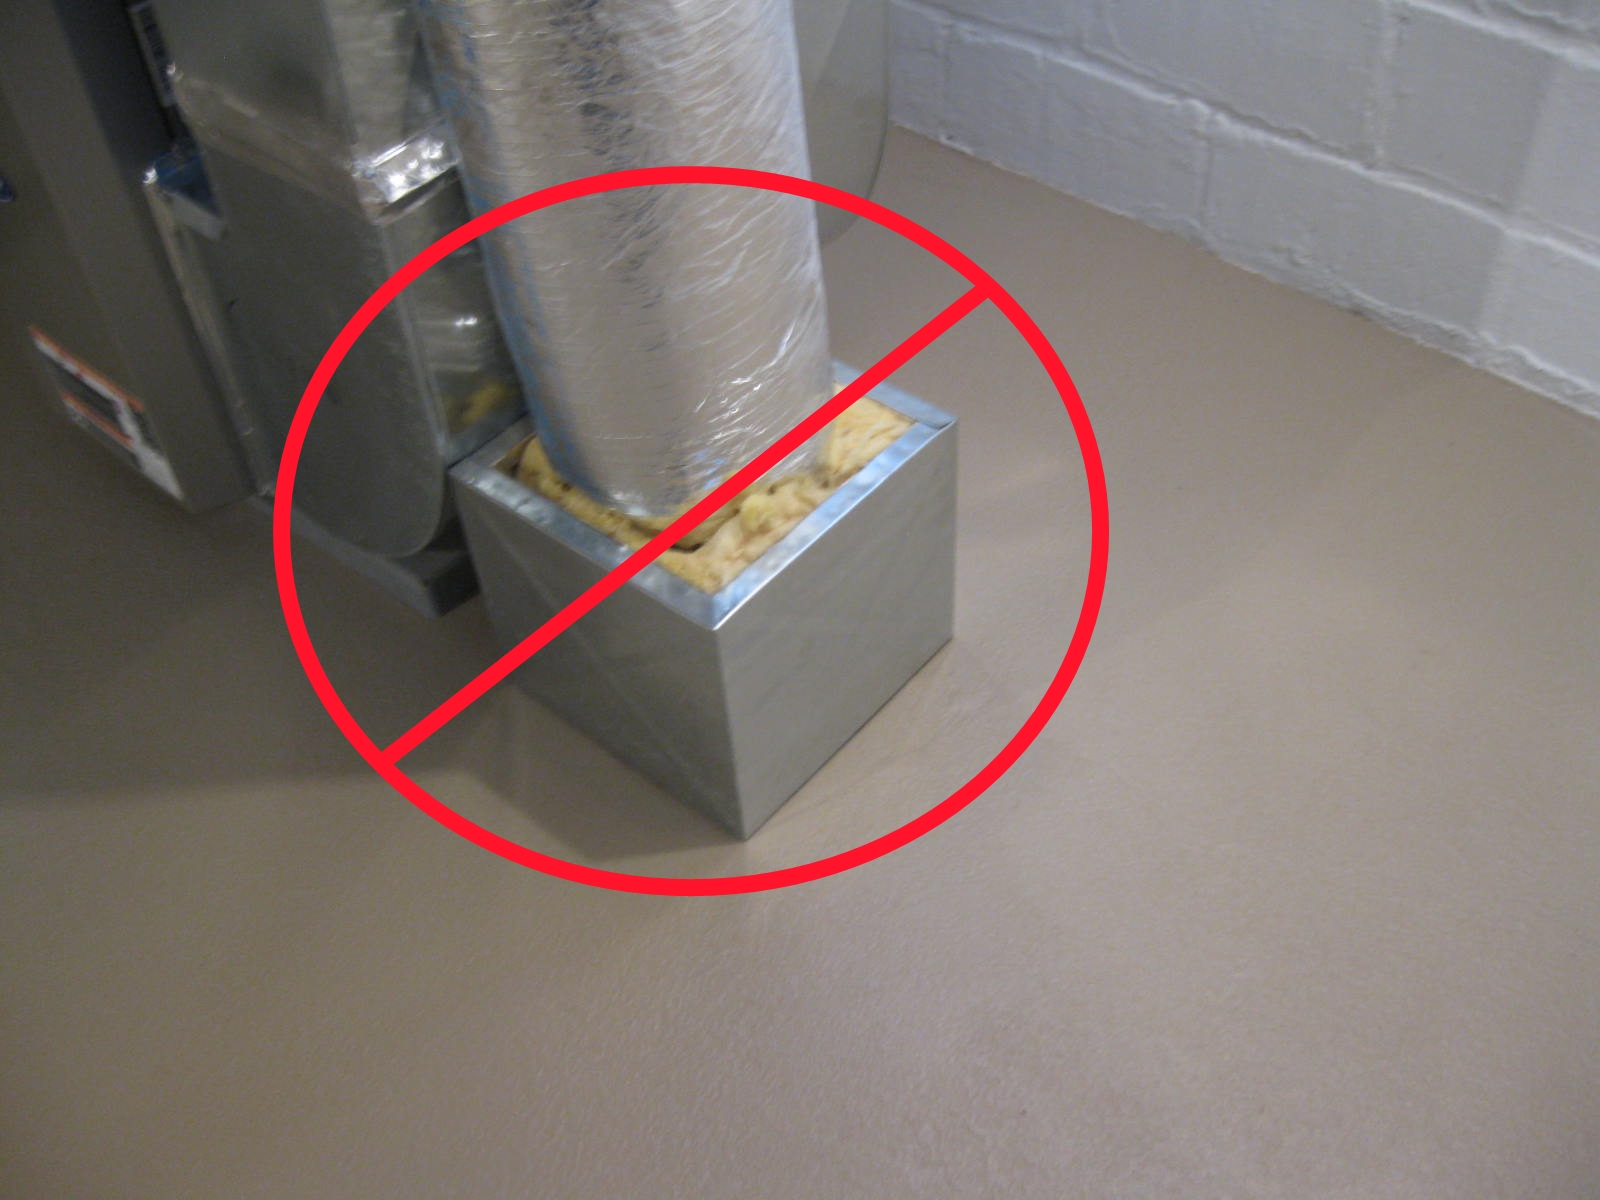
If you have a combustion air duct coming into your furnace room, make sure it’s not blocked. I gave several examples of blocked combustion air ducts in my blog post about combustion air duct problems and solutions. Here are some self-explanatory photos from that post:
Next, check to see if your furnace is operational. Set your thermostat to heat mode and turn up the heat about five degrees warmer than what the thermostat thinks the temperature is. Now head to your furnace and make sure it fires up. If the furnace doesn’t fire up, here are a few more items to check:
-
Check the service switch to make sure it’s on. This is typically a light switch that’s either mounted to the furnace or located on a wall very close to the furnace. If this switch is off, the furnace won’t run.
-
Check the circuit breaker or fuse at the main electric panel.
-
Test or replace the batteries in the thermostat.
-
Make sure the blower fan cover is in place. If the cover is removed, a safety switch on the blower compartment should prevent the furnace from turning on.
Older furnaces will typically fire up instantly, while newer furnaces often go through a startup cycle, where the blower fan runs for a while, the draft fan runs, then the furnace fires. If the furnace is working properly, the flames will fire up and stay ignited. If the flames go on and then off again right away, there’s a problem with the furnace and it’s time for a service call. The video clip below shows an example of this:
Once the furnace fires up normally, it should stay running without shutting off until the thermostat is satisfied. If the furnace runs for a few minutes and then shuts off before satisfying the thermostat, it’s short-cycling, which is a problem. This could be caused by an oversized system or a thermostat located in a poor location, like right above a heat register. A dirty furnace filter can also cause a furnace to short-cycle, but you already checked that, right?
Now go around your house and check to make sure the supply registers are open and unobstructed and make sure there is warm air coming out of them. If too many registers are closed off or obstructed, the furnace probably won’t operate properly. Check out this post at the Energy Vanguard blog for more information on that topic: Can You Save Money by Closing HVAC Vents in Unused Rooms?
After the furnace has been running for about fifteen minutes, put your hand on the ductwork above the furnace.

If everything is operating normally, the ductwork will be hot, but not uncomfortably hot. You should be able to leave your hand on the ductwork without feeling any pain. If the plenum is uncomfortably warm or you’d like to conduct a more technical test, check out my blog post titled A DIY Test For Furnaces.
Those are the basics, but it’s still a good idea to have your furnace professionally inspected annually. More on that topic here: Are Annual Furnace Inspections Really Necessary?
Click on any of the links below to see the past topics in this series:
-
- How to Inspect Your Own House, Part 1: Roof and Chimney
- How to Inspect Your Own House, Part 2: Exterior Water Management
- How to Inspect Your Own House, Part 3: Siding
- How to Inspect Your Own House, Part 4: The Rest of the Exterior
- How to Inspect Your Own House, Part 5: Electrical
- How to Inspect Your Own House, Part 6: Plumbing
- How to Inspect Your Own House, Part 7: Prevent Cross-Connections
Author: Reuben Saltzman, Structure Tech Home Inspections

Bill
October 22, 2014, 7:36 am
Another thing to do if the furnace doesn’t start.
Some furnaces from the last couple decades have a start fault indicator.
Look for a circuit board with a light emitting diode (LED) and a list of faults nearby (the list is on a removable panel on mine).
Watch the LED when you try to start the furnace, count the flashes, and look up the fault in the chart.
A furnace repairman I called after seeing that it didn’t detect the flame decided to save me a service call that would have only had seconds of work but a significant charge.
Some modern flame detection is done by putting a voltage on a wire that goes into the flame. The flame grounds the wire. Combustion products eventually coat the wire and keep it from being grounded by the flame. A few wipes of the wire with 600 grit sandpaper removes the combustion products.
I have also seen a “no air flow” error. A few minutes to remove the bottom vent pipe and remove a bird that had gotten in there and died.
Reuben Saltzman
October 22, 2014, 2:37 pm
Good advice, Bill. I made a video over a year ago showing most of those steps, then decided I didn’t like it and that it was a little too specific, so I never shared it. It’s also an unlisted video, but just for the heck of it, here it is:
Reuben Saltzman
April 28, 2021, 3:43 pm
This is a test comment from Reuben.