Most Minnesota homeowners know it’s important to winterize the outside faucets to prevent them from freezing. Freeze damage can destroy the faucet or lead to a burst pipe, or both. The problem is that many people don’t quite get it right; winterizing the outside faucets in the fall seems like a simple thing to do, and it seems like it should be straightforward and easy, but there are a few tricks you need to know to really get it right.
Garden hoses off
First and foremost, disconnect any garden hoses from the outside faucets. If you leave your garden hose attached to the faucet, you’re asking for trouble.

And while you’re at it, either bring your garden hoses inside or drain the water out of them.
Frost-free faucets
If you have a properly installed frost-free faucet, you shouldn’t need to winterize it. A frost-free faucet has a long stem and turns off the water well inside the wall, keeping the faucet from freezing. A properly installed frost-free faucet will have a slight downward pitch which allows water to drain out when the faucet is shut off.

When frost-free sillcocks aren’t installed with this downward pitch, water will sit inside the stem of the sillcock even when it’s turned off. The pitch is a little dramatic in the photo below, but you get the point.

If this water freezes, it can burst the stem of the sillcock. Most homeowners don’t know this has happened until the first time they use their faucet in the spring. Once they turn their faucet on, water starts shooting out of the burst stem inside the house, making a big mess while nobody is inside the house to see it. This happened to Connecticut home inspector James Quarello while he was inspecting a home a couple of years ago. Better him than me, I say.
The fix for an improperly installed frost-free faucet is to have it re-installed with a slight downward pitch.
Having said all that, it’s still a good idea to winterize all of your faucets. You should assume that your faucets are not frost-free, and even if they are, assume they’re improperly installed and winterize them anyway.
How to winterize your faucet
To winterize your faucets, start by turning off the water supply to the faucets from inside the house. Exterior faucets should have a separate shutoff valve inside the house, but not all of them do. In older homes, these valves are typically located at the ceiling somewhere close to the outside faucet. In newer homes, the valves are typically located right next to the main water valve, and they’re also usually labeled.

Once you’ve turned the water off inside the house, go outside and open up the exterior faucet. If you shut off the water inside, you’ll get a very small amount of water that comes out of your faucet.
Next, you’ll need to head back inside and unscrew the bleeder cap on your shutoff valve. This will allow water to drain out of the pipes. Depending on how the pipe is pitched, the water may drain through the bleeder cap or through the outside faucet. Keep a small bucket handy when you do this, just in case a lot of water needs to drain out of the bleeder. And consider holding a rag over the opening to help minimize any potential mess.
After the water drains out, screw the bleeder cap back on. I recommend leaving the outside faucet open; in the unlikely event that your interior shutoff valve doesn’t shut off the water 100% or someone accidentally opens it, you’ll minimize the potential to accidentally fill your pipe with water again.
Sometimes, two wrongs really do make a right Some older houses in Minneapolis and Saint Paul don’t have a shutoff valve for the outside faucet, and the faucets never get winterized… yet they never have a problem with freezing. How can this be?
Here’s a hint:
On older houses with no insulation at the rim space, there can be so much heat loss occurring here that the outside faucets never get cold enough to freeze. I call this two wrongs making a right. It’s certainly not a reliable method of preventing freeze damage, but it can work.

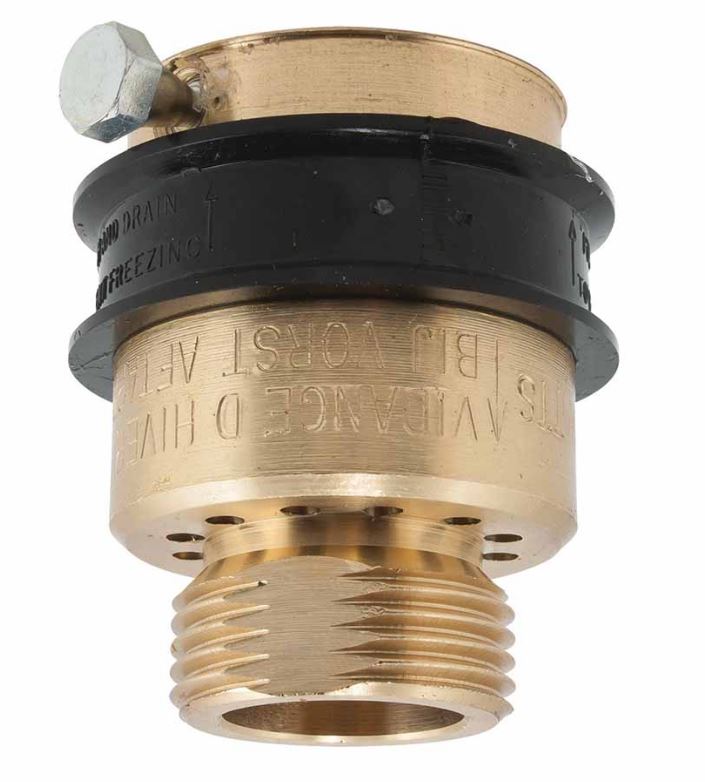
 Vacuum breakers complicate things

The problem with external vacuum breakers (aka backflow preventers) is that they don’t allow all of the water to drain out. After you turn the water off and it looks like everything has drained out, the rubber seal in the vacuum breaker will still trap enough water to destroy it. This will cause water to spray out all over the place when you use the faucet again in the spring.
There are two possible solutions: remove the vacuum breaker in the fall, or drain the water out of the vacuum breaker. If you can unscrew the vacuum breaker from the sillcock, go ahead and take it off in the fall. The problem with this is that vacuum breakers are often designed to be permanently installed. They have a little set-screw on the side that you’re supposed to tighten down until it breaks off, making it so the vacuum breaker can’t be removed.
If your vacuum breaker leaks every time you turn on your faucet and you need to replace it, there is still a way to remove it without destroying your faucet. You use a saw to cut a slot in the top of the screw, then use a slotted screwdriver to unscrew it. I demonstrated this in the video above.
If you can’t remove the vacuum breaker or you don’t want to hassle with removing it, no problem; there is still a way to drain the rest of the water out. If you look up inside the vacuum breaker, you’ll notice that there is a small white plastic post. Just push this post to the side, and the rest of the water will drain out. I also showed that in the video above.
If the vacuum breaker doesn’t have that white post, it may have a black ring on the outside. Pull the ring down to allow water to drain out.
What about those insulated faucet covers? I don’t trust ’em. They’re probably just a little better than nothing. Don’t waste your time.

What if you forgot?
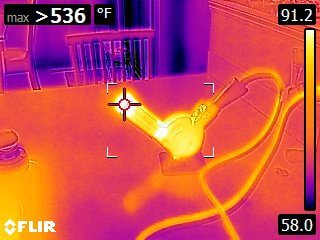
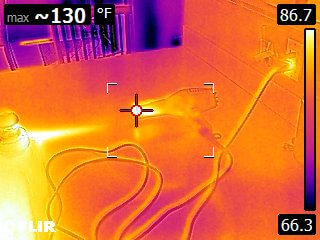
If you forgot to winterize your faucets, use a hairdryer or a heat gun to thaw your faucets. This will take a long time with a hairdryer, but it’ll happen eventually. If you choose to use a heat gun, be very careful. That’s not a high-powered hairdryer, it’s a heat gun. It’ll blister paint, melt vinyl siding, and start paper on fire. The two infrared images below show a heat gun on the left and a hairdryer on the right; note the temperatures shown at the top left corners of the images.
So anyway, use one of these tools to thaw the faucet. You’ll know the faucet has thawed once you can turn the faucet handle to open it. If there is ice inside the pipe and faucet, you’ll first get a little trickle of water coming out, but the water coming through should quickly break the ice loose and you’ll soon get a normal stream of water coming out of the faucet.
Once that happens, you can winterize your faucet as normal.
Ashley Berryman
December 21, 2021, 12:00 am
I typically just turn the old things off and put the foam covers on.
My ’49 still has original spigots that modern hoses won’t screw to properly thanks to the awesome spring doohickies preventing a good seal. I’ve seen all kinds of adapters for spigots. Can I put a modern dual adapter on them? I really need to have more than two hoses for each spigot since my tiny vet cottage only has 2. Right now it takes me all day to water my 4,000 feet of yard-front one day, back the other.
Though my crawl has insulation (loose) along the ceiling, my condensing furnace/full HVAC is down there. I can’t find anything about a furnace drawing on unconditioned crawl space air, but I’m thinking it probably gives off enough heat for the pipes.
Because it is a single pipe system, I never put back the fiberglass insulation pieces that were stuffed in the two crawl vents, thinking my furnace (which may have been using stack effect up chimney) could use more air, and I was really concerned about radon and the insulation possibly wicking moisture to my beams. I was a tad concerned about pipes freezing if I remove the insulation chunks, but I’m hoping between my vintage home designed to breathe and six roaring gas fired jets down there, I might be just fine?
So my questions are
A: do I really need to winterize plumbing under my home?
B: Will leaving vents open create all of this rot, mold and condensation crud everyone freaks out about? (my crawl is in amazing clean, dry, and critter free state!)
D: Is my furnace actually helping pump radon out???
E: IS crawl air considered “conditioned” when vents are open?
WAY too many questions! SO helpful to see a photo of a supposed “energy-waster” old home breathing fresh air in, bad air out, and preventing all KINDS of rot issues associated with these super sealed up homes-one woman woke up to mushrooms fruiting out her carpet! No thanks-I’M GOOD!
I live in Spokane Washington and winter here only dips to zero and below every few years or so, and we typically spend time in the 20’s and 10’s at night.
Thanks for your help!
Reuben Saltzman
December 21, 2021, 10:09 am
Hi Ashley,
A: If you’ve gone this long without a problem, you’re probably fine. You probably don’t need to winterize it.
B: When it comes to crawlspace questions, your climate is much different from what we have here in Minnesota. It’s extremely unusual to find a Minnesota home with crawlspace vents, so I’m not qualified to comment on what will happen if you leave those vents open. But you’ll surely increase the potential for your pipes to freeze if you do.
C: I don’t know. Your furnace will pull air from the crawlspace for combustion, so it might help to reduce radon by promoting air exchange, but it might also pull radon into the crawlspace if it’s especially tightly sealed.
D: If the vents are open to your crawlspace, the crawlspace air should be considered outside of your thermal envelope, and the air in that space should be considered unconditioned.