This is part three in a multi-part series of How to Inspect Your Own House. In part one, I covered how to inspect your own roof and chimney. In part two, I covered the inspection of the exterior water management, which is one of the most critical parts of preventing major water damage to a building. Today the focus will be on inspecting your own siding, broken down by the most popular types of siding in the Twin Cities. Oh, and a note to any word sticklers: a more technical/accurate term for siding would be “exterior wall covering”, but that term is a little geeky and pretentious. I’m happy to call the stuff that covers the exterior walls “siding”, whether it be vinyl, stucco, wood, or whatever else.
Wood Siding and Trim
The two most common problems you’ll find with wood siding and trim are peeling paint and rotted wood.
Peeling paint is an obvious defect that can be spotted from a block away. Paint is meant to protect wood surfaces from decay and rot, but it’s not common to find rotted wood siding because of the lack of paint. The main issues with peeling paint at siding are that it looks horrible, it’s an environmental hazard if the paint contains lead, and it may violate a maintenance code for the city. For example, section 244.500 (d) of the Minneapolis Housing Maintenance Code says “No exterior wall of any dwelling or building accessory thereto shall have paint which is blistered, cracked, flaked, scaled, or chalked away.” I don’t have any inside tips to share on peeling paint; if you need more info on that topic, check out what Dr. Lstiburek has to say about it.
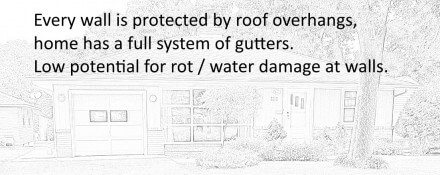
Rotted wood siding isn’t much of an issue at old houses in Minneapolis and Saint Paul that have been sided with old-growth wood; it’s more of a ‘new wood siding’ type of issue. To inspect your own home for rotted wood siding, start by figuring out which areas will be prone to rotting first. If you’ve already taken the advice that I gave in last week’s blog post about exterior water management, you probably have a good idea of which areas you need to pay the most attention to. Areas of the house that are covered by large soffits or overhangs will probably be fine.
The areas that turn into problems are the areas where water gets concentrated.
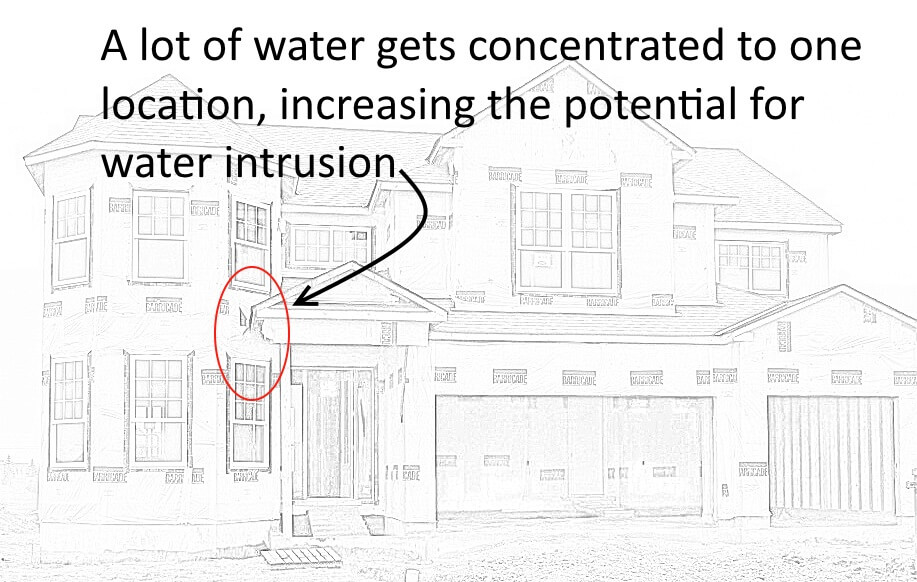
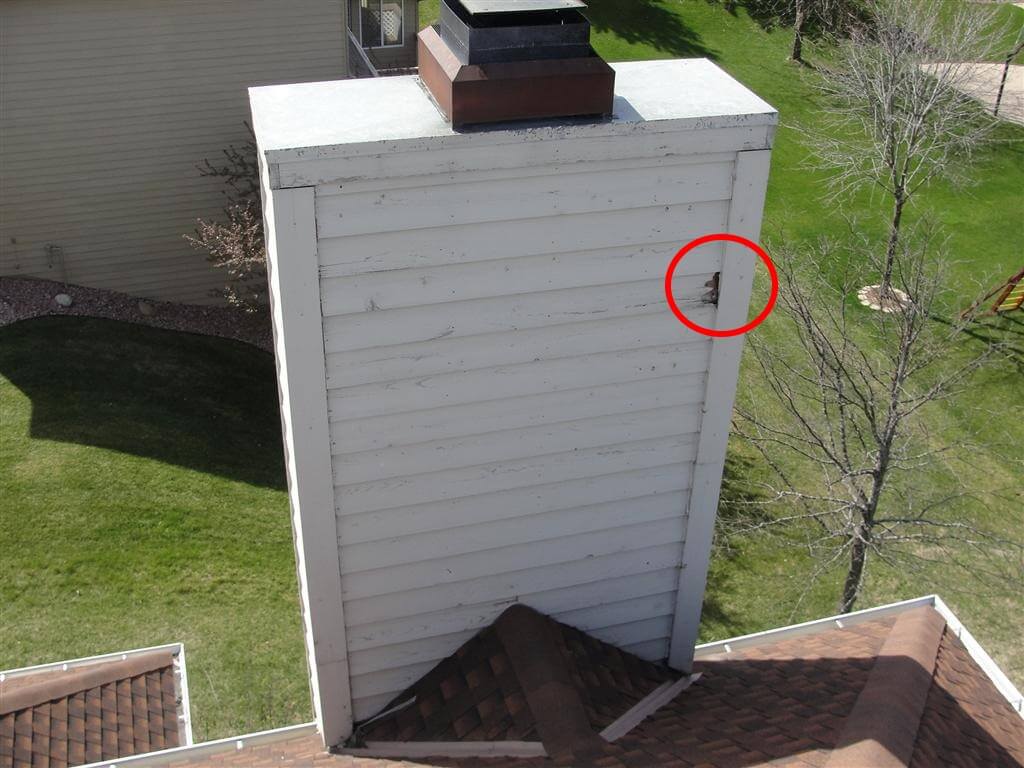
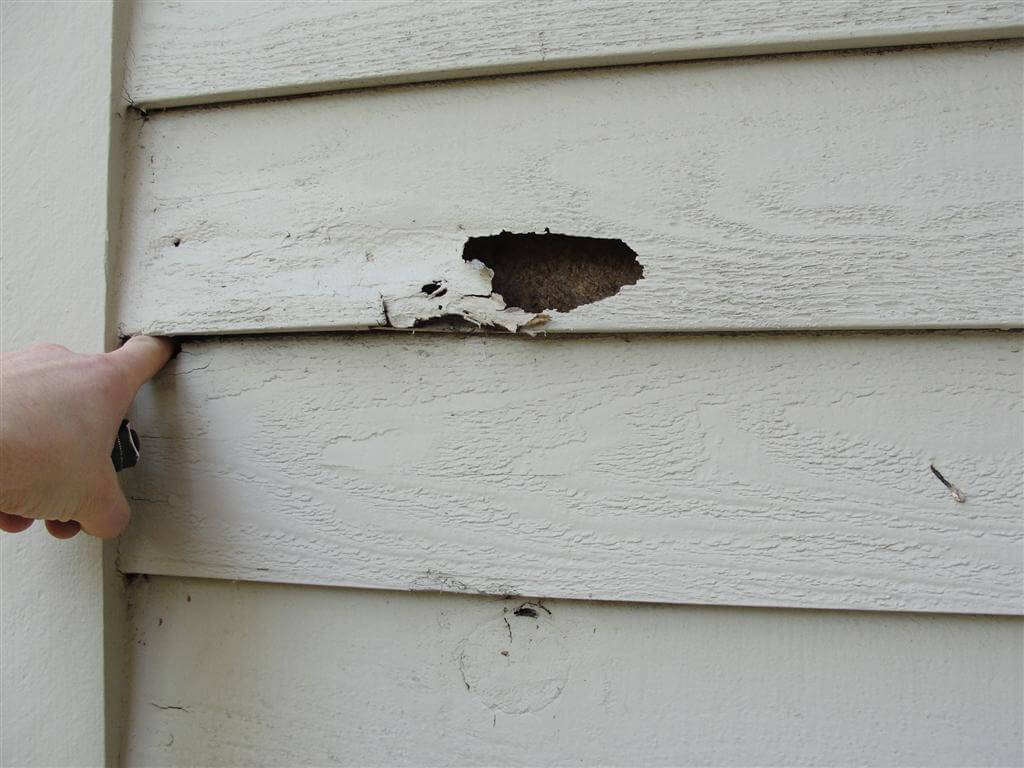
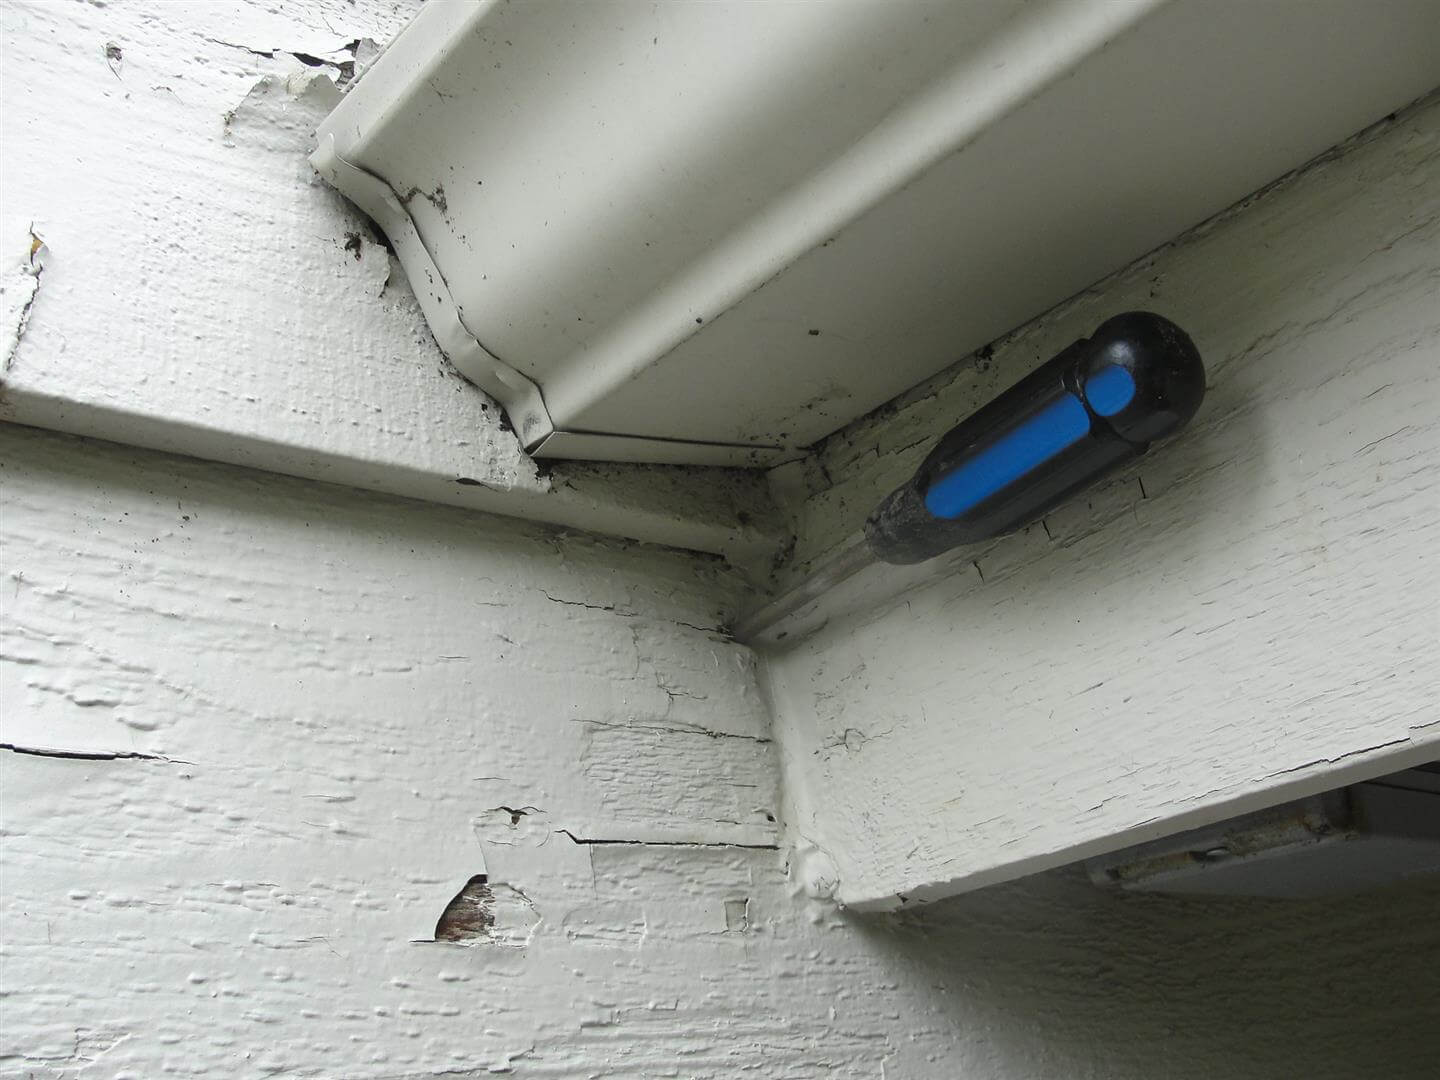
Other areas to pay special attention to are the siding below roof ends with missing kickout flashing, below bay windows, and at wood chimney chases. Also, any areas that have water splashing against them will be prone to rotting. To check for rotting at wood siding, start by looking for obvious things like holes in the siding. Be sure to look at everything. As shown in the photo below, this might require walking the roof.
The next step is to go around and poke at the areas that will be most susceptible to water intrusion and rotting. You can sometimes just push on the siding with your fingers to find rotted and soft areas.
If you want to look and feel a little bit more official, you could go poking around with a rot detection device (aka “awl”). I used to do that during home inspections until someone accused me of punching holes in their walls. I stopped doing that a long time ago.
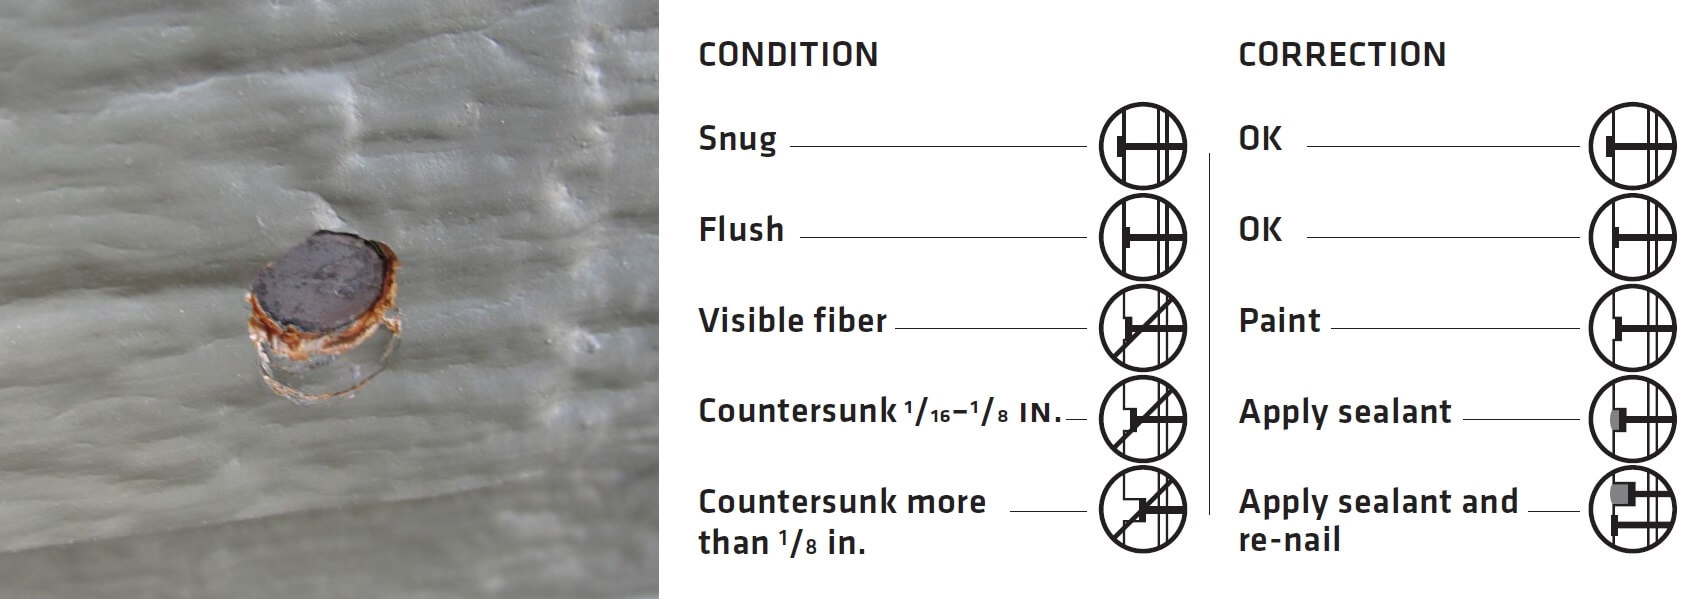
Look for areas with missing or dried-out caulking that need attention. If you find rotted siding in several areas, there’s a good chance that there’s rotted wall sheathing behind the siding. There are two ways to check for rotted wall sheathing; remove the siding and check it out, or have moisture testing performed by a company that specializes in this (like us). When we conduct moisture testing on wood siding, we start by scanning the siding with a non-invasive moisture meter. Areas with elevated moisture levels are tested the same way that stucco siding is tested; two small 3/16″ holes are drilled, and a moisture probe is pushed into the wall to determine the moisture content and condition of the wall sheathing.
Vinyl Siding
First, a primer on vinyl siding. Love it, tolerate it, or hate it, vinyl siding is very good at what it does. Vinyl siding is an exterior cladding that reduces the amount of rain that reaches the stuff underneath it, which is referred to properly as a water-resistive barrier, but more commonly as Tyvek®, which is a brand name. Vinyl siding is not watertight and isn’t designed to be watertight. Vinyl siding should always be installed over a water-resistive barrier, but this wasn’t spelled out in the Minnesota state building code until 2003. If you have a home built before 2003, you may or may not have a water-resistive barrier behind the siding. After 2003, it should definitely be there.
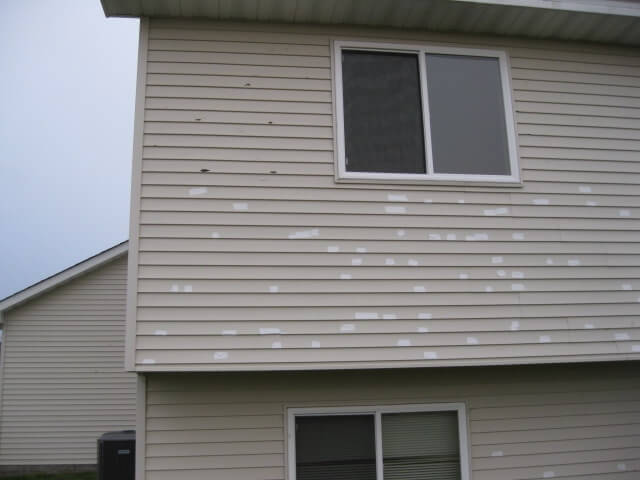
The most common visible problem with vinyl siding is physical damage from hail, basketballs, baseballs, weed trimmers, or rocks thrown from lawnmowers and snowblowers. Small chips and nicks aren’t big performance issues; remember, vinyl siding is not watertight. The main issue with physical damage to vinyl siding is that it makes the house look bruised up. The photo below shows an extreme example of a house with some nasty hail damage, as well as some makeshift repairs by someone with a short ladder and a long roll of duct tape. This siding is clearly in need of replacement.
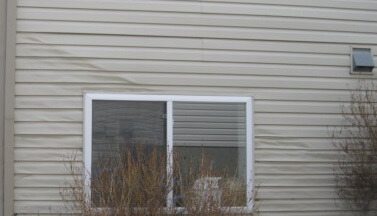
Vinyl siding can also melt or deform when someone has a grill too close to the siding, or from reflected sunlight. The photo below shows an example of deformed siding caused by reflected sunlight. This is a cosmetic issue; the vinyl will still do its job even though it looks terrible.
Unfortunately, homes with vinyl siding can experience water intrusion just like homes with other types of siding. There is typically no visible evidence of moisture intrusion with vinyl siding… at least not until it’s too late. The nice thing about vinyl siding is that it’s fairly easy to pull apart and put back together without any tools. The video below shows me pulling apart vinyl siding on a bank-owned property that had experienced major water intrusion. As you can see, it’s pretty easy to open vinyl siding up.
If there are areas where moisture intrusion is suspected, pull the siding apart and check it out.
Stucco Siding
Old stucco houses typically don’t have big problems, while newer stucco homes (late-1980s+) often do. There’s not much that can be seen to identify major problems with stucco houses. Stains below windows and other similar penetrations in the walls are cause for concern, but they’re not necessarily a problem.

As I’ve said for many years, long before we ever began doing moisture testing on stucco houses ourselves, the only way to know for sure is to have intrusive moisture testing performed.
Stone Siding
Stone siding is typically installed only on the front of houses, but it’s subject to the same problems as stucco, and problems with moisture intrusion are just as difficult to identify. This requires intrusive moisture testing. Click the following link for information on stone siding installation defects.
Hardboard Siding
Hardboard siding, often called masonite, is a pressed wood siding product that lasts about 20 – 30 years. When hardboard siding rots, it’s usually quite easy to spot, as it really starts to look nasty.
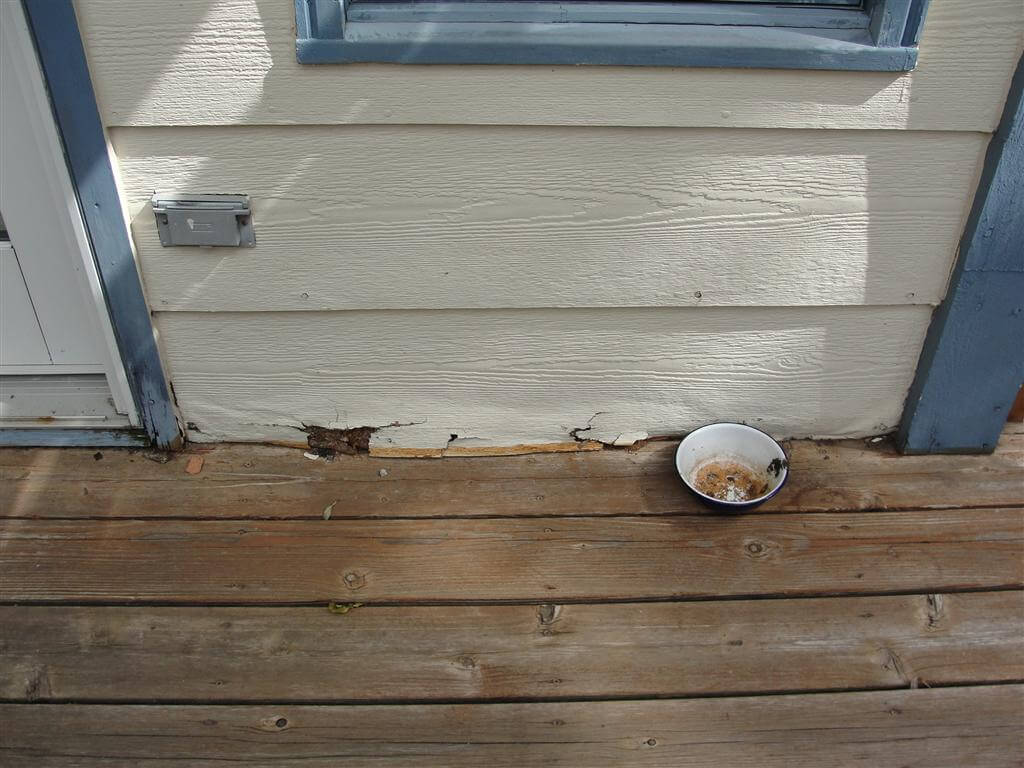
Hardboard siding fails at the lowest courses first, usually from water splashing up against siding that has been installed too close to the ground. When it’s just a few pieces of hardboard siding that are rotted, the appropriate repair is to replace the rotted pieces of siding. Once there is rotted siding in many areas throughout the exterior, it’s time to reside.
LP Smartside / James Hardie
I’m lumping these two types of siding together because they’re nearly indistinguishable to the untrained eye, most new construction home buyers that we work with don’t know which type of siding their new home has, and the installations instructions for these two types of siding are very similar.
For the record, they really are quite different products though; check out this post for more info: James Hardie vs. LP Smartside
The most common problems I find with these types of siding are improper nailing and improper clearances to grade, hard surfaces, and roof coverings.
My best advice for inspecting these types of siding would be to read the installation instructions from the manufacturer, then walk around your home and make sure the installation details match up with the diagrams the manufacturer provided. I have installation instructions for James Hardie siding going back to 1998 on one of my older blog posts about that product: Problems with James Hardie Siding Installations. I also have a post about LP Smartside Installation Problems.
While this is not a full list of siding products used in the Twin Cities, these are the most common, and the same goes for the list of problems. Next week I’ll have a blog post on inspecting the rest of the exterior of your home.
Brad
August 5, 2014, 6:41 am
I’m assuming brick and stone have the same issues?
Reuben Saltzman
August 5, 2014, 11:13 am
@Brad – no, stone and brick behave quite differently. The big difference with brick is that it’s supposed to be installed with an air space between the brick and the wall; not so with stone siding and stucco.
Ben
September 18, 2014, 7:29 am
I have a home log home that was sided over 20 years ago by previous owner. Is there any way to see if there is water damage underneath on logs without taking off the siding itself. It is cedar vertical sheets of siding.
Reuben Saltzman
September 18, 2014, 12:58 pm
Hi Ben,
I’m guessing that you could have invasive moisture testing performed, but I honestly know nothing about performing moisture testing on a log home.
– Reuben