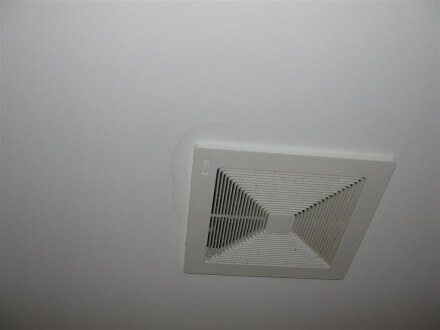
It’s common to find stained ceilings around bathroom exhaust fans in Minnesota, as well as stains in the attic around where the bathroom exhaust fan terminates at the roof. Home inspectors find these things all the time.
While the knee-jerk reaction that most homeowners have is to call a roofer when a stain shows up at the bath fan, this type of staining is rarely the result of a roof leak. This is typically the result of condensation.
The job of a bathroom exhaust fan is to remove moist air and foul odors from the bathroom. When moist air is carried through a duct that passes through a cold attic space, condensation will occur inside the duct. When enough condensate accumulates, it drains to the bottom, leaks through the fan, and stains the ceiling. It’s as simple as that. To help prevent these stains from occurring, take these steps to minimize condensation inside the duct.
Use an insulated duct inside the attic. This is a no-brainer. If you have an uninsulated duct in your attic, don’t try to wrap a bunch of fiberglass insulation around it in a feeble attempt to insulate. That’s a time consuming chore that probably won’t work work out well. Instead, just replace the uninsulated duct with an insulated one. They’re not that expensive, and it’s a lot less work than trying to insulate an existing duct. Click here for an example of a pre-insulated 4? duct sold at Home Depot. Don’t use metal ductwork; you’ll end up with way too much condensation.
Use the shortest run possible. The longer the bath fan duct, the greater the potential for condensation inside the duct. These ducts will sometimes run from one side of the attic to the other to create a more aesthetically appealing roof line, but this increases the potential for condensation and reduces the performance of the fan.
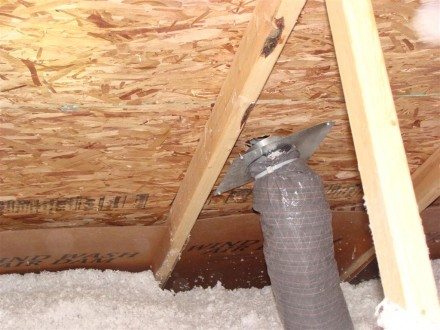
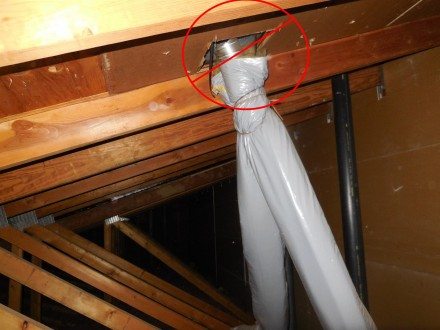 Make sure the duct is tightly connected to a roof cap with a damper. The damper will help prevent cold air from dumping back down into the house, which may lead to condensation right at the fan itself. The duct should not be aimed at a roof vent or have any loose connections inside the attic. Anything other than a tight connection to a dampered roof cap is an improper installation that can lead to problems.
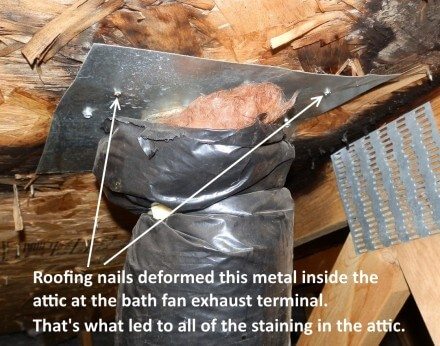
If you recently had your roof covering replaced, have someone get up into the attic to verify the bath fan duct is still tightly connected. It’s common for roofing nails to knock the bath fan duct right off the roof, or at least knock it loose. Click the photo below to see a large image showing exactly how this happens.
Here’s a photo of a loose duct at a new construction inspection.
When the fan connection is loose, moist air can escape into the attic, and cold air from the attic will dump down the duct when the fan isn’t running, increasing the potential for condensation in the duct.
Check the damper at the roof cap periodically. This should be a part of any home maintenance inspection, whether the inspection is done by the homeowner or a home inspector.
If the damper at the roof cap gets stuck shut, it’s pretty much a guarantee that moisture will condense inside the duct. To check the operation of the damper, turn the fan on and make sure air is coming out at the terminal. If there is no air movement, check to make sure the damper opens freely. Dampers made before 2006 had a serious flaw that caused the damper to get stuck closed all by itself. For more information on that topic, click here: A Common Problem with Roof Caps for Bath Fans. The other common reason for roof caps to get stuck shut is wasps. They love to make nests inside of roof caps, and even the smallest nests are enough to prevent a roof cap from opening. Just one more reason to hate wasps, right?
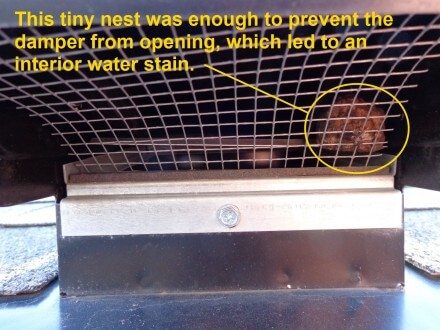
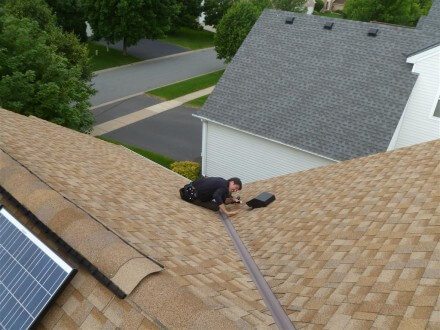
If it’s not safe to walk the roof, try looking up at the roof cap from the ground with a pair of binoculars while someone inside the house turns the bath fan on and off; if it’s working properly, you should be able to see the damper opening and closing.
Click this link for more information on the causes of moisture stains on ceilings.

Reuben
July 25, 2014, 2:25 pm
Testing capcha
Mark Brandon
July 30, 2014, 9:54 am
Great Blog Reuben!
This is one of the blogs I do love! Very informative.. This also serves a way for people who doesn’t have any idea about bath fan inspections..
🙂
Mark Erickson
July 31, 2014, 10:11 am
Forgot to come back and post my comment. On the “Common Problem” post, the link to the installation instructions is dead. New link is http://www.broan.com/common/productDigitalAssethandler.ashx?id=923c5d0c-876e-4cb7-b2fd-8e4e40faf891
Thanks for this great blog, Reuben.
Reuben Saltzman
July 31, 2014, 2:07 pm
@Mark – fixed. Thank you!