This post was originally published in 2012. This is an updated version of that post.
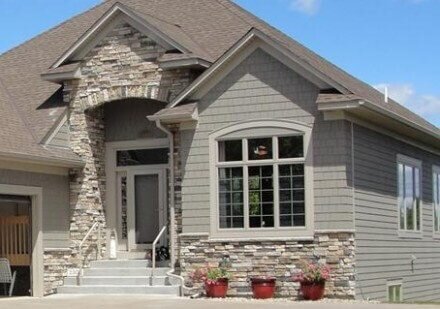
Stone siding might be the most problematic siding that we come across as home inspectors. This stuff is failing left and right all over the country, and most of time the homeowner has no idea when their wall is a rotted mess behind the siding. I’m calling it stone siding because that’s what everyone knows it as, but what I’m really referring to is a product called Adhered Masonry Stone Veneer, or AMSV. This is a man-made product that looks like stone siding but performs like stucco. Well, lumpy stucco to be specific.
WE FIND PROBLEMS
While masonry veneer looks great, it’s susceptible to the same moisture problems that stucco is susceptible to. We’ve tested dozens, possibly even hundreds of homes throughout the Twin Cities that have stone veneer siding, and we’ve found that these homes experience the exact same type of moisture intrusion problems as newer stucco, but worse.
HOW TO DO IT RIGHT
While the newest stucco installations are done quite well, the folks installing stone veneer almost never get it right. When we inspect stone veneer, we use the National Concrete Masonry Association’s installation guide. To understand how important this guide is, here’s some background on it, directly from one of their engineers:
When the masonry stone veneer (MSV) was first introduced into the market, manufacturer recommendations were the only available guidelines to install the product as there were no industry-wide practices or standards.
In 2009, The Masonry Veneer Manufacturers Association (MVMA) created the industry-wide installation recommendations. In 2012, MVMA became part of the National Concrete Masonry Association and we pursued a product and an installation standard through ASTM. That is how ASTM developed the ASTM C1670/C1670M — Standard Specification for Adhered Manufactured Stone Masonry Veneer Units, and ASTM C1780 — Standard Practice for Installation Methods for Adhered Manufactured Stone Masonry Veneer. Both are now widely used and are referenced in the TMS 402/602-16 Building Code Requirements and Specification for Masonry Structures that in turn is referenced by the IBC code.
In short, the installation guide that I referenced above is the standard that should be followed everywhere. This is the way to do it right. Whether or not that standard is adopted will vary throughout the country. And even when it’s adopted, enforcement of that standard varies wildly.
Here in Minnesota, our modified version of the International Residential Code made it very easy for us back in 2015. Section R703.12 simply said “Adhered masonry veneer shall be installed in accordance with the manufacturer’s instructions.” So you download the guide that I linked to above and you follow it. Easy-peasy.
The latest version of the Minnesota State Residential code isn’t quite as clear. In the 2020 version of the Minnesota Residential Code, section R703.12 says “Adhered masonry veneer shall be installed in accordance with Section R703.7.1, Article 3.3C of TMS 602 or the manufacturer’s instructions.” So we have three options.
Option 1, following R703.7.1, doesn’t make any sense. This has to be a typo. R703.7.1 simply discusses how to attach lath to a wall. Option 2 requires the purchase of TMS602 for $150. Boo. Option 3 goes back to what we had in 2015, which is to follow the manufacturer’s installation instructions. I’ll go with that, thank you very much.
INSTALLATION GUIDE
The Installation Guide for AMSV is packed with diagrams showing how to install the material and forms the basis of ASTM C1780. It’s awesome. Every home inspector ought to have a copy of this guide, and ought to be familiar with the installation requirements.
As I mentioned above, we find the same installation shortcomings over and over again. To help you understand how widespread these issues are, I’ve taken several installation diagrams from the AMSV guide and edited them down to more clearly illustrate where the installations went wrong.
As a home inspector, I don’t get to see all the different layers of materials that get installed behind the stone veneer; my inspection is limited to what I can see on the surface, and that’s what I report on. To make the installation diagrams easier to understand, I’ve removed the labels of all the components that aren’t visible during the course of a home inspection.
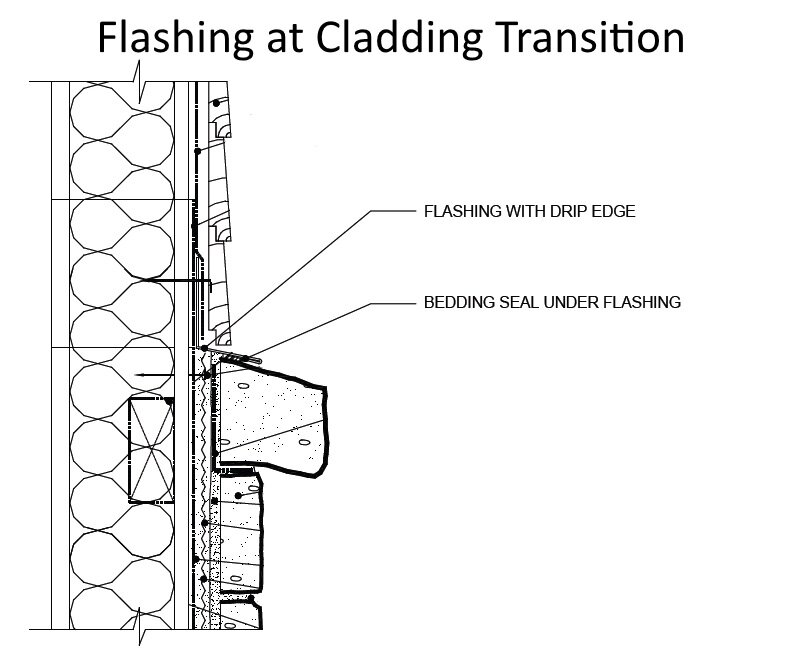
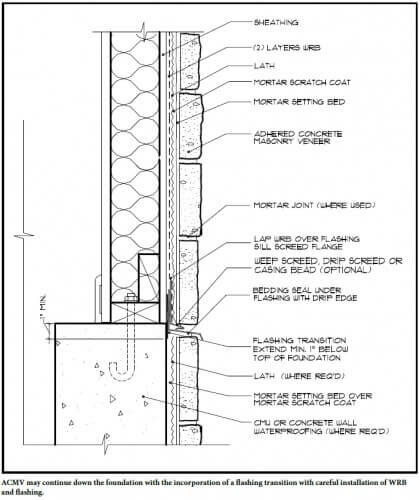
Missing bedding seal at flashing
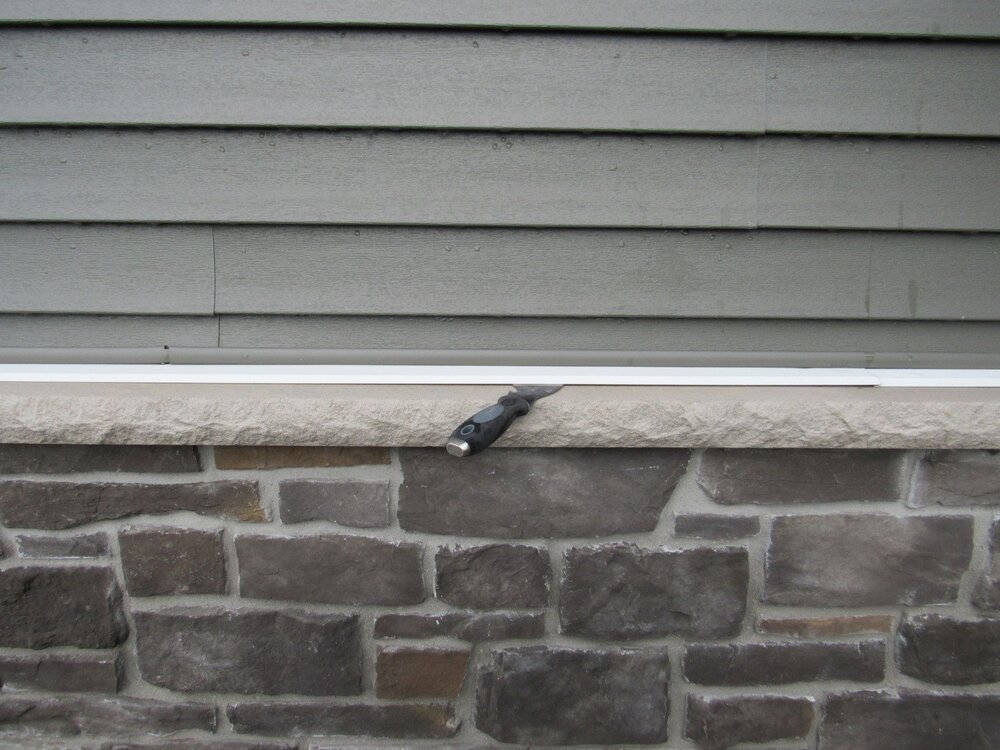
This is never done right. Never. We verify this by slipping a putty knife underneath the flashing. When it’s not done right, wind-driven water will leak behind the siding at this location.
We shouldn’t be able to put our putty knife underneath the flashing like this. This means it wasn’t installed properly, and this is all that we ever find.
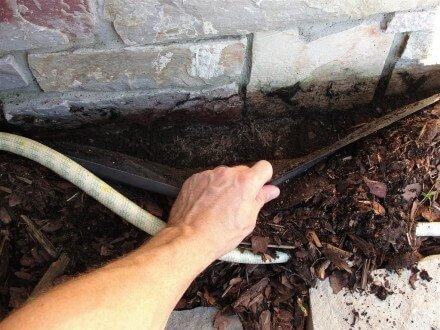
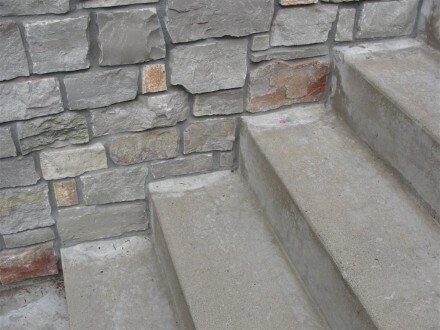
Too close to grade or hard surfaces
Masonry veneer should be kept at least 2″ above hard surfaces, such as concrete, and 4″ above the soil.

When the material is buried in dirt, water can wick up in to the material and cause rotting at the wall.
There should also be a 2″ gap to paving, but often not done. How is water supposed to get out at the bottom?
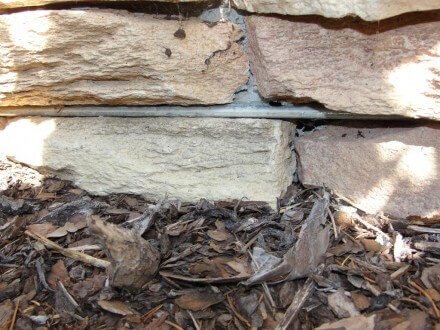
Of course, leaving a 4″ gap at the ground isn’t the prettiest looking thing in the world, but there is a solution; simply have the weep screed terminated at least 4″ above the ground, and have another layer of masonry veneer installed below it, as shown in the diagram below.
The photo below shows this detail done properly.

Here’s a close up – note the weep screed.
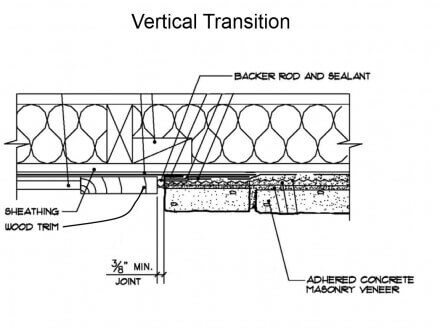
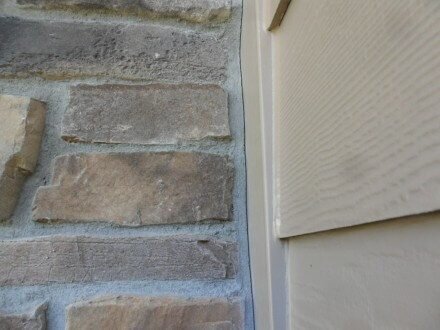
Improper Vertical Transitions
When masonry veneer has a vertical transition to something like wood trim, windows, or other siding materials, it should have a 3/8″ gap left between the two different materials. This gap needs to have a foam backer rod pushed behind it, and then filled with sealant to help prevent water intrusion. This is rarely done.
This is what it looks like when it’s wrong.
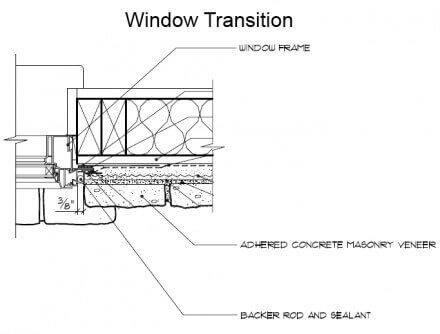
Here’s the detail for windows.
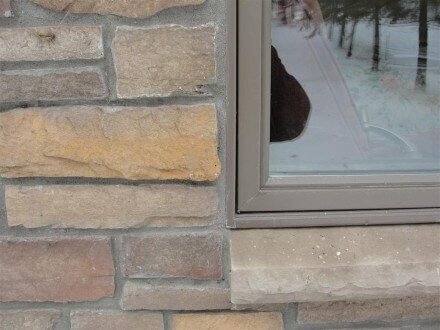
And here’s another improperly installation, with the mortar tight to the window.
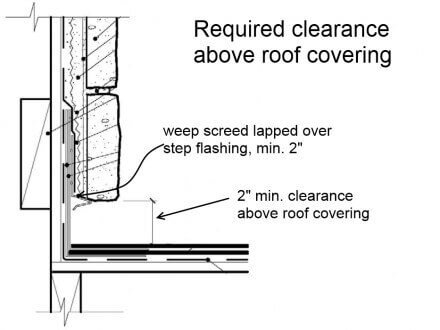
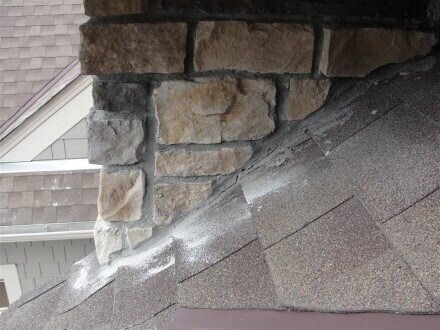
Clearance to roof coverings
Masonry veneer must be kept 2″ above roof surfaces to help prevent water from wicking up into the wall. The photo below shows a common deviation, where the masonry veneer actually touches the shingles. This is just asking for trouble.
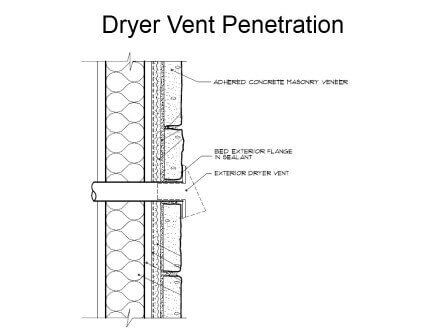
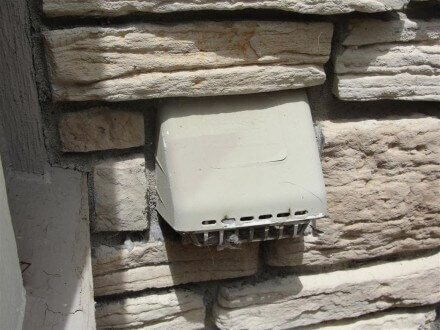
Improper Vent Penetrations
Dryer vents, kitchen exhaust vents, bath fan vents, and other similar vent terminals should be pushed up against a bed of sealant, but they’re often buried in masonry. What happens when the vent cover gets broken and needs to be replaced?
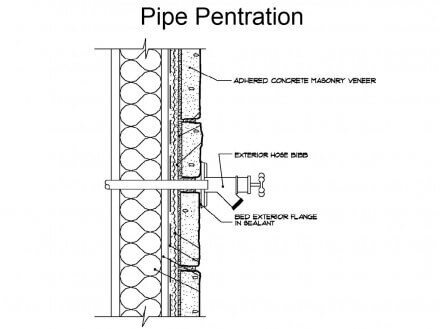
Improper Faucet Installations
Just like dryer vents, exterior faucets need to be embedded in sealant on the surface of the masonry veneer, not buried behind the veneer. What happens when the faucet needs to be replaced?
How many bloody knuckles will this installation cause?
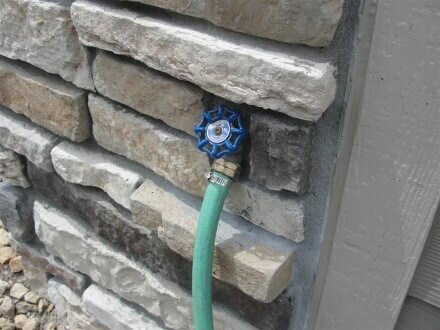
The nice thing about the installation shown above is that they got the vertical transition correct – check out that thick bead of caulk.
Of course, this is only a partial list of the things that can go wrong on a stone veneer installation. If you’re planning to have this material installed on your home, make sure the installation instructions are followed to help lower the potential for water intrusion. If you’re buying a home with masonry veneer already installed, treat it the same way you would newer stucco and have intrusive moisture testing performed. The process is the same as for stucco.
In next week’s blog post, I’ll share a cautionary tale of woe from a podcast guest who stumbled across some major problems throughout an entire townhome community.