It’s been one day short of a year since my last post on new construction home inspections, so it’s time for another. My message is pretty simple: new homes should be inspected by private home inspectors. Home inspections aren’t just for old houses or used houses.
One of the newest inspectors on our team is Patrick Brennan, who worked as a project manager for Charles Cudd building new homes for many years. Because of his background in home building, Patrick brings some excellent perspective to the table when it comes to inspecting new construction homes. For the majority of the new construction inspections that Patrick has done for us, the builders have actually been quite appreciative for the inspections that we provide. It gives the builders a chance to address defects before they turn into big problems, and there are no occupants that have to be disturbed while corrections are taking place.
Here are some of the most common arguments that we hear against new construction inspections:
- The house has already been inspected plenty of times by the city. We’re private home inspectors. We only have one or two inspections to do each day, so we often spend more time during our single inspection than the city inspectors all spent combined at the home. This isn’t a knock against city inspectors; it’s simply a fact that private home inspectors have the luxury of more time.
- The builder already has a one-year warranty, so anything that comes up later will be addressed by the builder. We do a lot of inspections for clients right before their one-year warranty is up because they’ve had a lot of problems with the builder, and sometimes can’t even get the builder to come out. Builders also seem to be much more responsive to problems that come up before the closing than after the closing.
- If you’re paying a private home inspector to find problems, they’re going to come up with problems. Most of ’em won’t be real.
- A private home inspection is a waste of money.
- The builder won’t fix anything the home inspector comes up with because the house already meets code.
Instead of arguing the rest of these points individually, I’ll let the photos speak for themselves. These are all issues we’ve found during new construction inspections over the past year. Some of these photos are from pre-drywall inspections, and some are from one-year warranty inspections. The point of sharing these photos isn’t to make home builders look bad; the point is that everyone is human, everyone can make mistakes, and the home inspector can help to make sure that many of these mistakes are addressed. We identify problems with houses long before they become expensive to fix.
Click any of the photos for a larger version.
Exterior
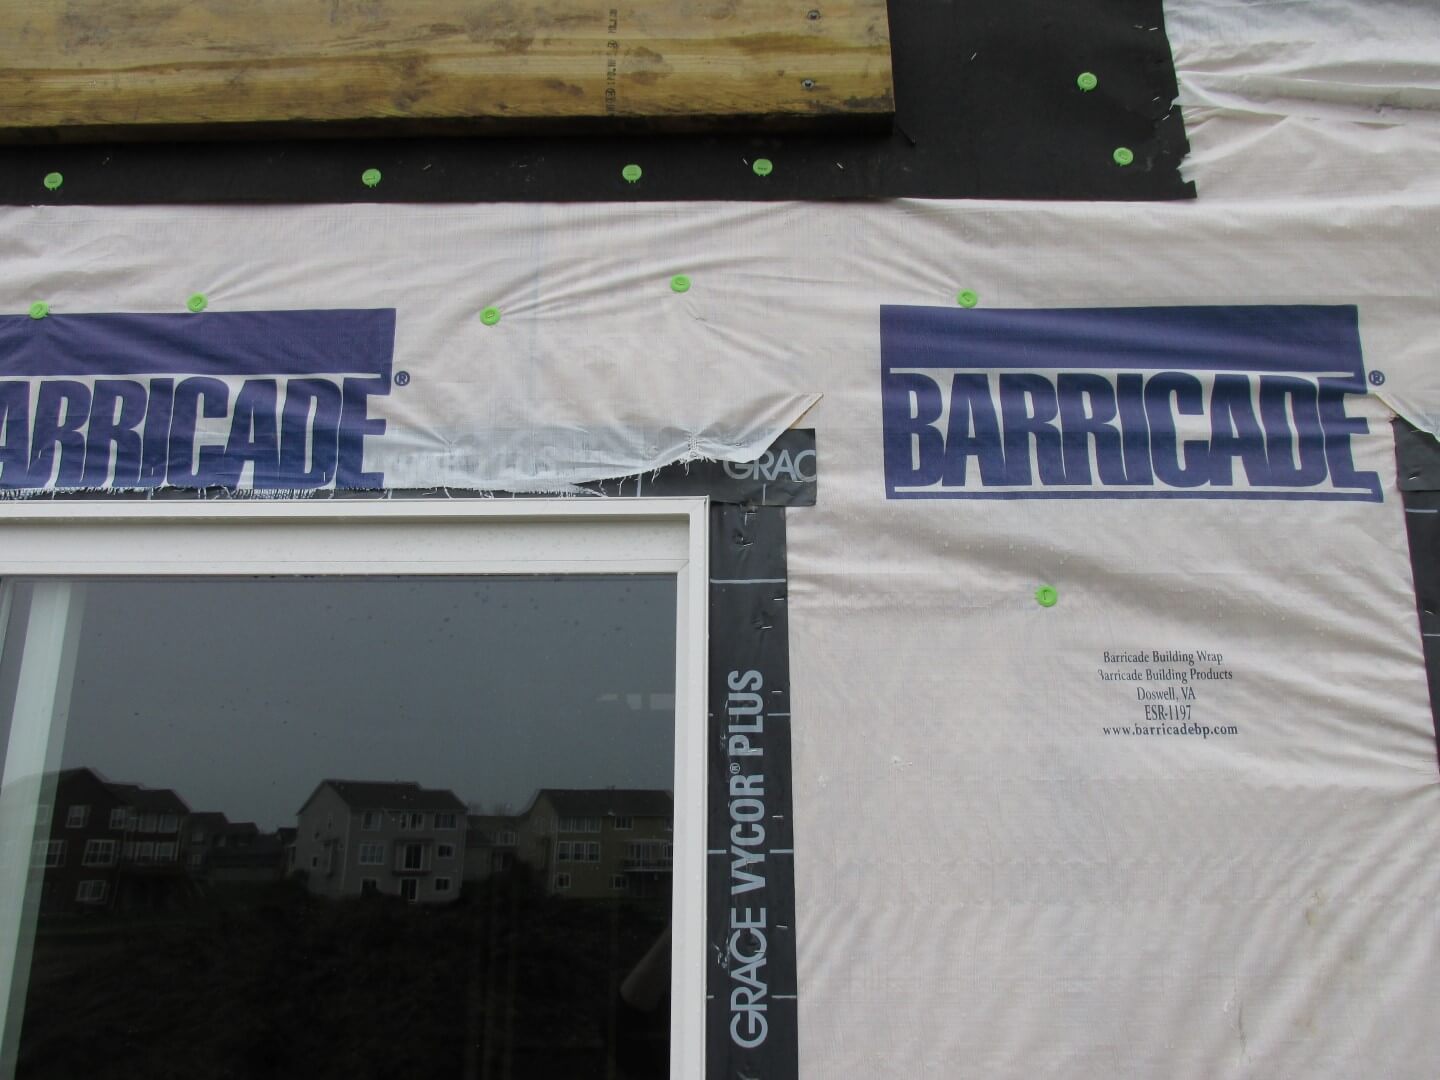
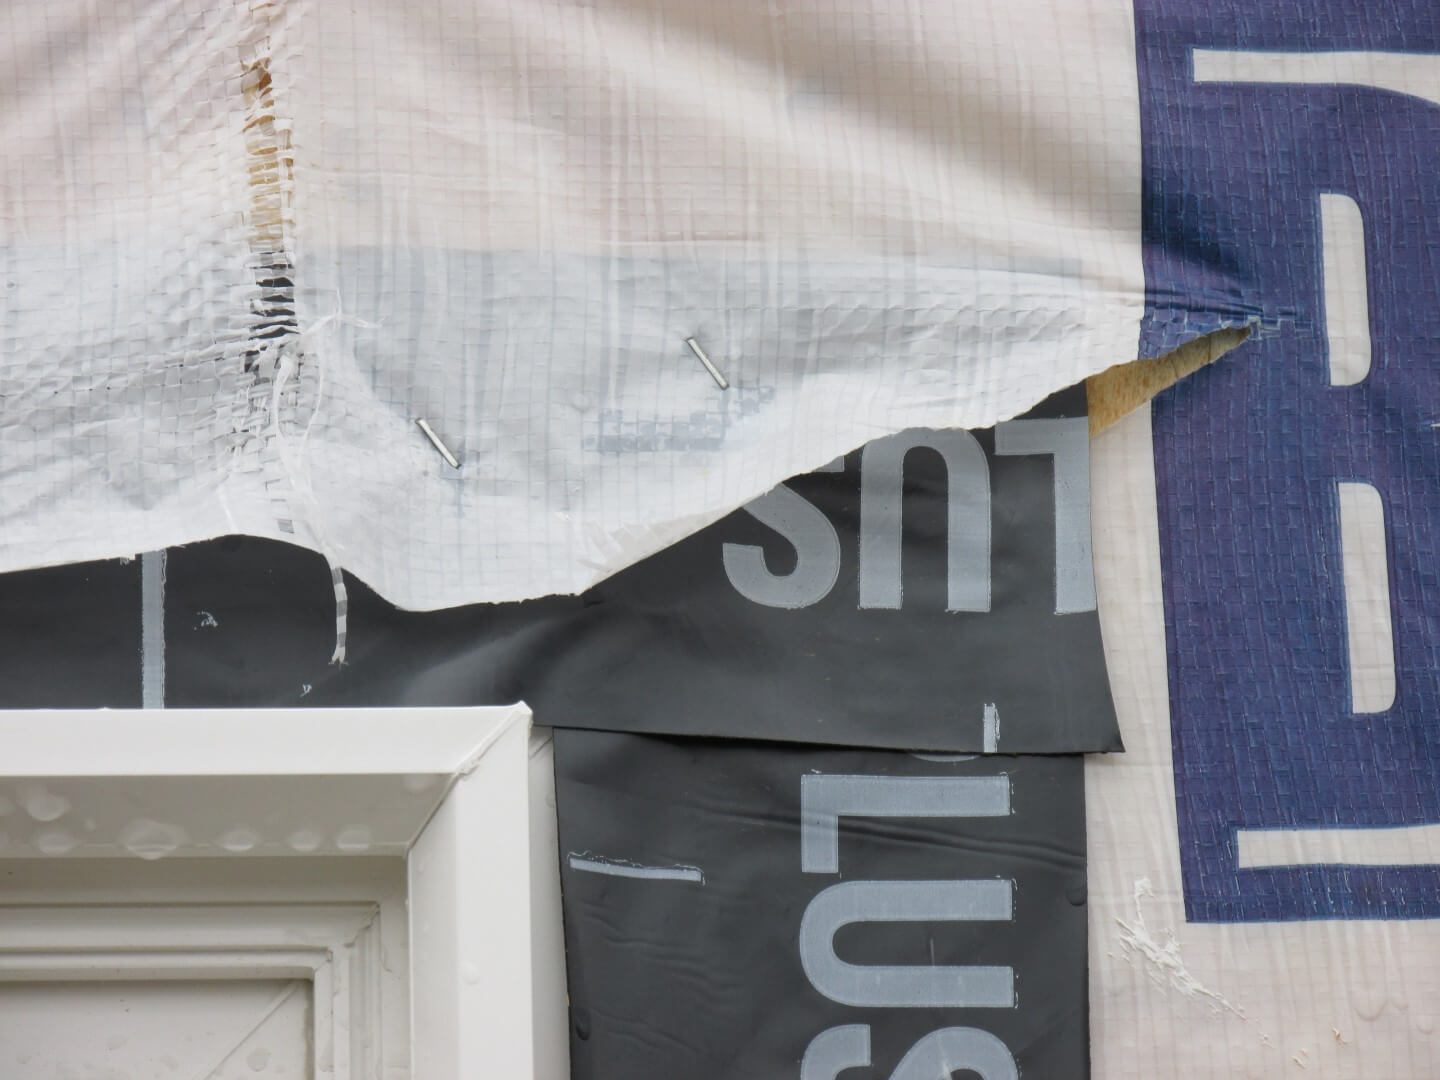
A large portion of the exterior house wrap was improperly installed at this home. We identified these defects during a pre-drywall inspection. These are the types of defects that can lead to major water damage, sometimes after the builders 10-year warranty has expired. It’s not a big deal to fix this stuff today.
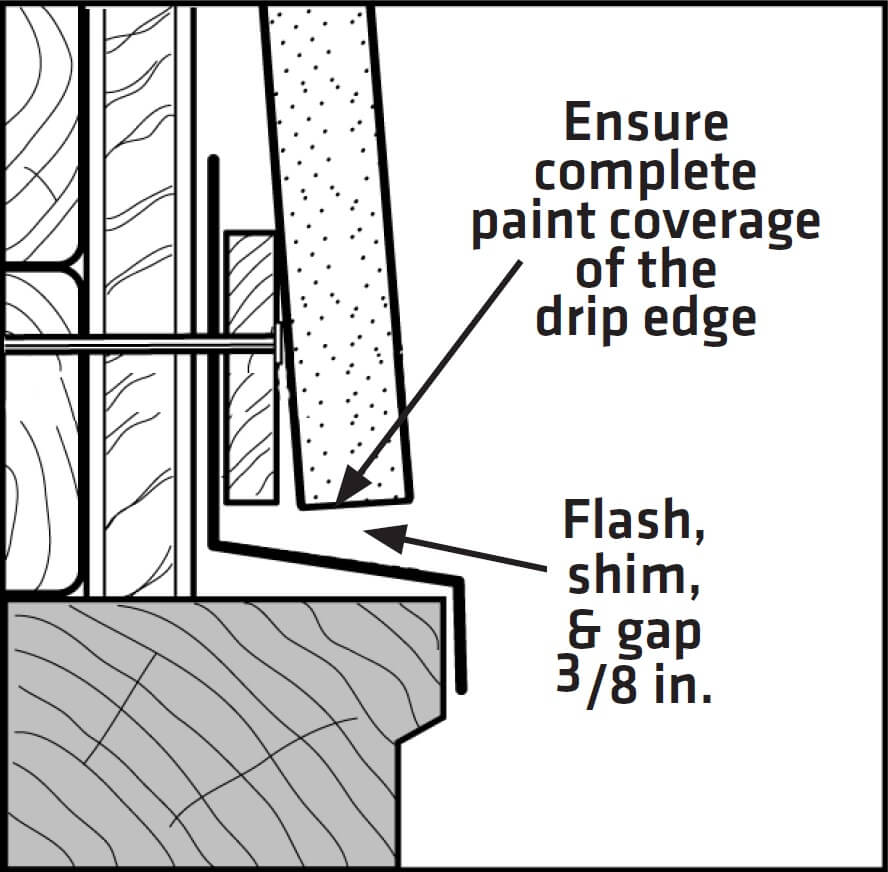
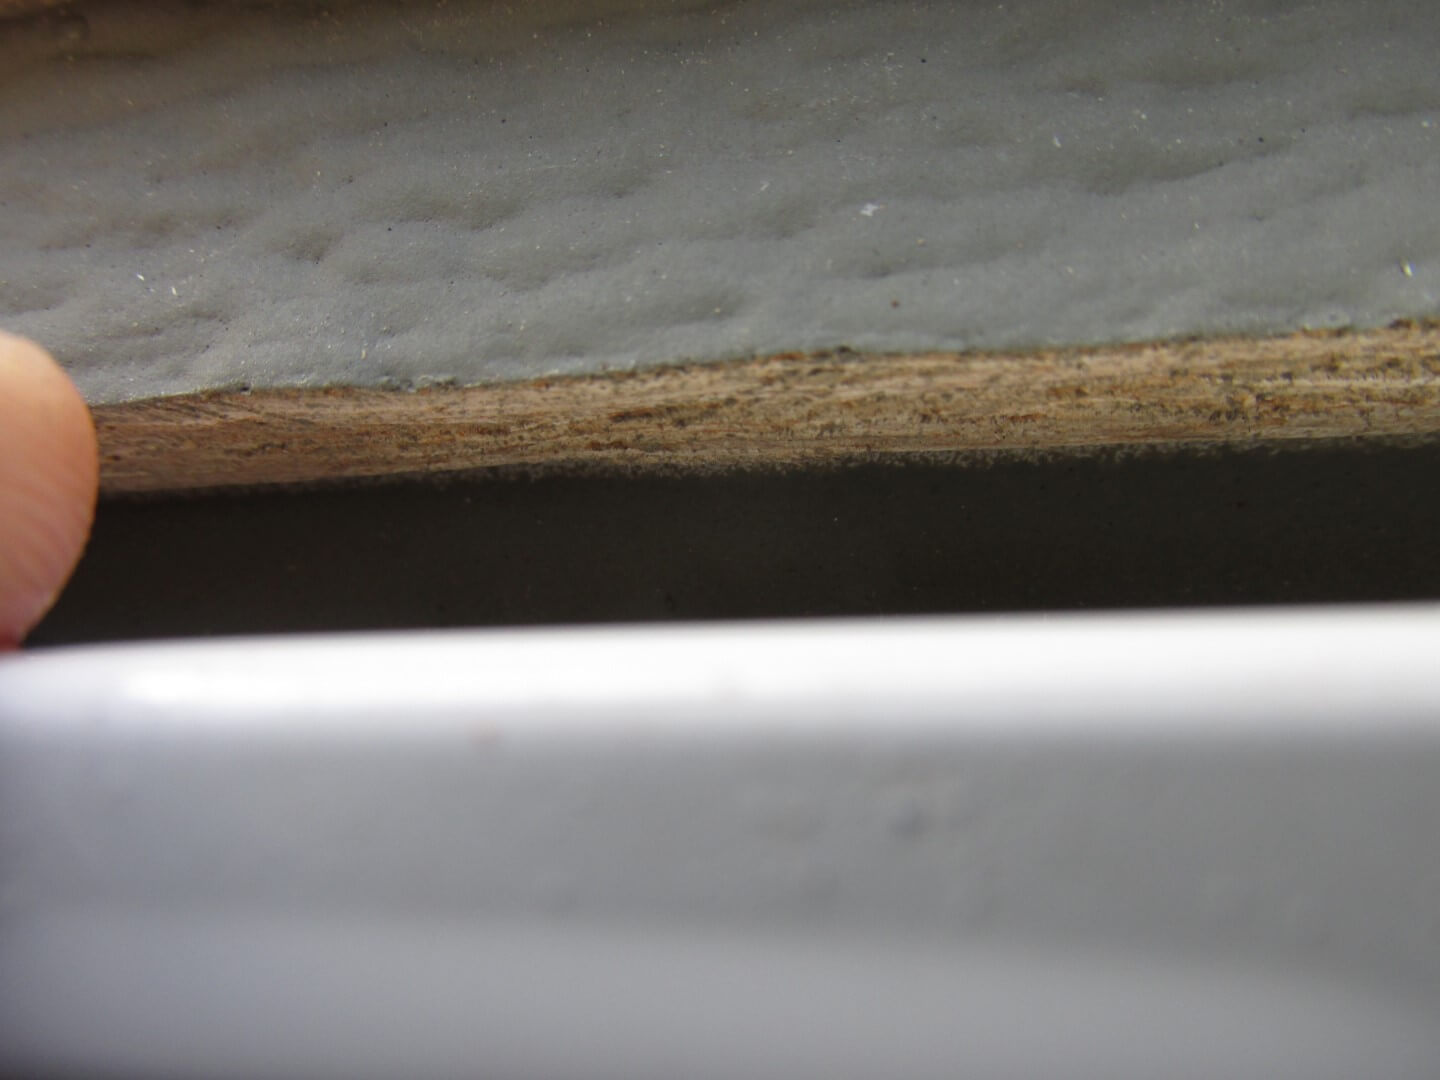
Do you see what went wrong with the installation of the LP Smartside siding shown below?
The manufacturer requires a 3/8″ gap between the bottom of the siding and the flashing below it, so that the cut edge of the siding can be properly painted. The diagram below comes right out of their installation manual.
Even when a proper 3/8″ gap is left, the siding doesn’t always get painted. The photo below shows a close-up view of a proper gap but no paint at the cut edge of the siding. If the siding isn’t painted at the cut edges, it can experience premature failure.
While we’re on the topic of LP Smartside, overdriven nails are another common defect with this siding on new installations.
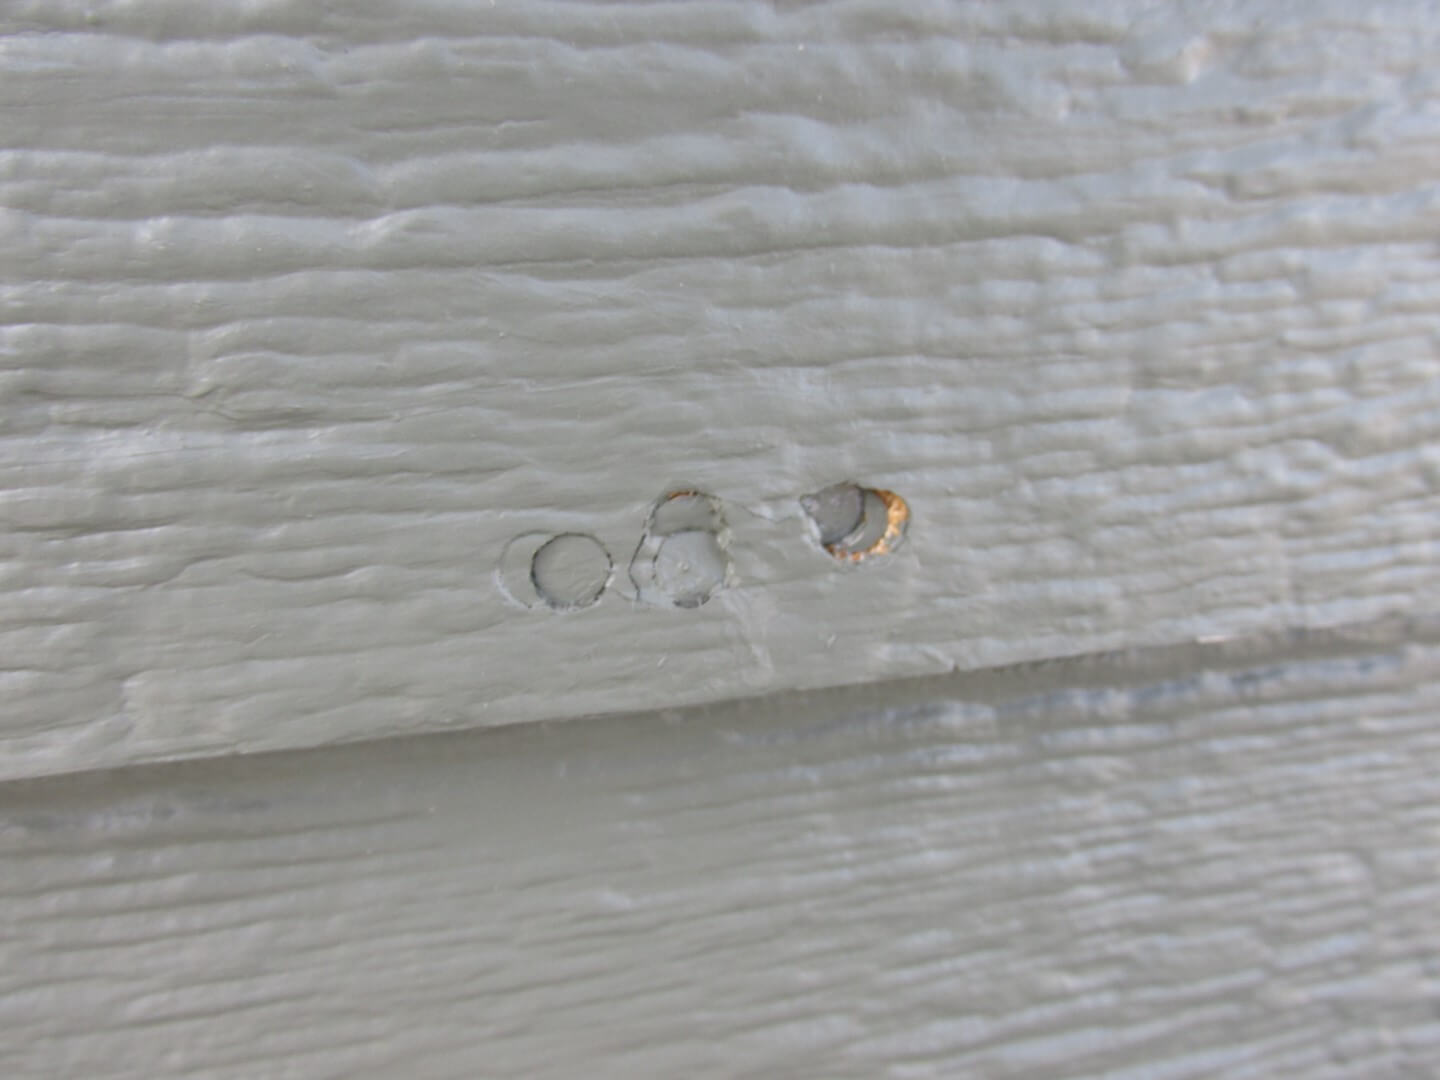
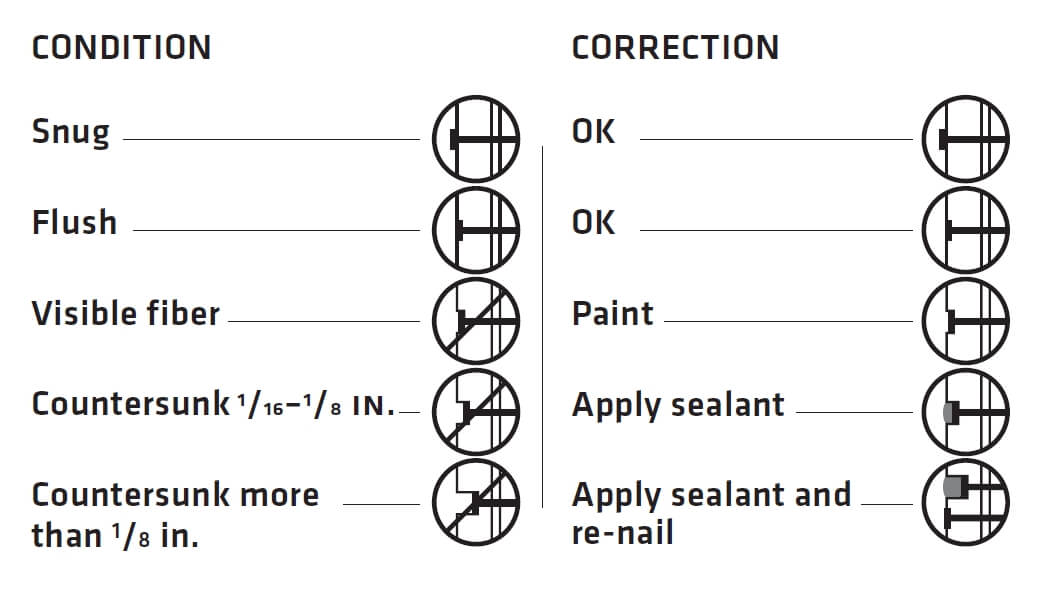
Here’s how the manufacturer says to fix this:
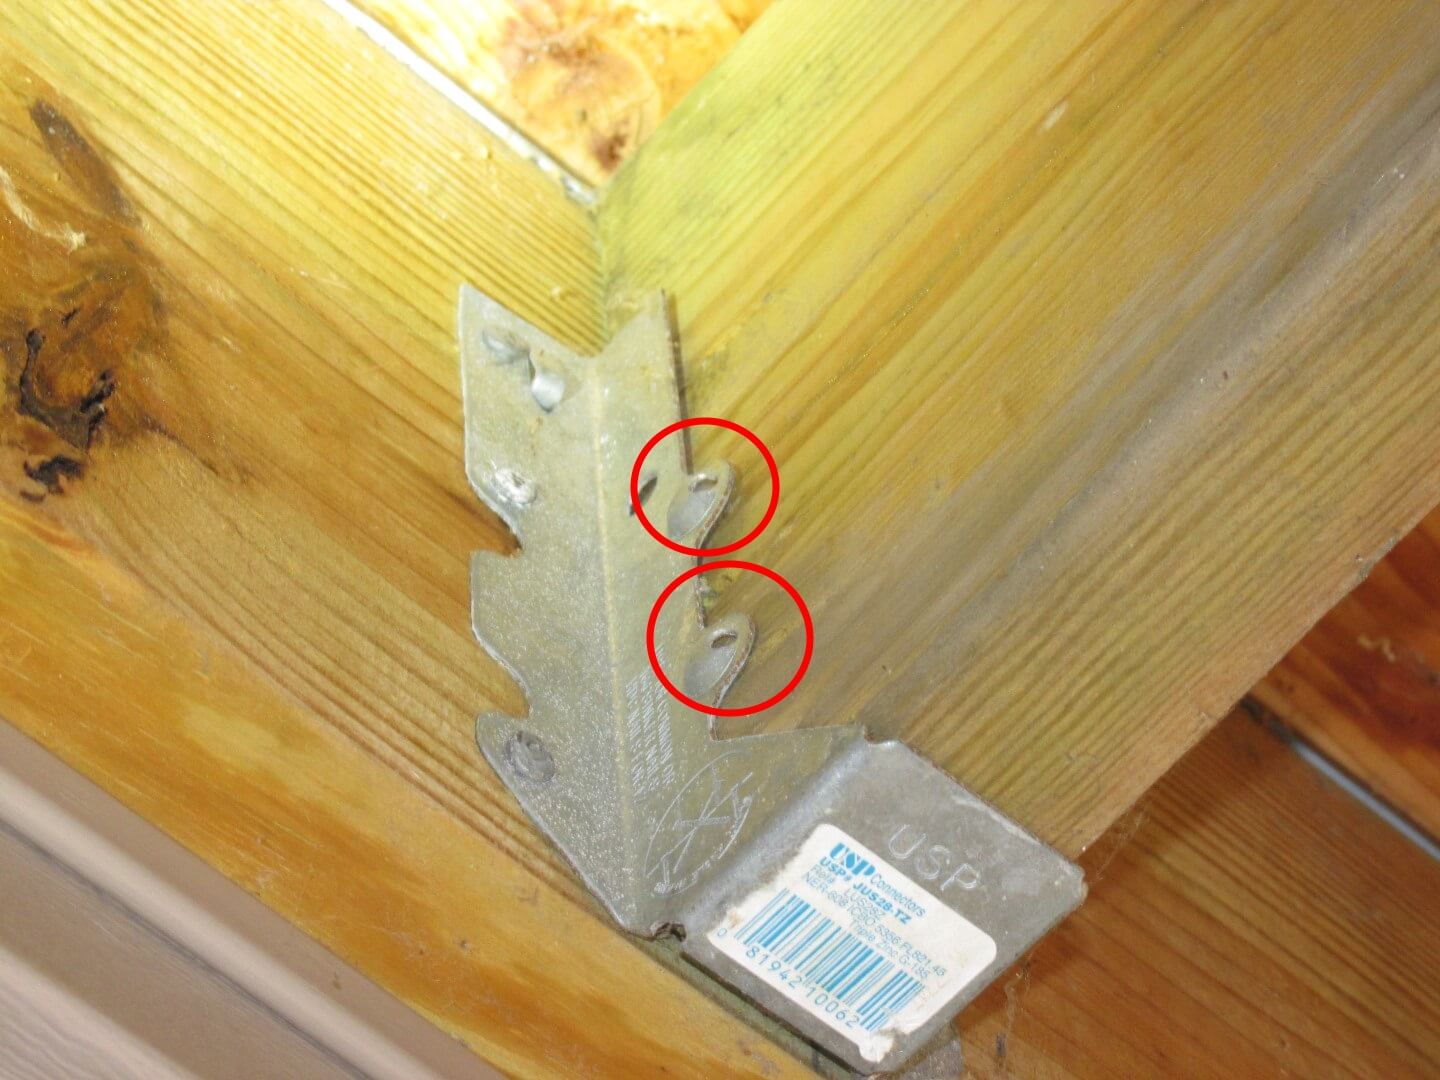
Most new-construction homes don’t have decks, but when they do, we often find problems with them. The photo below shows a couple of missing nails at a joist hanger. Pretty minor stuff.
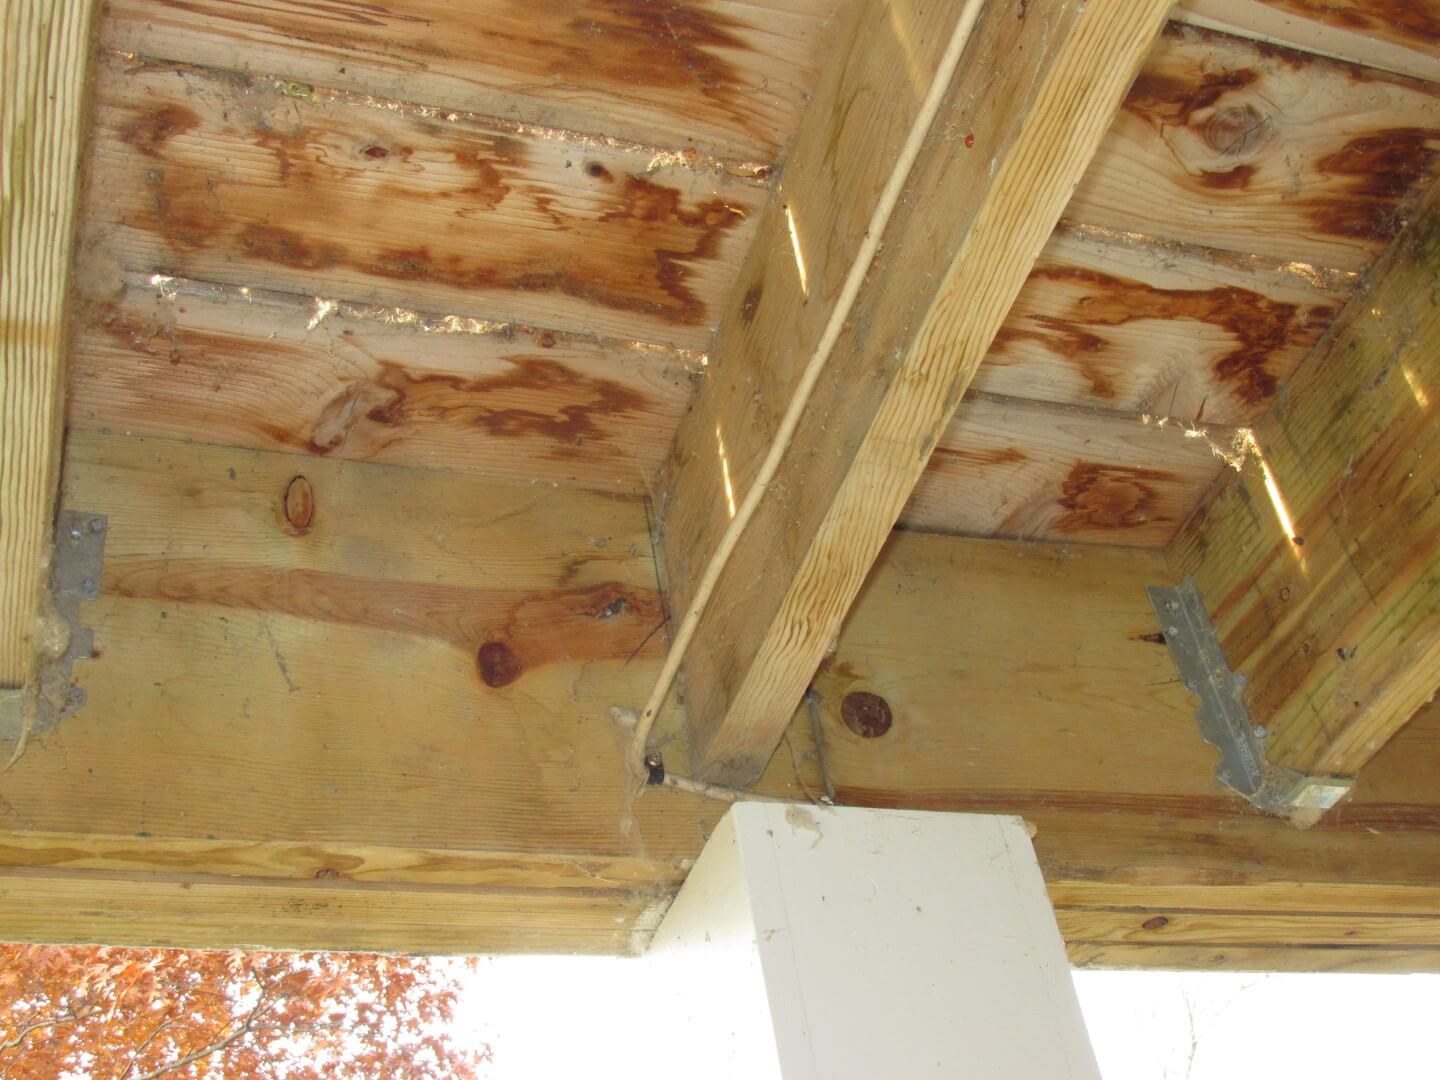
This next photo shows a missing metal bracket (joist hanger) at one of the joists. That’s a little bigger.
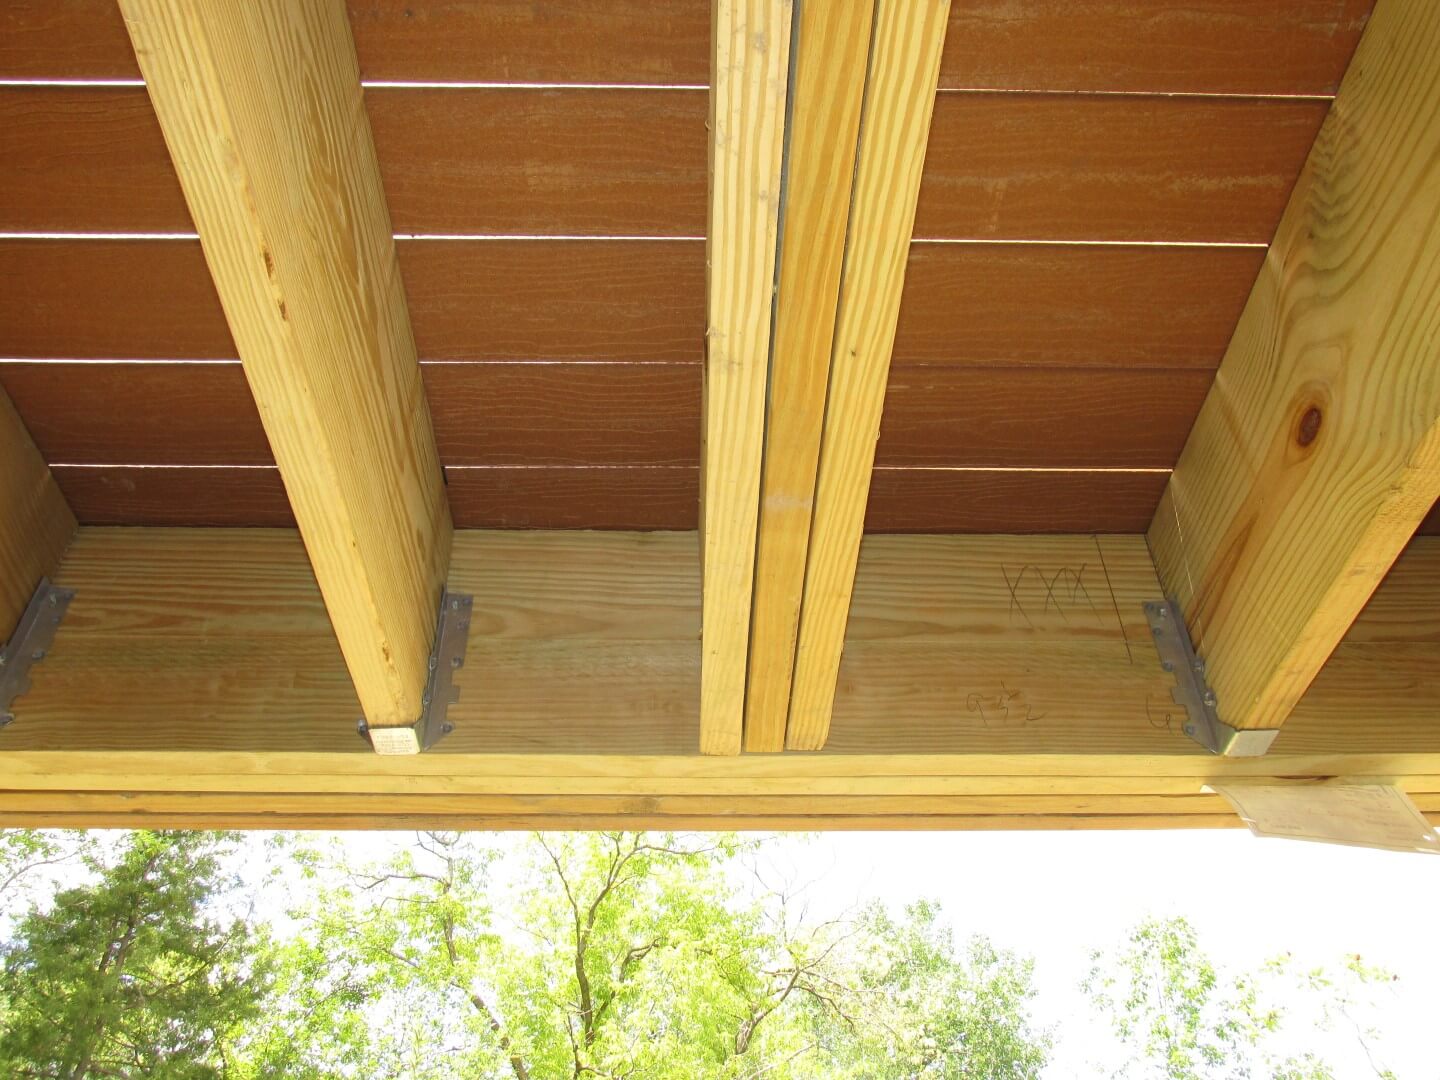
And here we have a missing metal hanger at the tripled 2x10s, which was supporting the stairway. This really needs to be fixed.
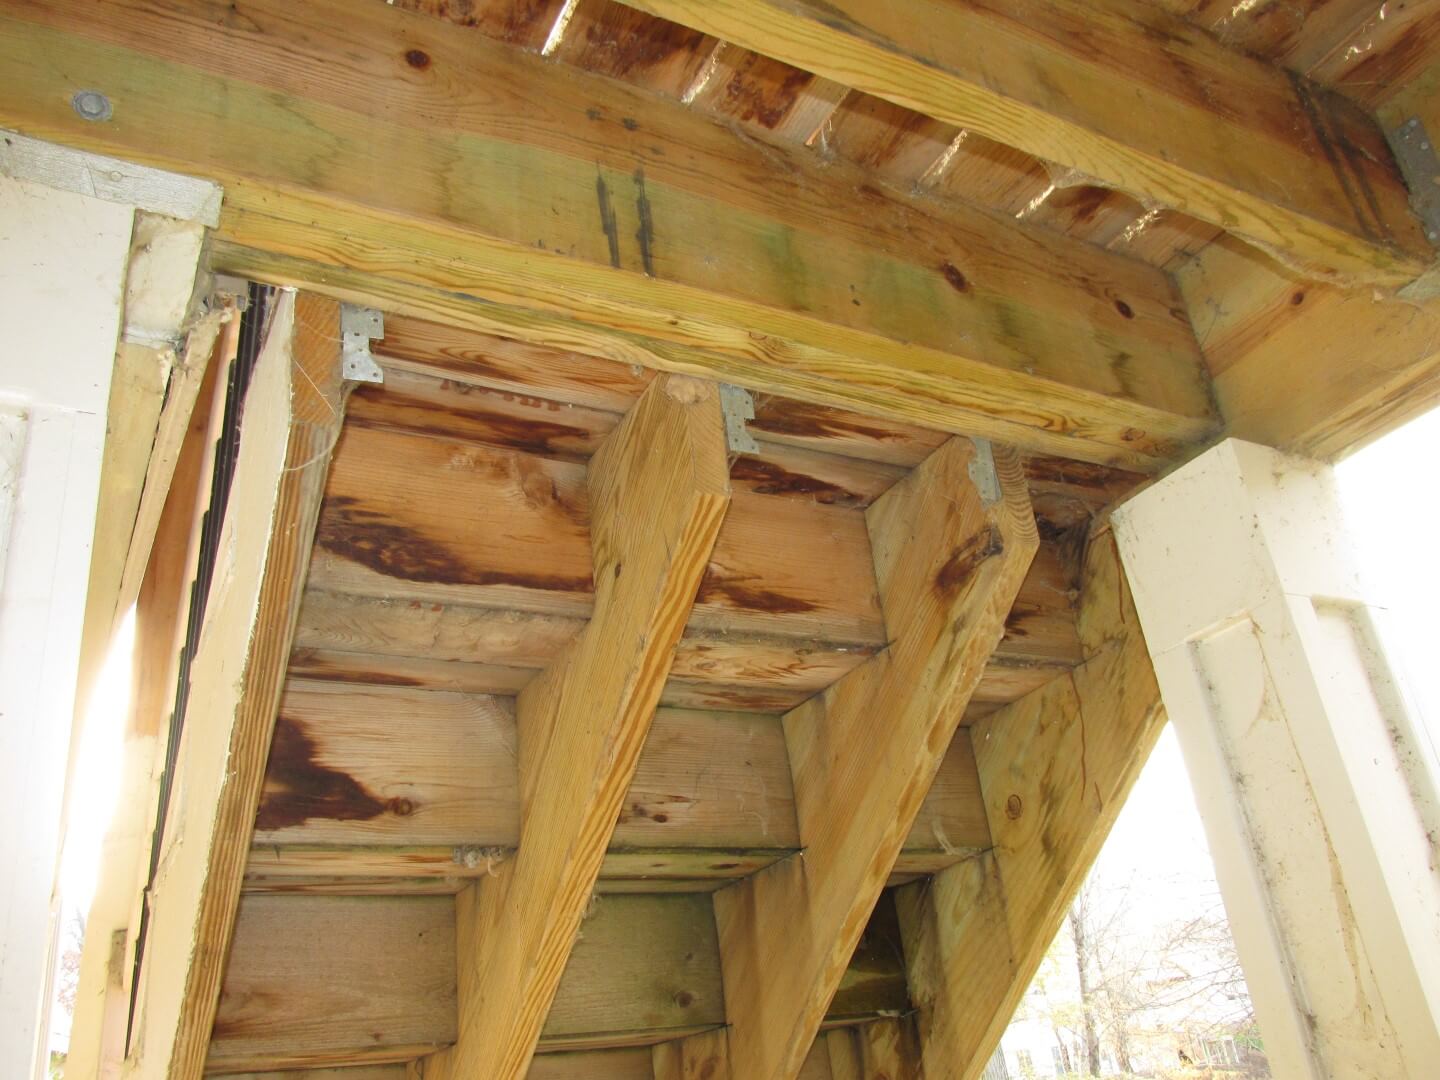
Here’s a stairway with improper attachment to the deck. Each stringer was attached to the header with two 1-1/2″ nails going into the corner bracket. No joke.
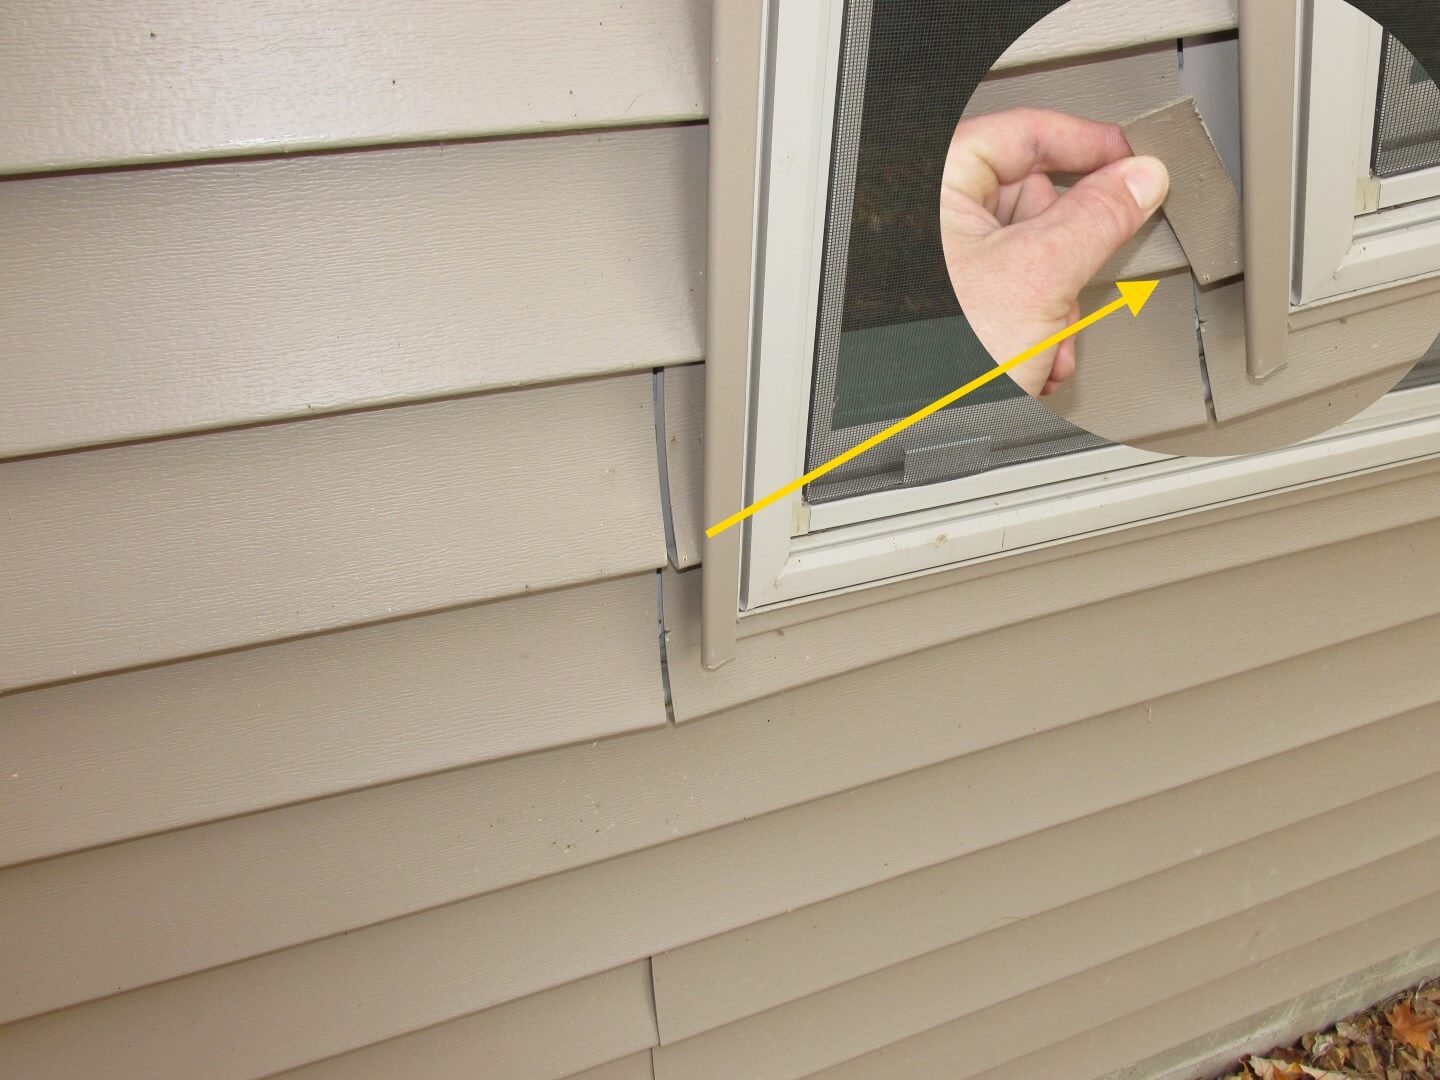
The J-channel installed on vinyl siding is supposed to be continuous. This one wasn’t.
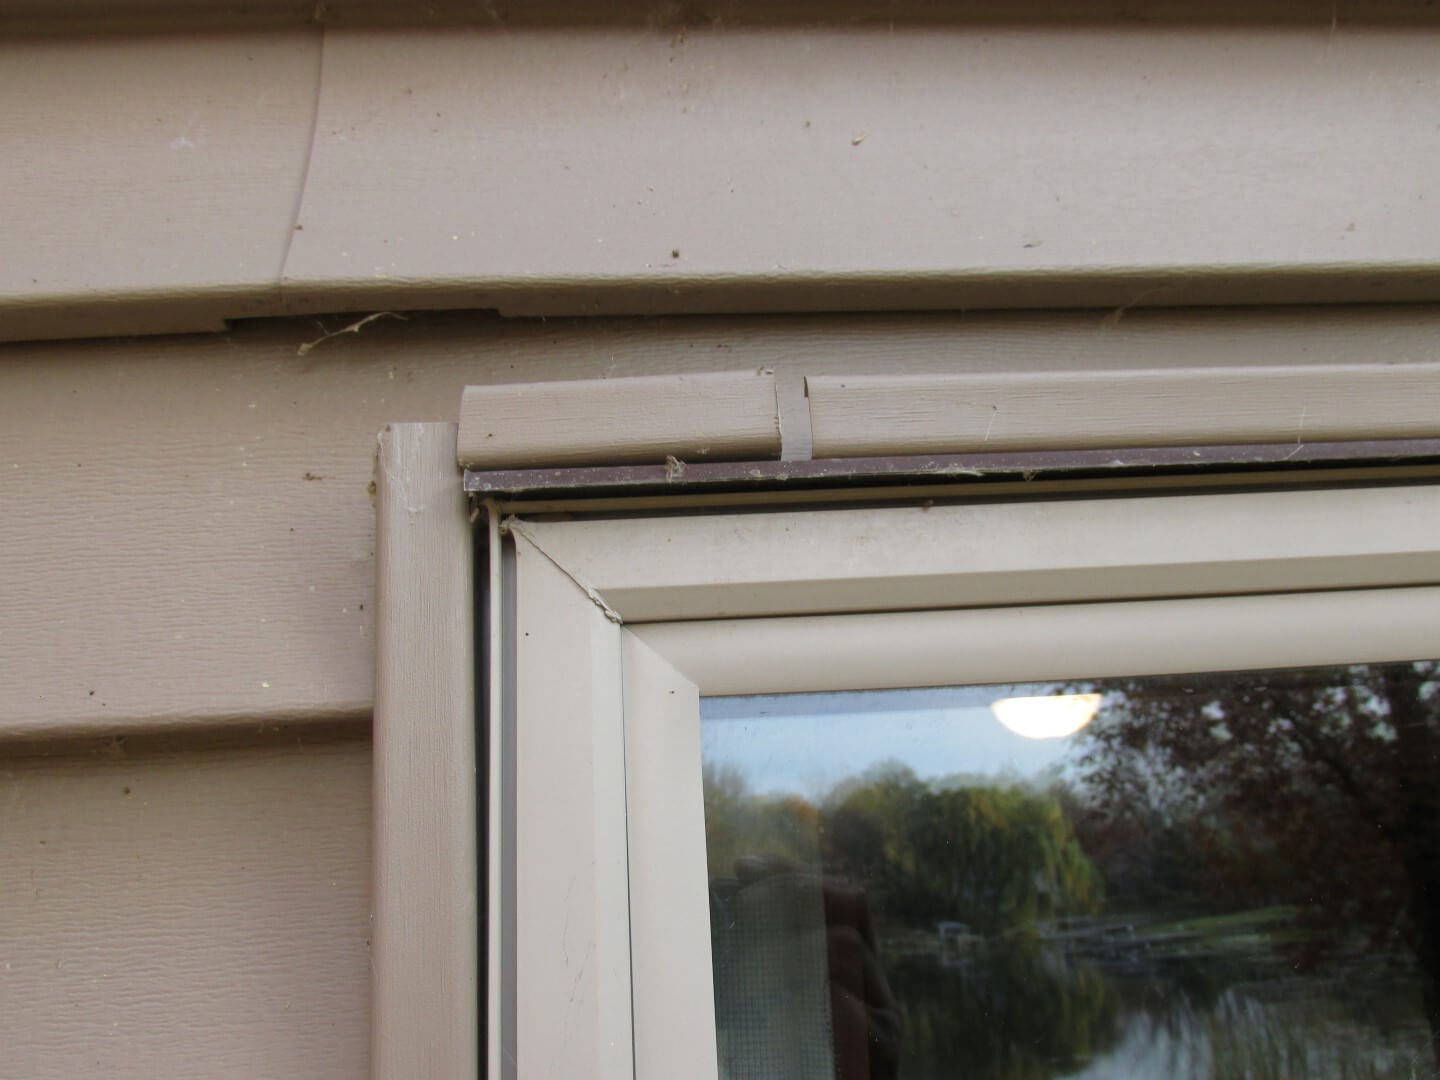
On that same window, there was a poorly located seam in the siding, preventing the siding from being attached on this side of the window.
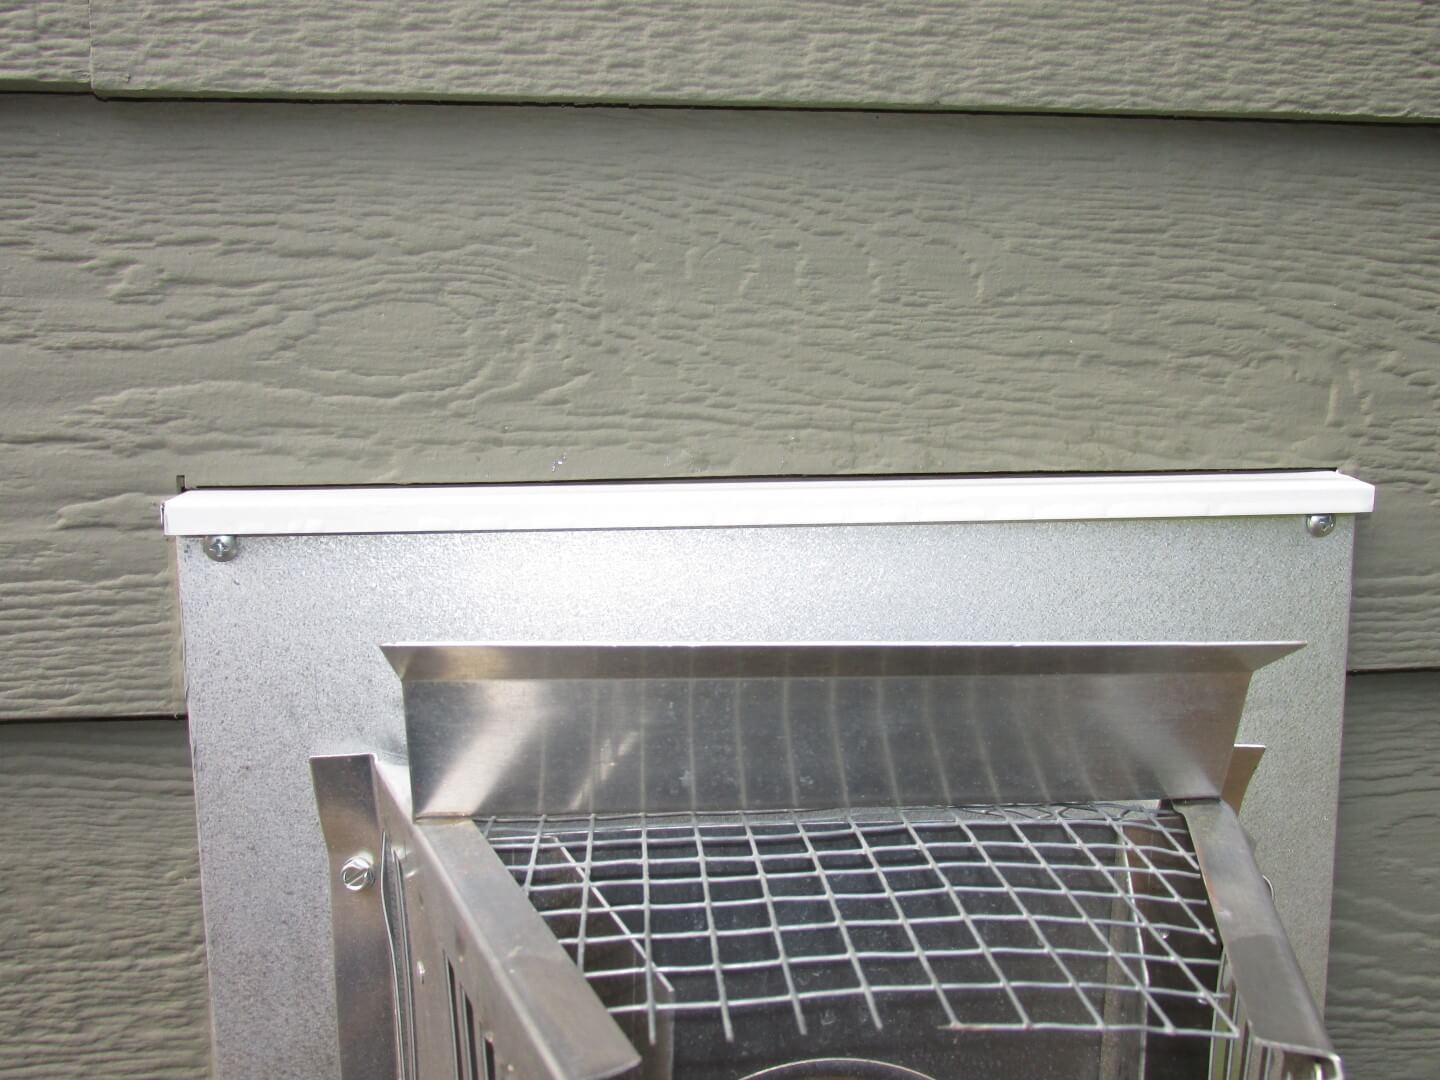
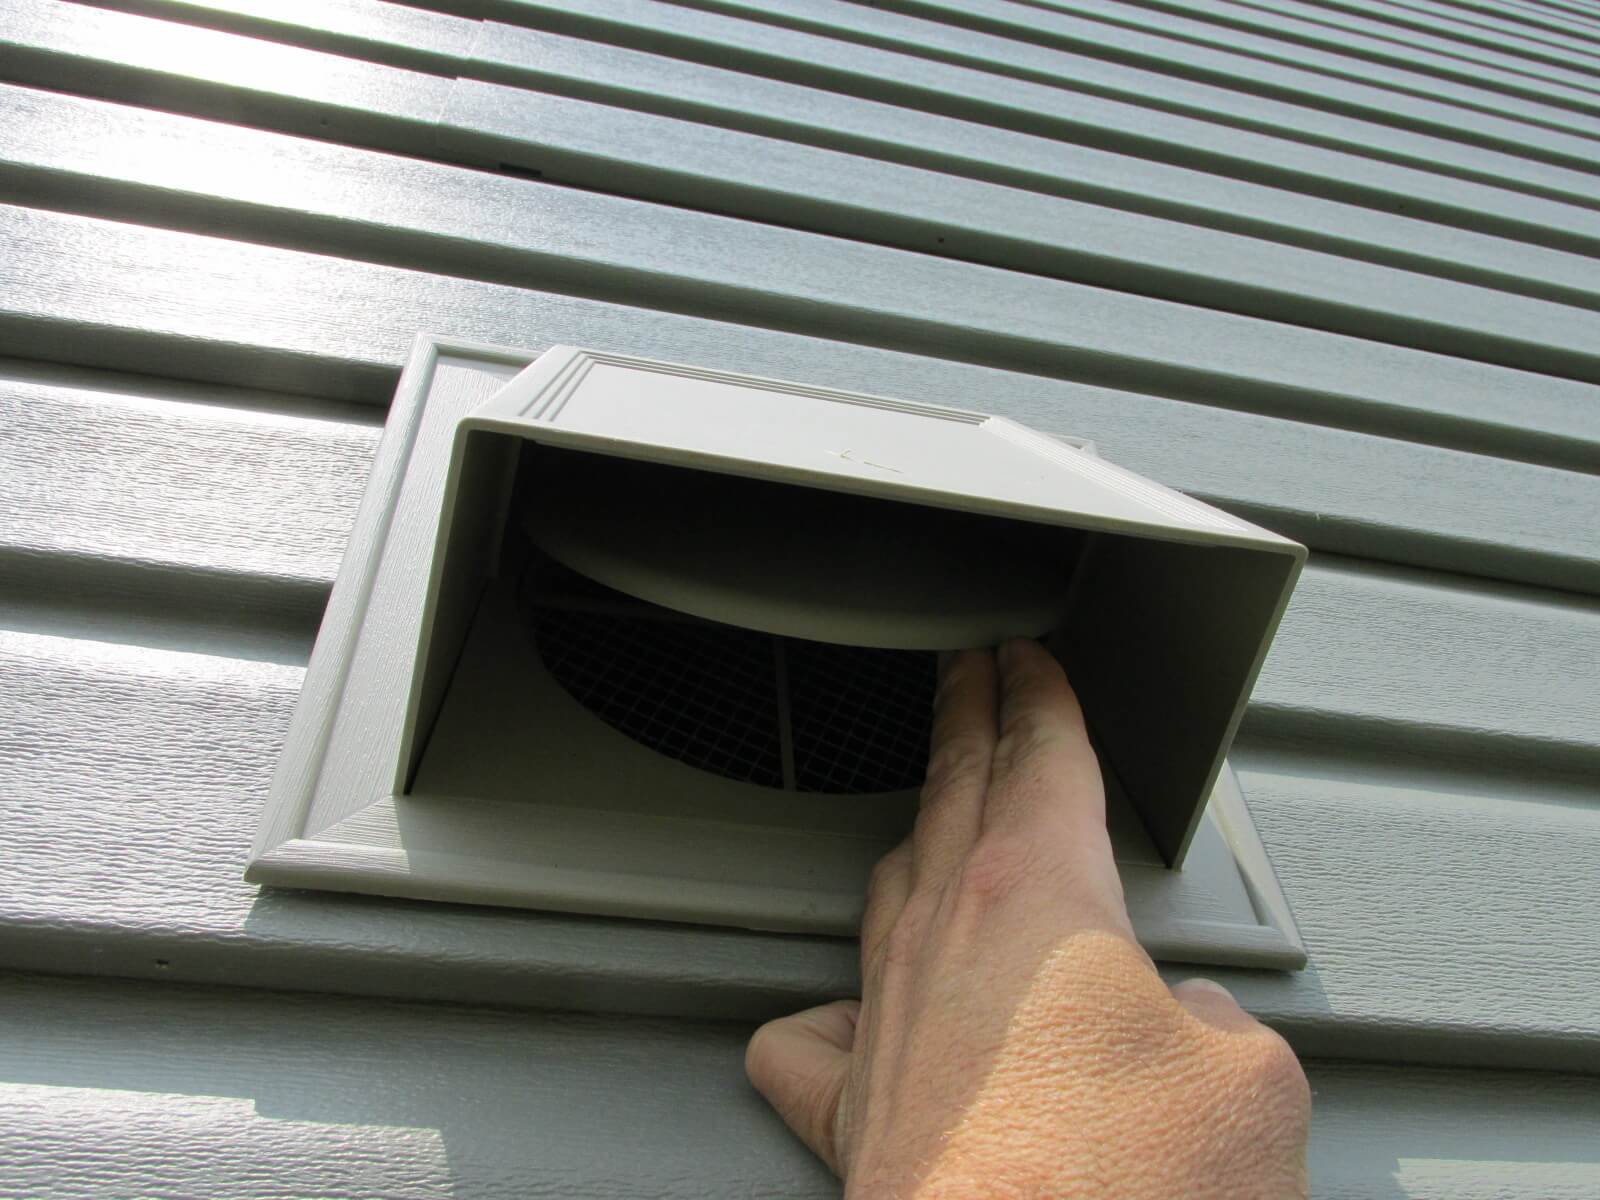
The damper for this bathroom exhaust fan didn’t open because the plastic grill obstructed it. The grill obstructed it because the feature board wasn’t cut out enough. This renders the bath fan useless.

Roofs
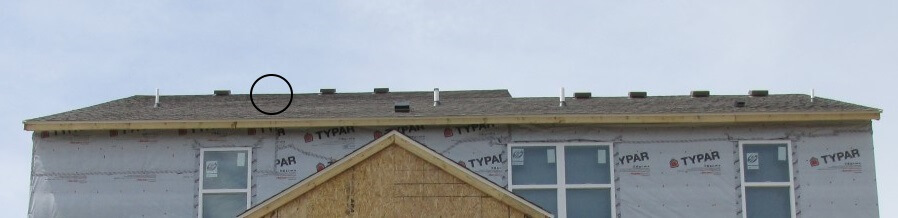
Here’s a roofing defect that we were suspicious of before we even went into the attic. The roofer missed one of the roof vents. As you can tell from the house wrap, this was a defect we caught during a pre-drywall inspection.
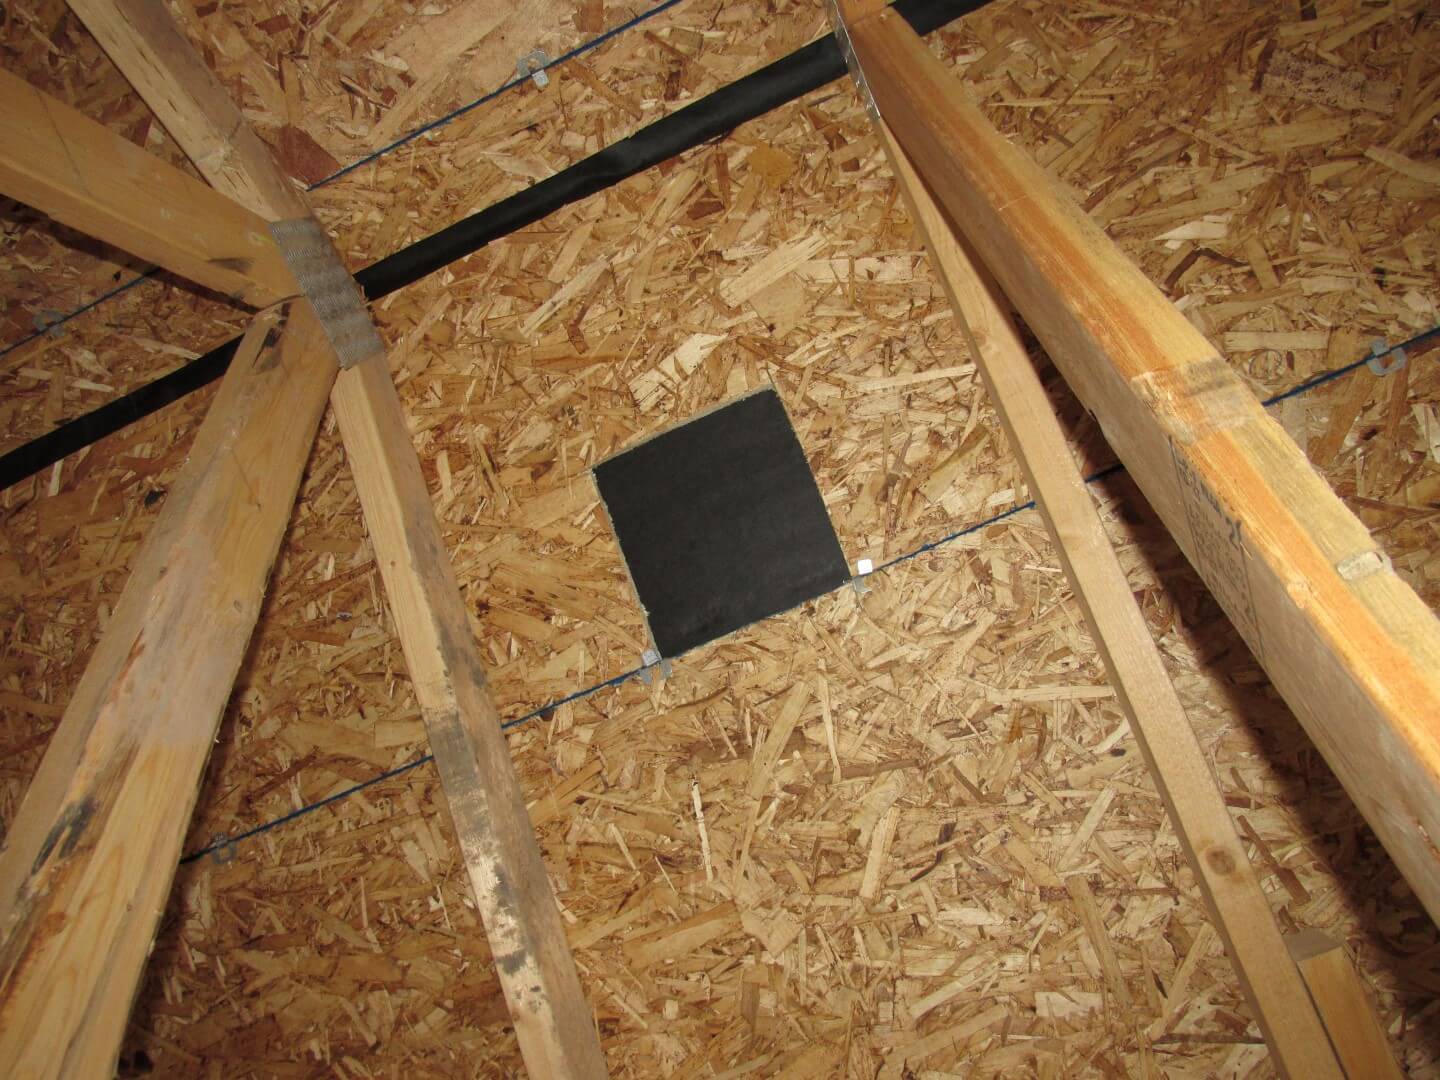
Here’s what it looked like from inside the attic. Don’t step there.
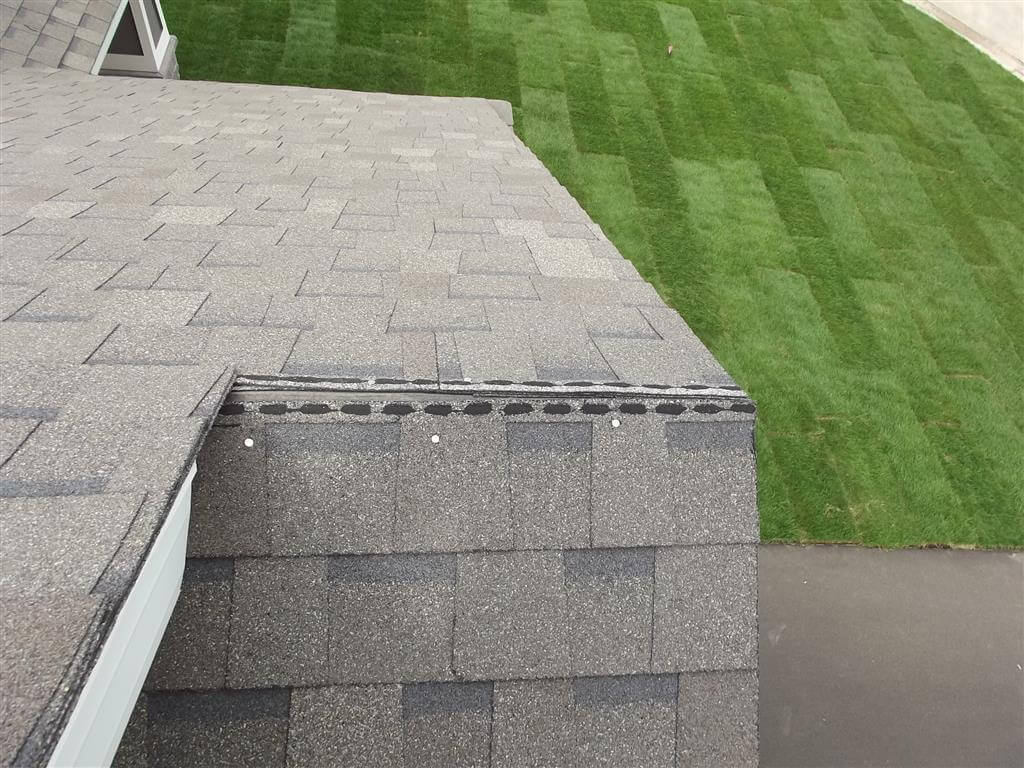
Why was the shingle lifted? Oh, that’s why. Duh.

Lifted shingles can lead to shingles catching the wind and blowing off. That’s probably what happened in the photos below.
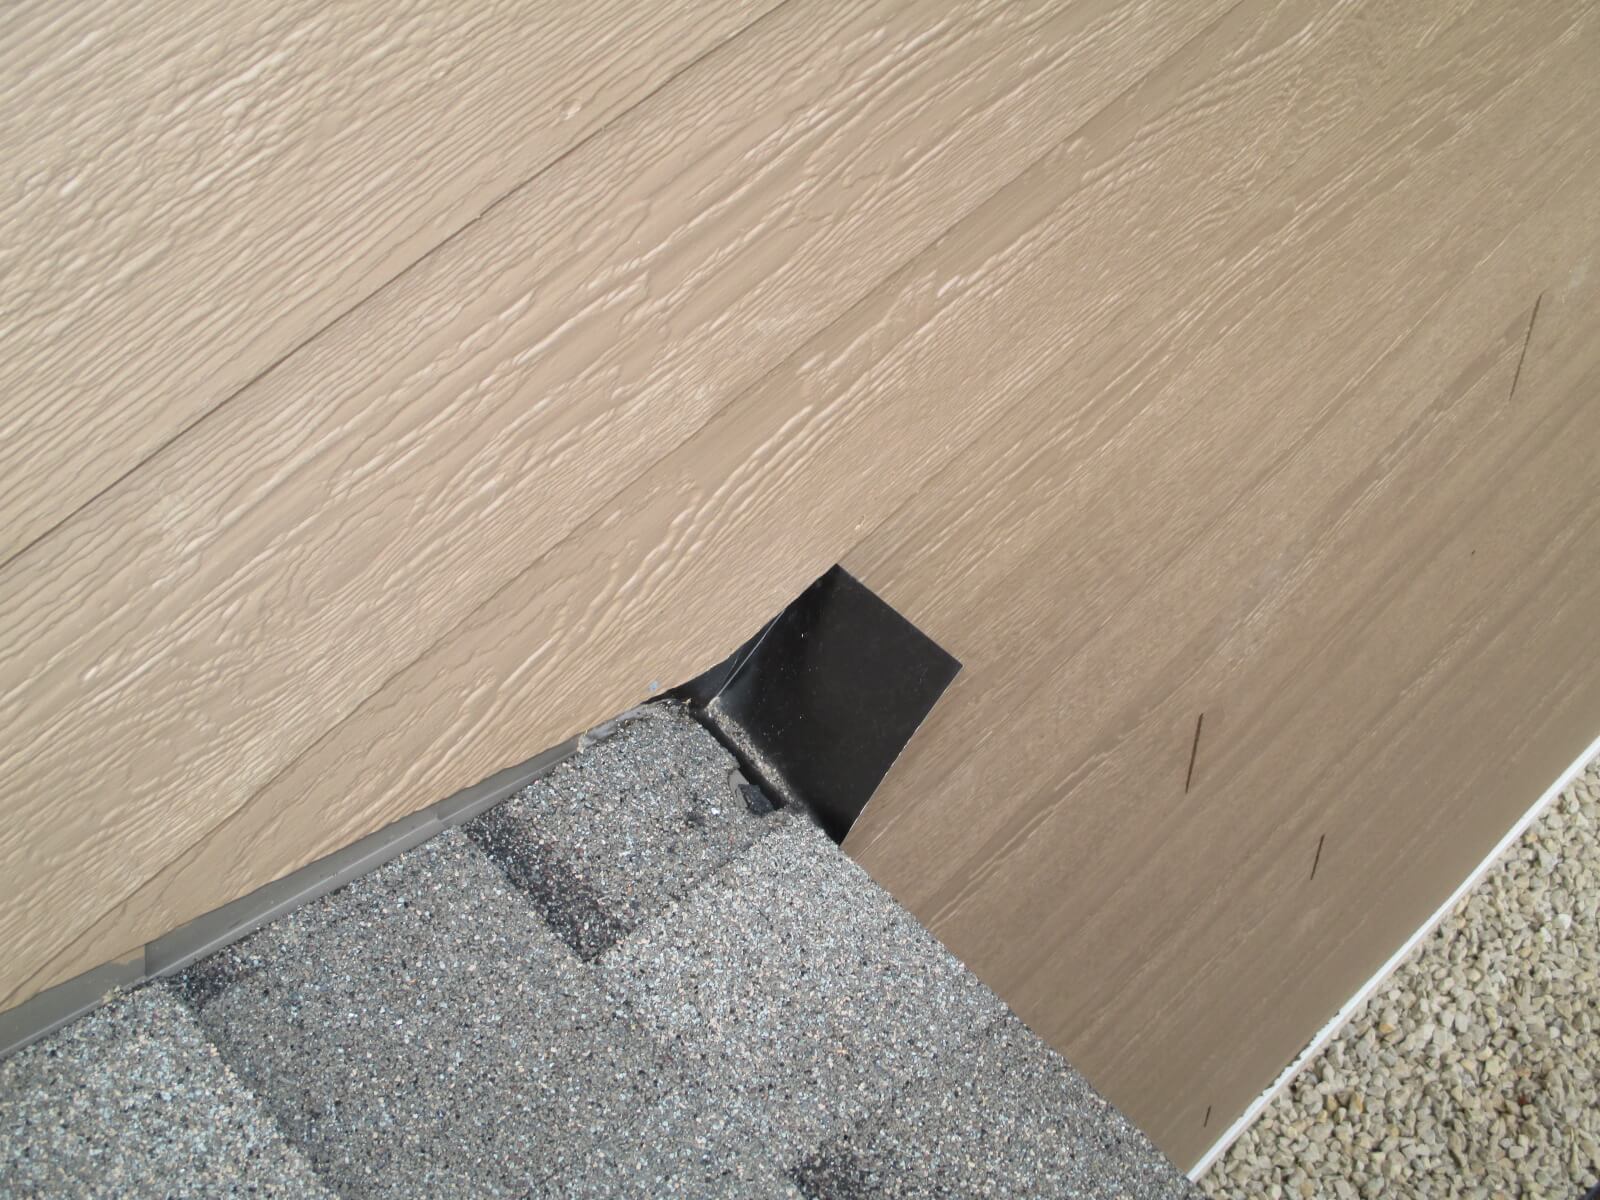
Kickout flashings have been required by the Minnesota State Building Code since 2007, so they’re nothing new… but we still see ’em bungled. This first photo shows the kickout bent at a 90 degree angle, which will create a lot of turbulence and splashing.
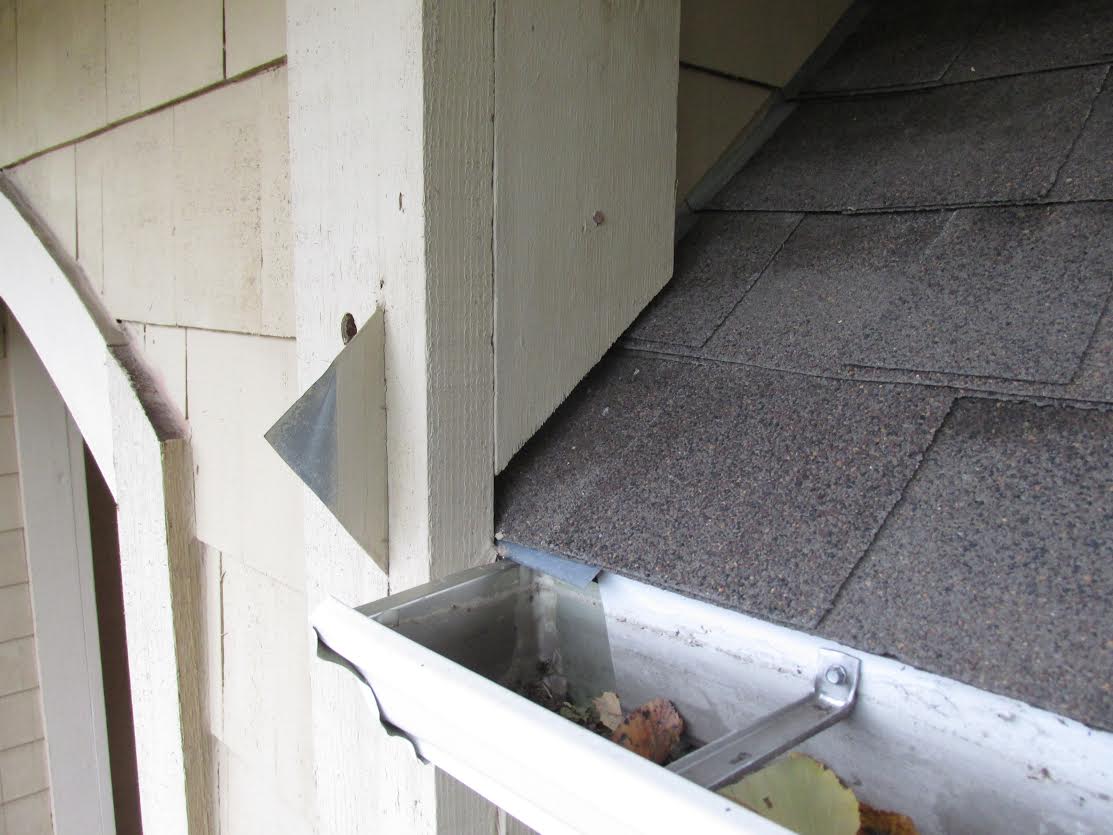
This next photo wasn’t from a new construction inspection, but it was a relatively new home, and the installation surely happened at the time the house was built. Just think about where water is going to go.
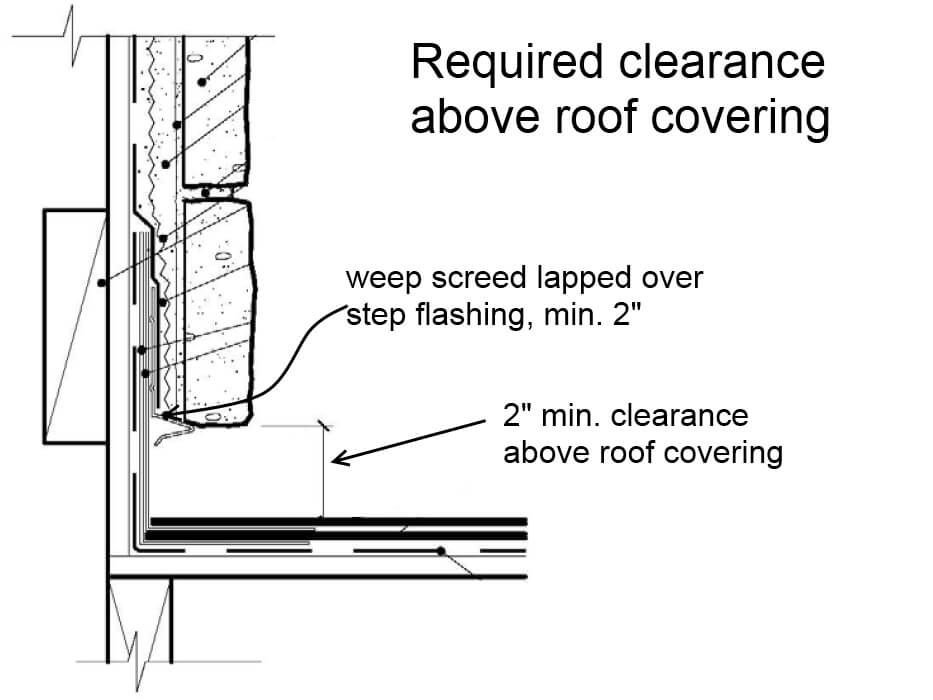
Here’s a home with adhered concrete masonry veneer siding, and missing kickout flashing. Every little detail on this type of siding is critical, so it really boggles my mind how something like kickout flashing can be omitted.
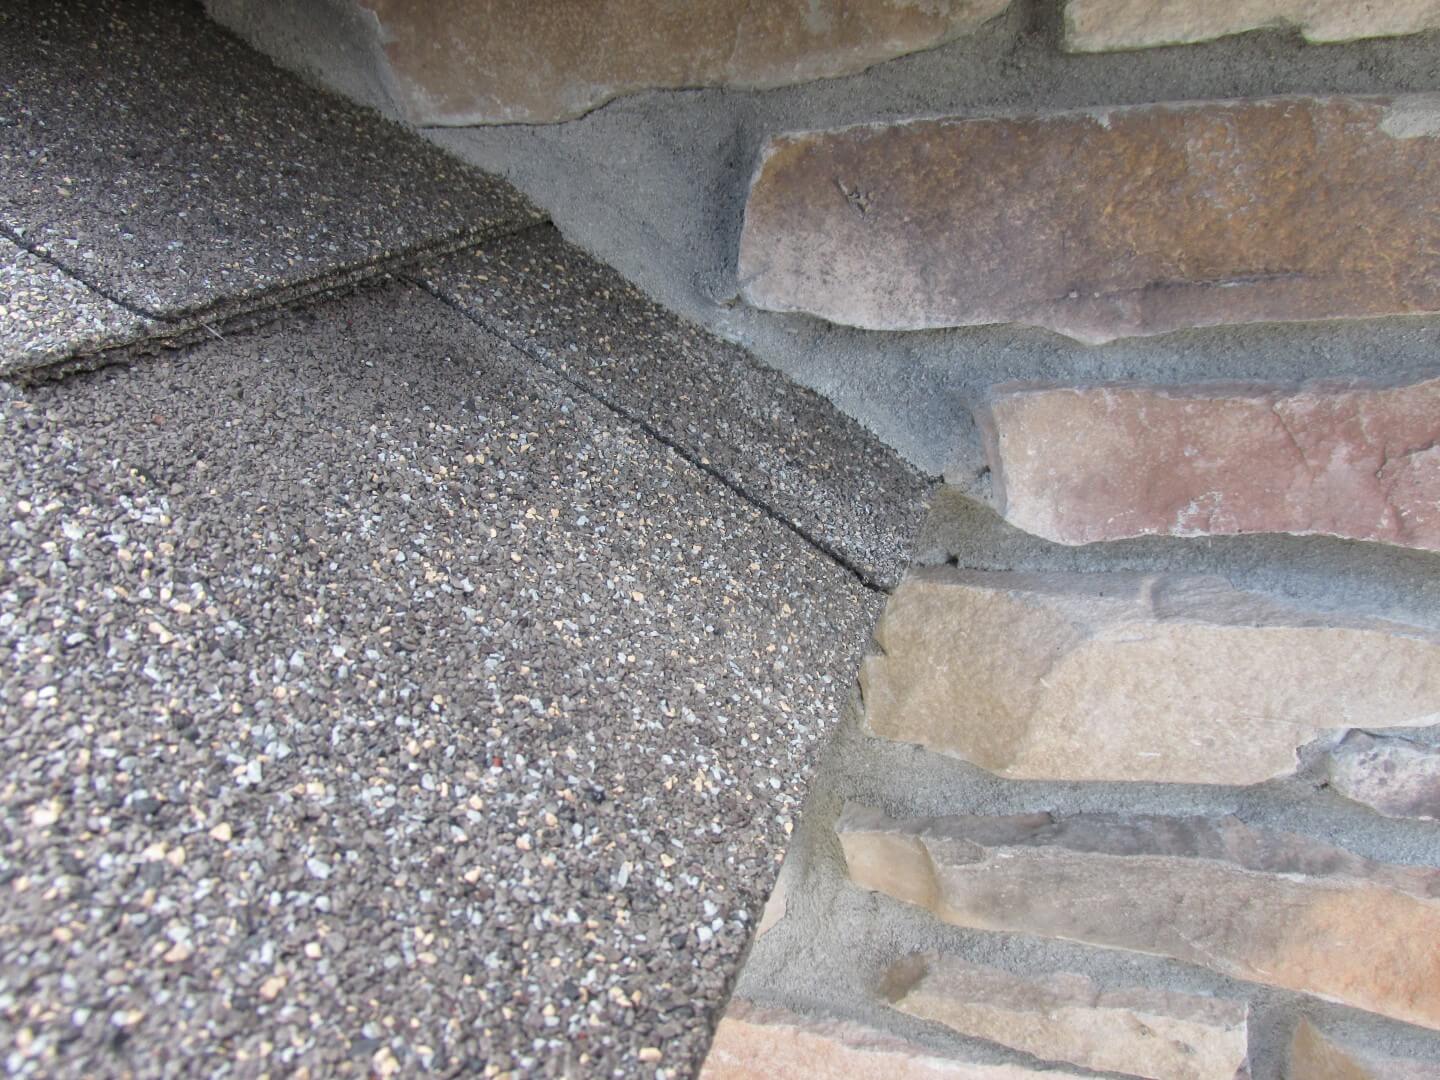
Oh, and the stone siding is supposed to be kept at least 2″ above the surface of the shingles, not touching them.
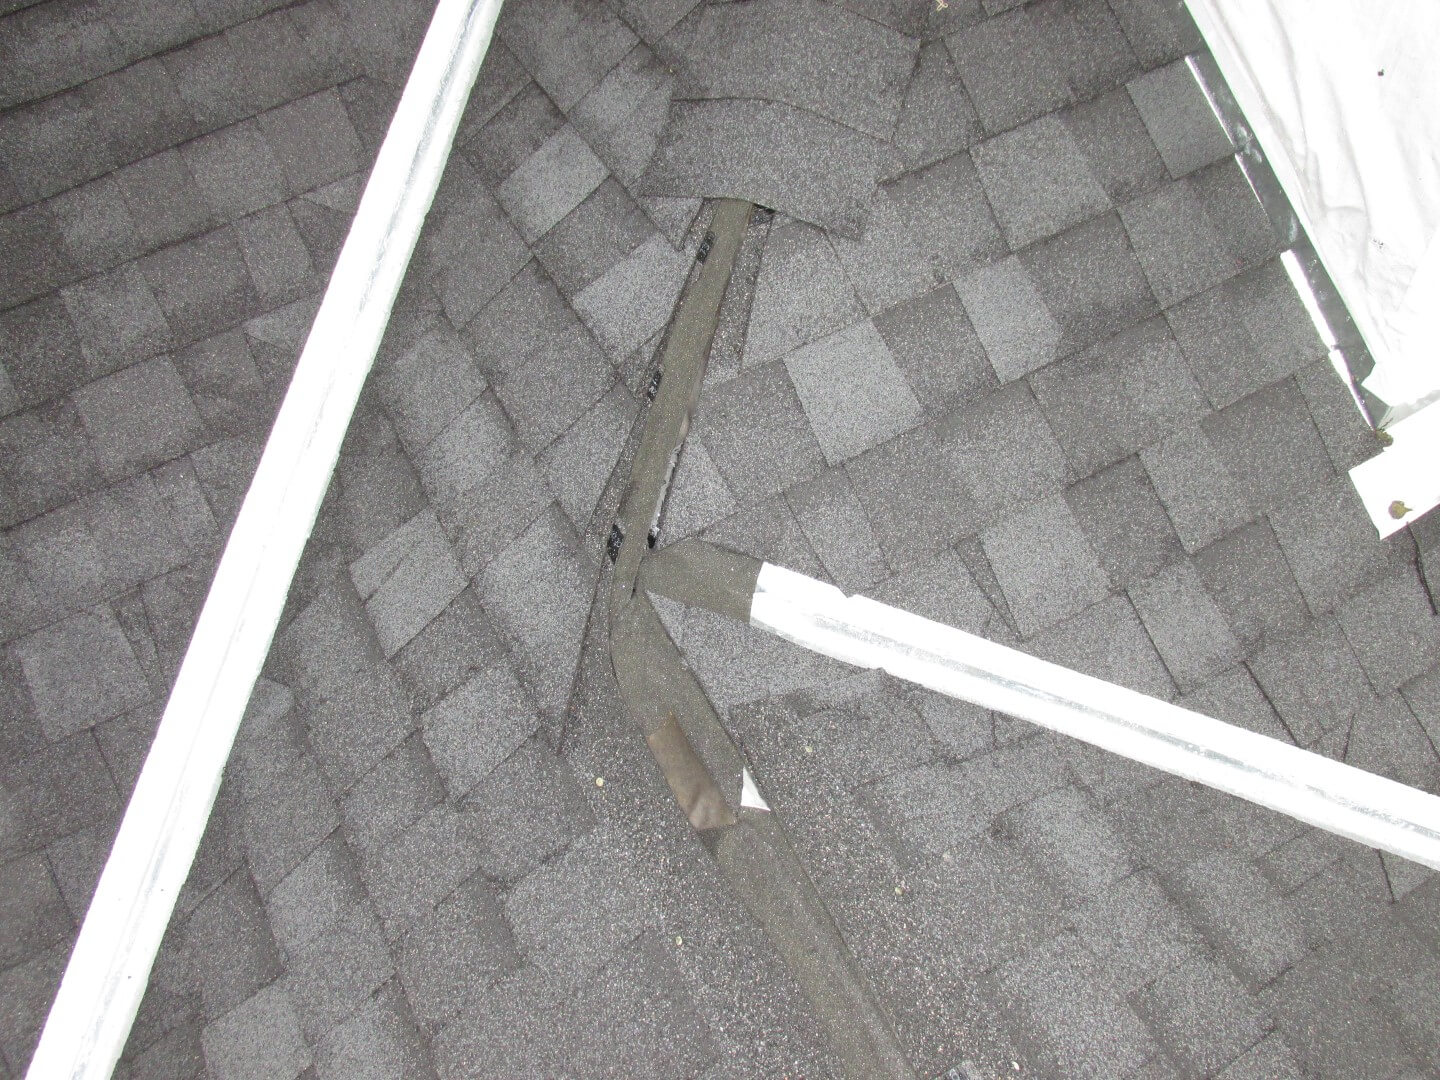
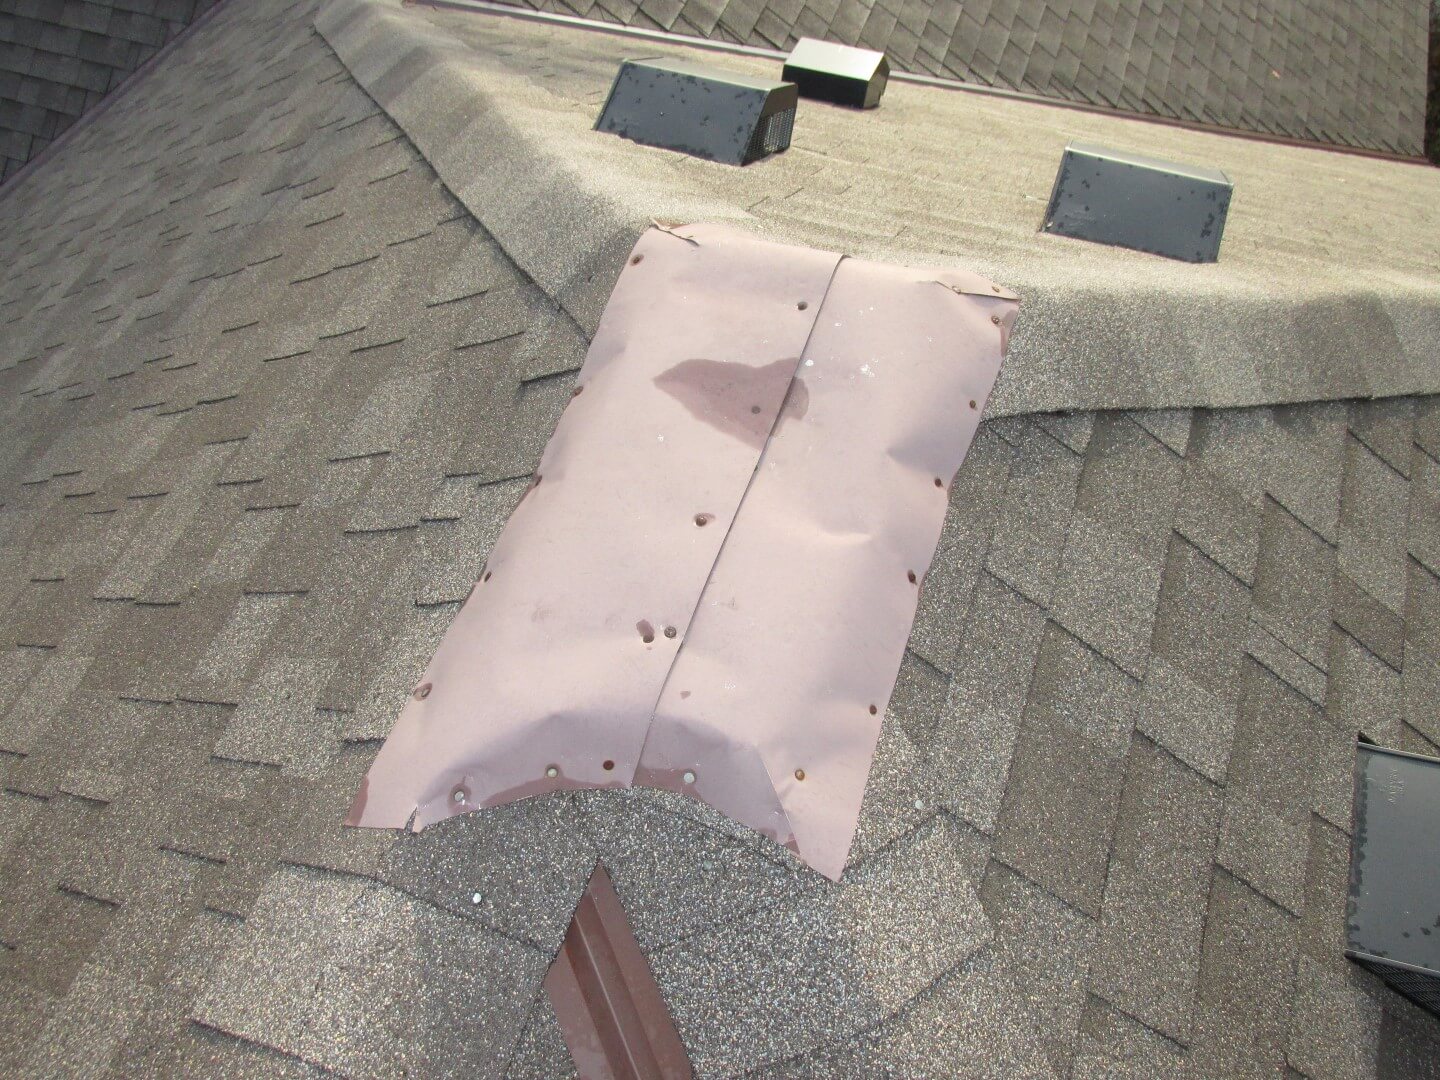
Here’s a peak with two pieces of makeshift flashing that will almost surely leak.
Plumbing
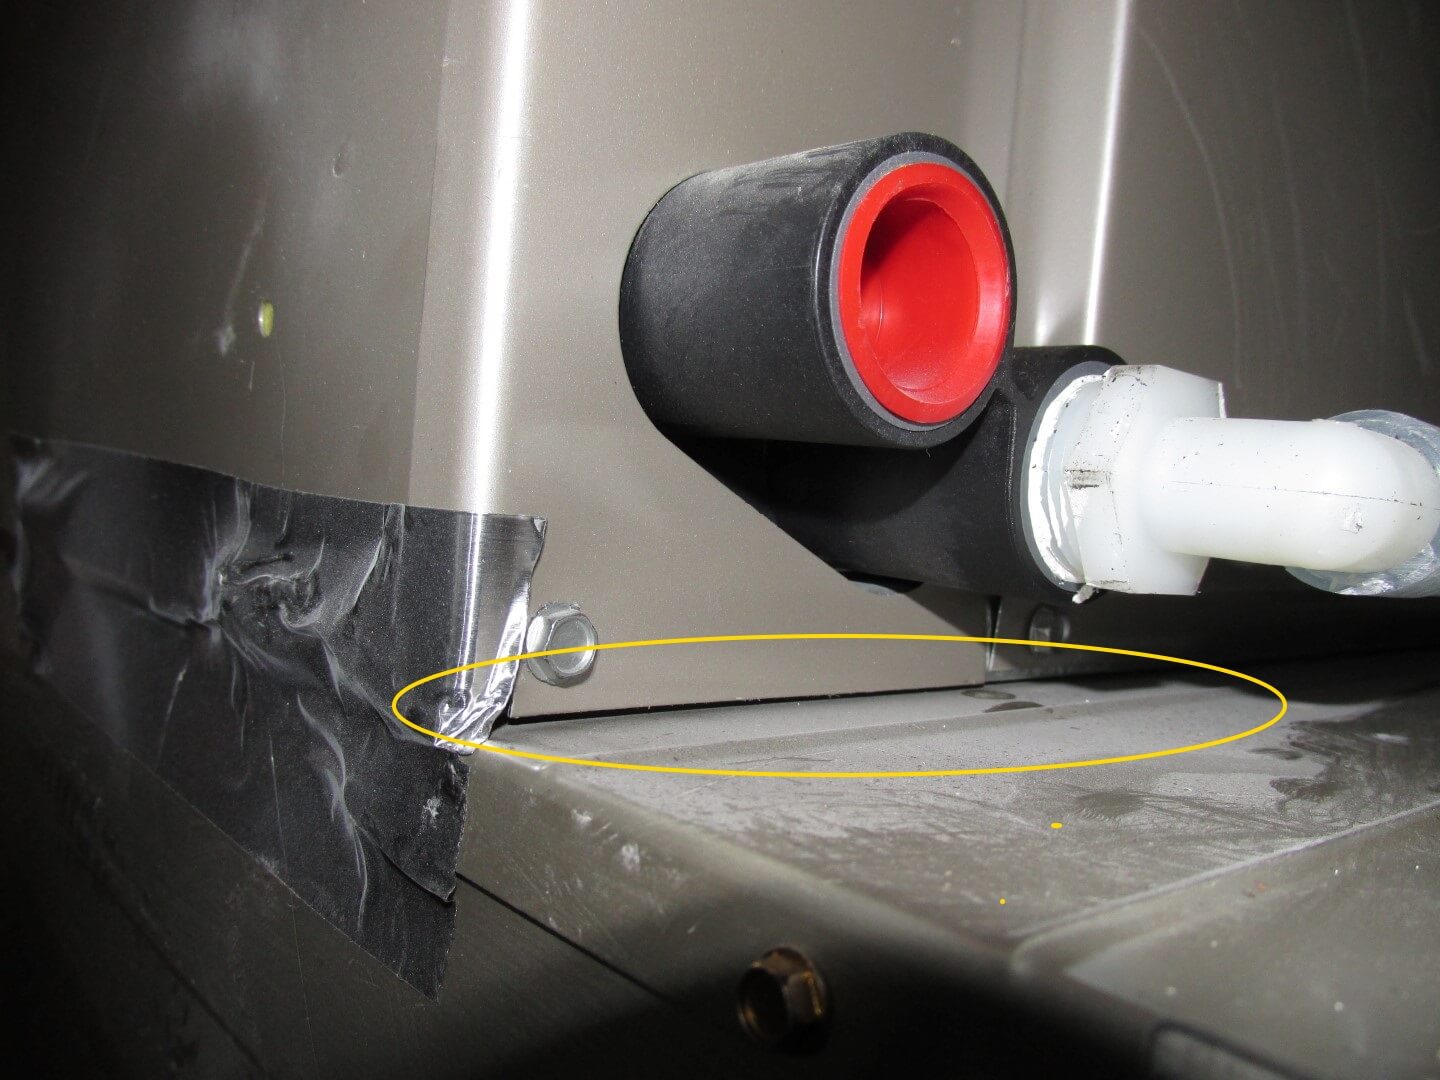
Even new stuff can leak. This first photo shows a leaking bath tub overflow drain.
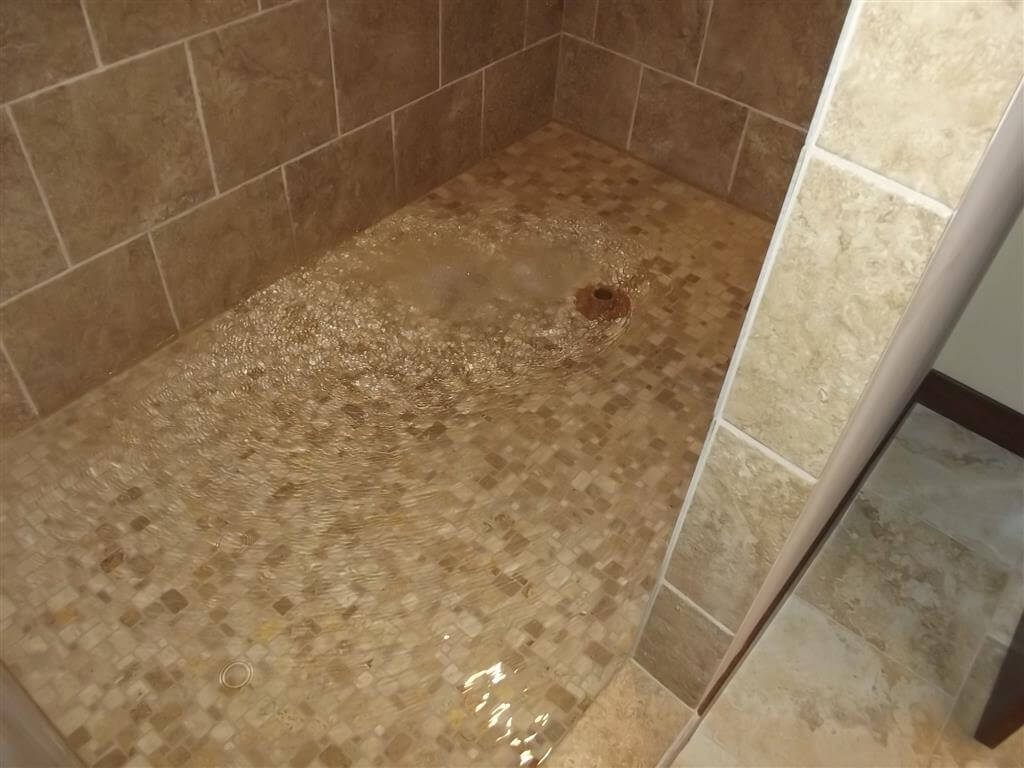
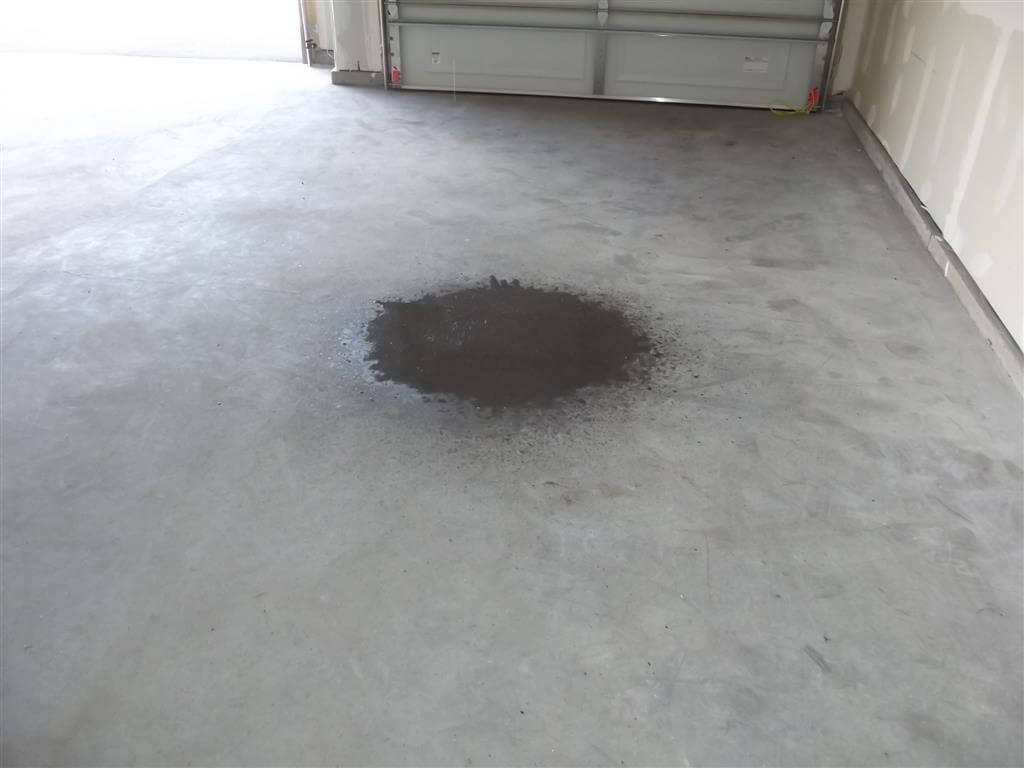
Showers can leak too. We test tiled showers by using a shower dam. When tiled showers leak, it’s a big deal. This first photo shows our shower dam sitting in the shower.
The next photo shows water that leaked through the shower base, down into the garage.
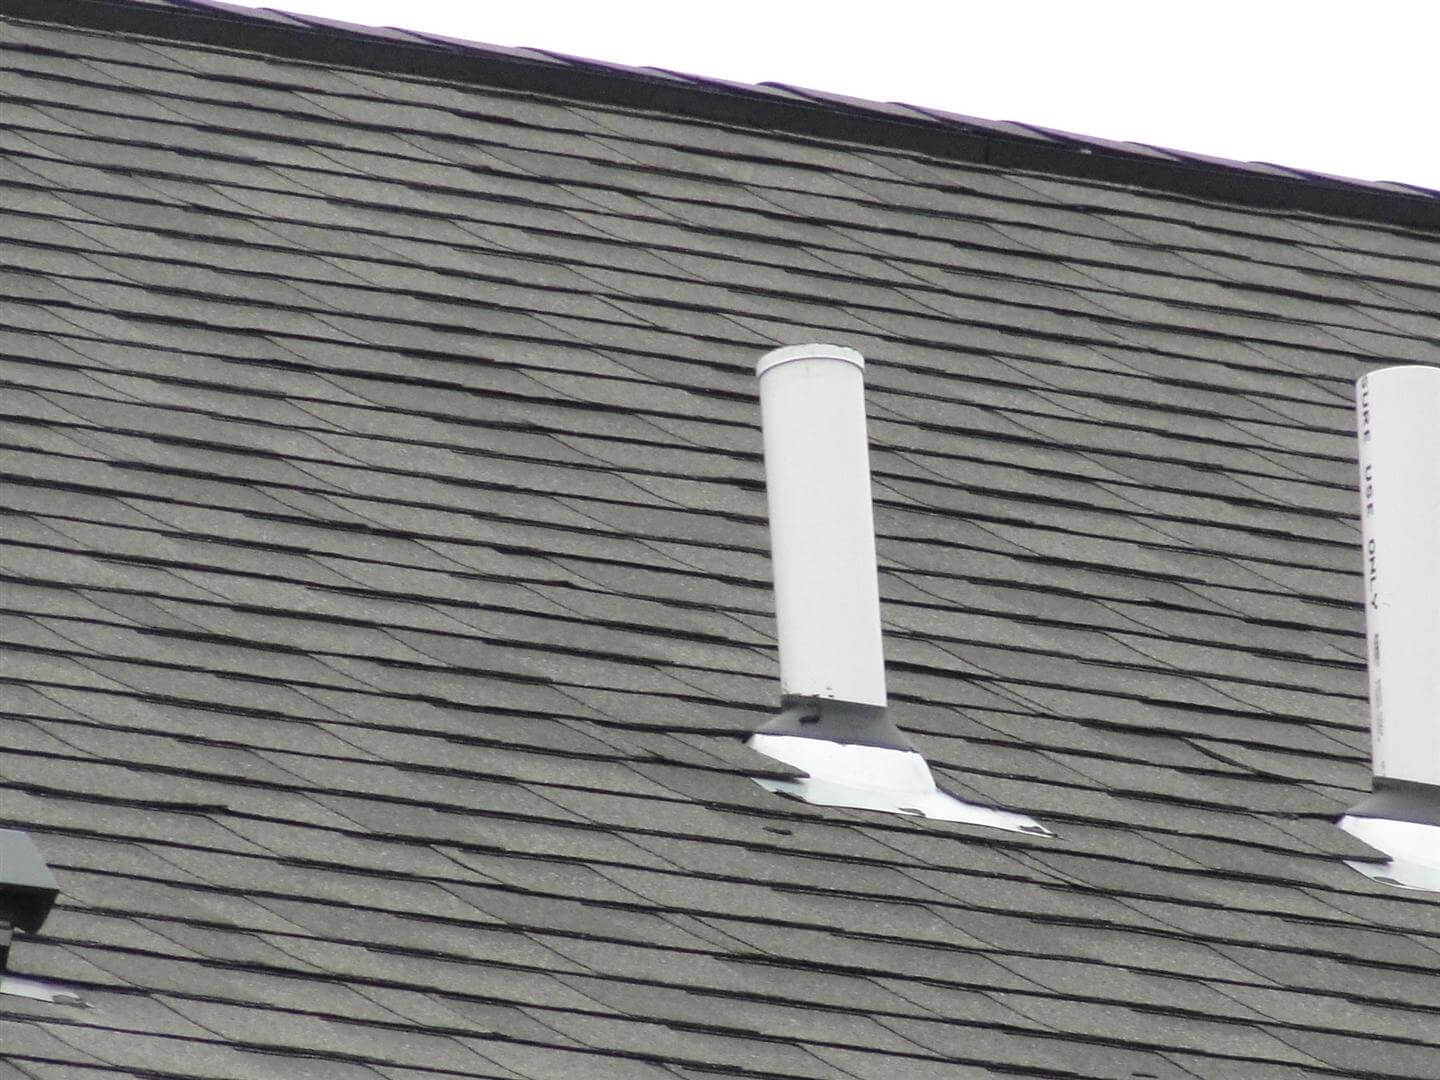
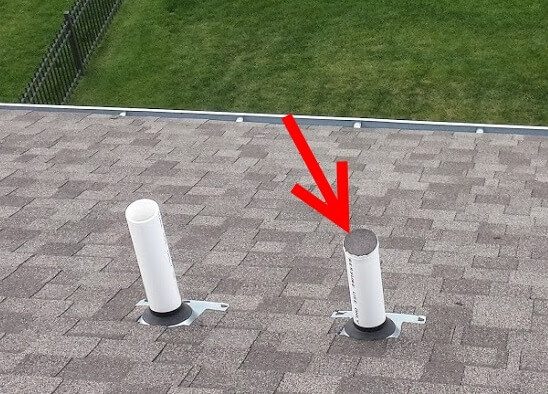
Plumbing vent caps are installed at the roof so the system can be pressure tested to make sure the drains don’t leak. After that, the caps are supposed to be removed. We find a lot of caps that still haven’t been removed. When the caps aren’t easily seen from the ground, they’re easily forgotten about. The photo below comes from a new-construction home in Plymouth that I inspected during the winter. I couldn’t safely walk the roof because it was partially frost covered, but it looked like there was a test cap still in place at the plumbing vent. I put this in my inspection report, the buyer brought it up to the builder, and the builder said it would be taken care of.
The client was suspicious that it had never been done, so I stopped by the house during the summer when I felt safe to walk on the roof to check it out. Nope. Never was done.
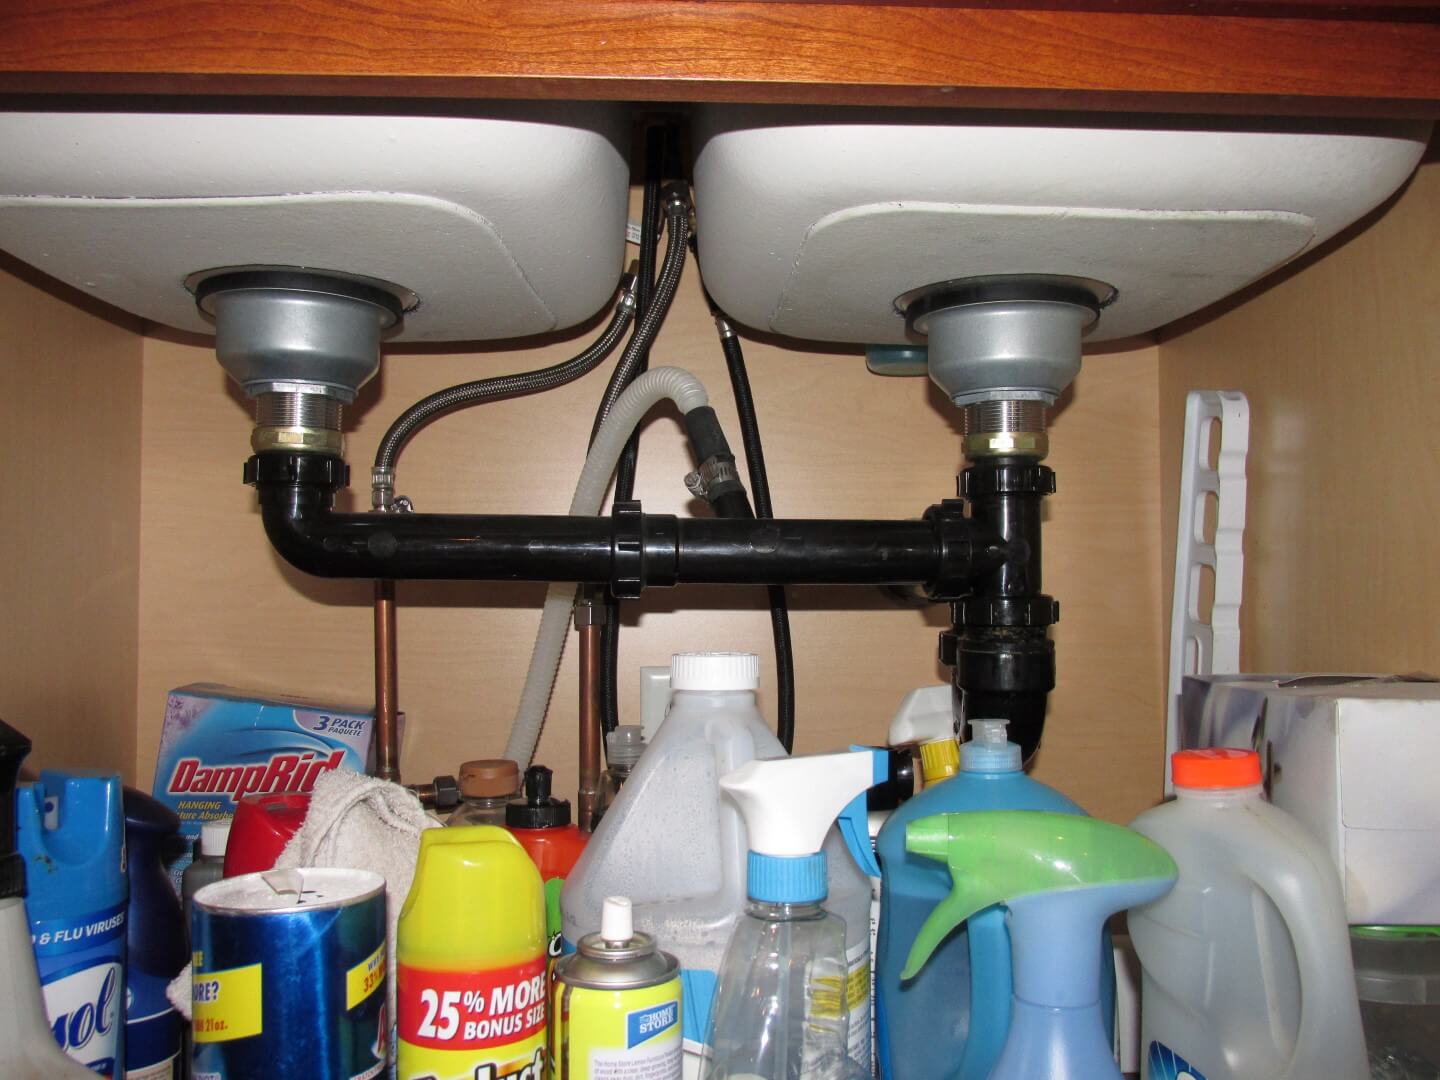
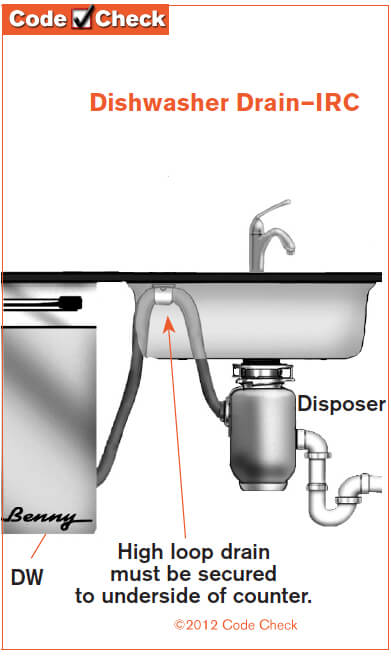
Dishwasher drains are supposed to be looped to the underside of the countertop. This is done wrong on a lot of new homes. I mentioned this condition during my recent blog post on cross connections, but it’s worth bringing up again.
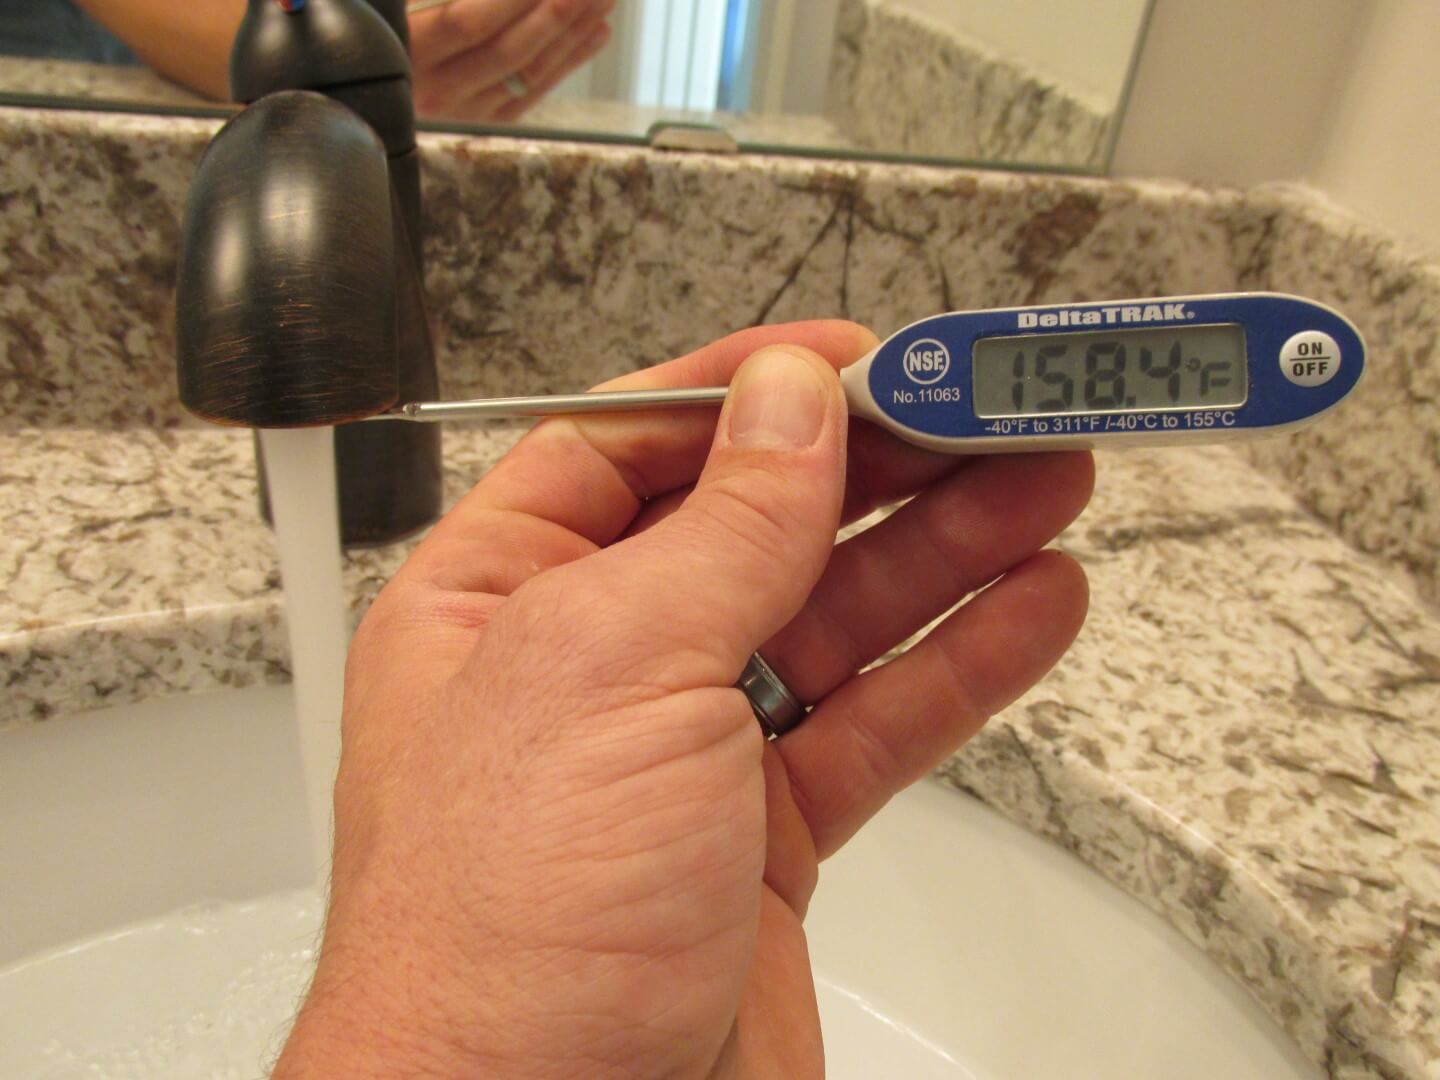
This next photo doesn’t exactly show a defect, just some scary hot water. A safe temperature is 120°. Turn the temperature down at the water heater.
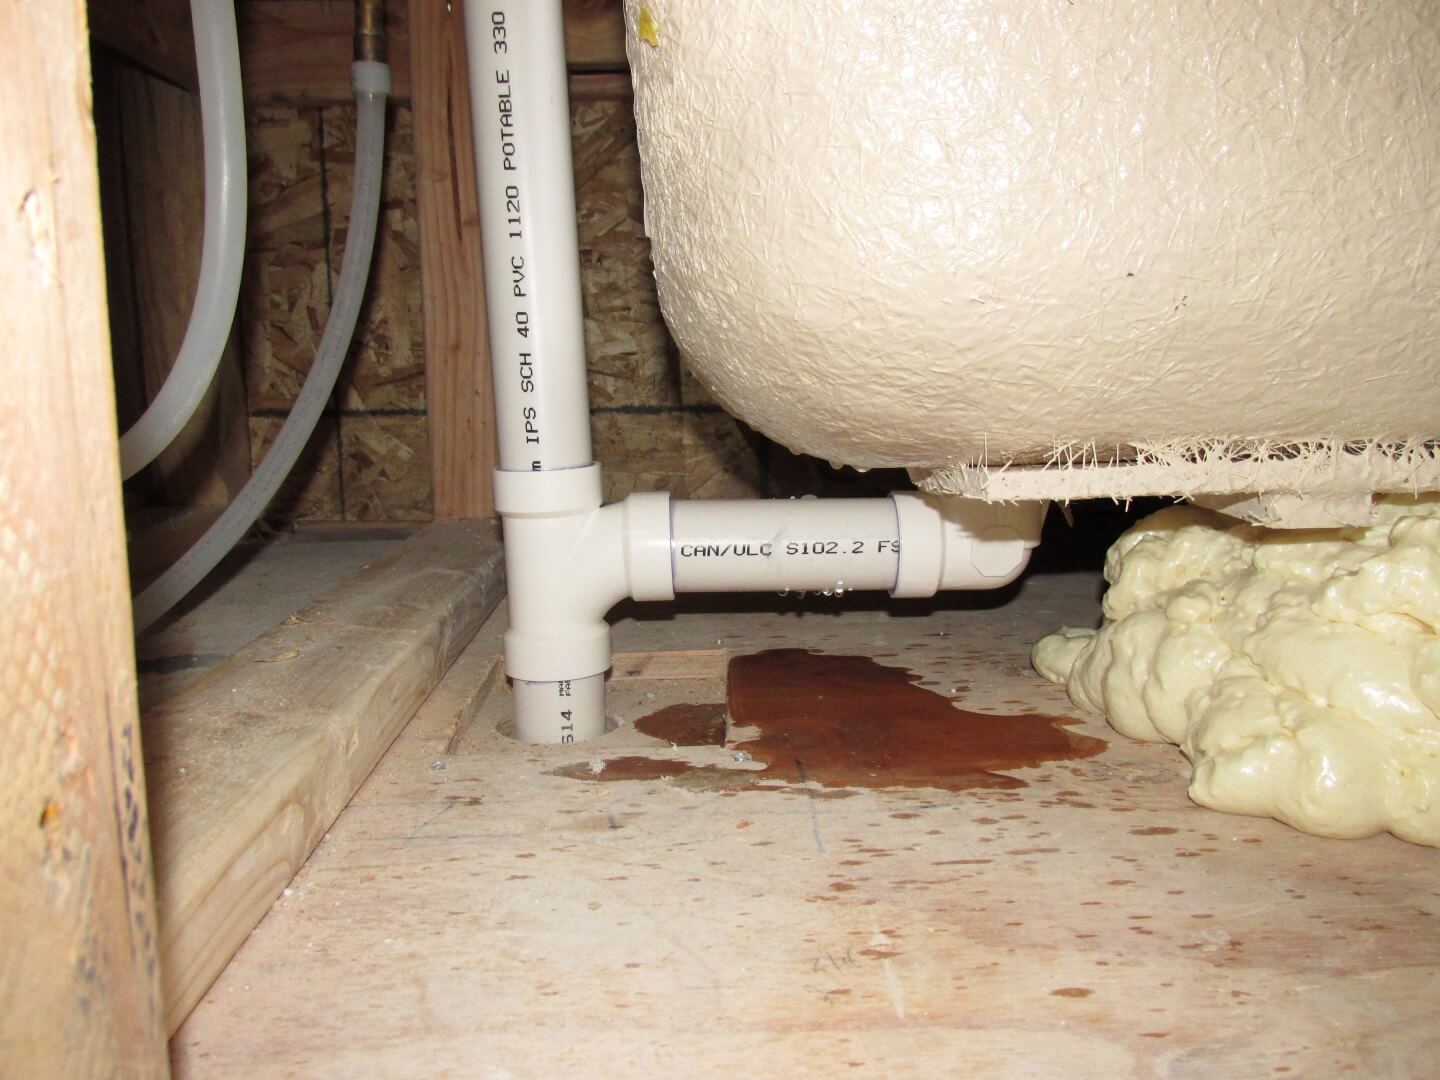
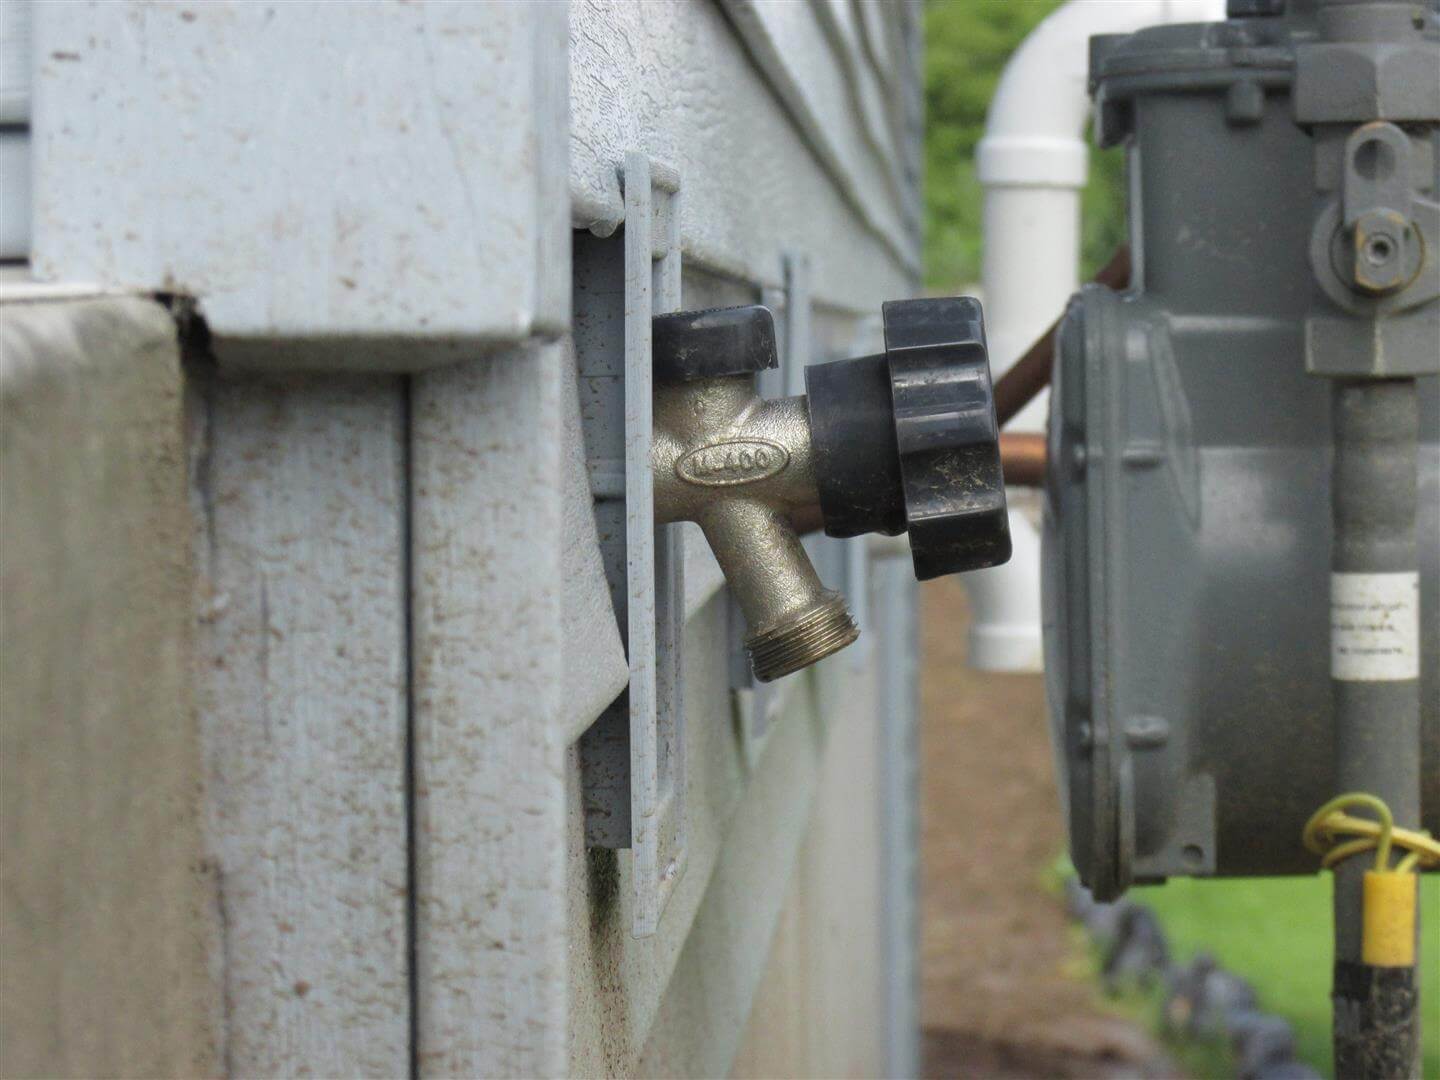
Frost free faucets are great, but they can still freeze when they’re not installed properly. The faucets need to be pitched slightly down, so water can drain out of the stem when the faucet is shut off. The faucet below was pitched up instead. I’ve seen this same defect a few times this year on new construction homes.
Here’s another comically small access hole for the bath tub drain.
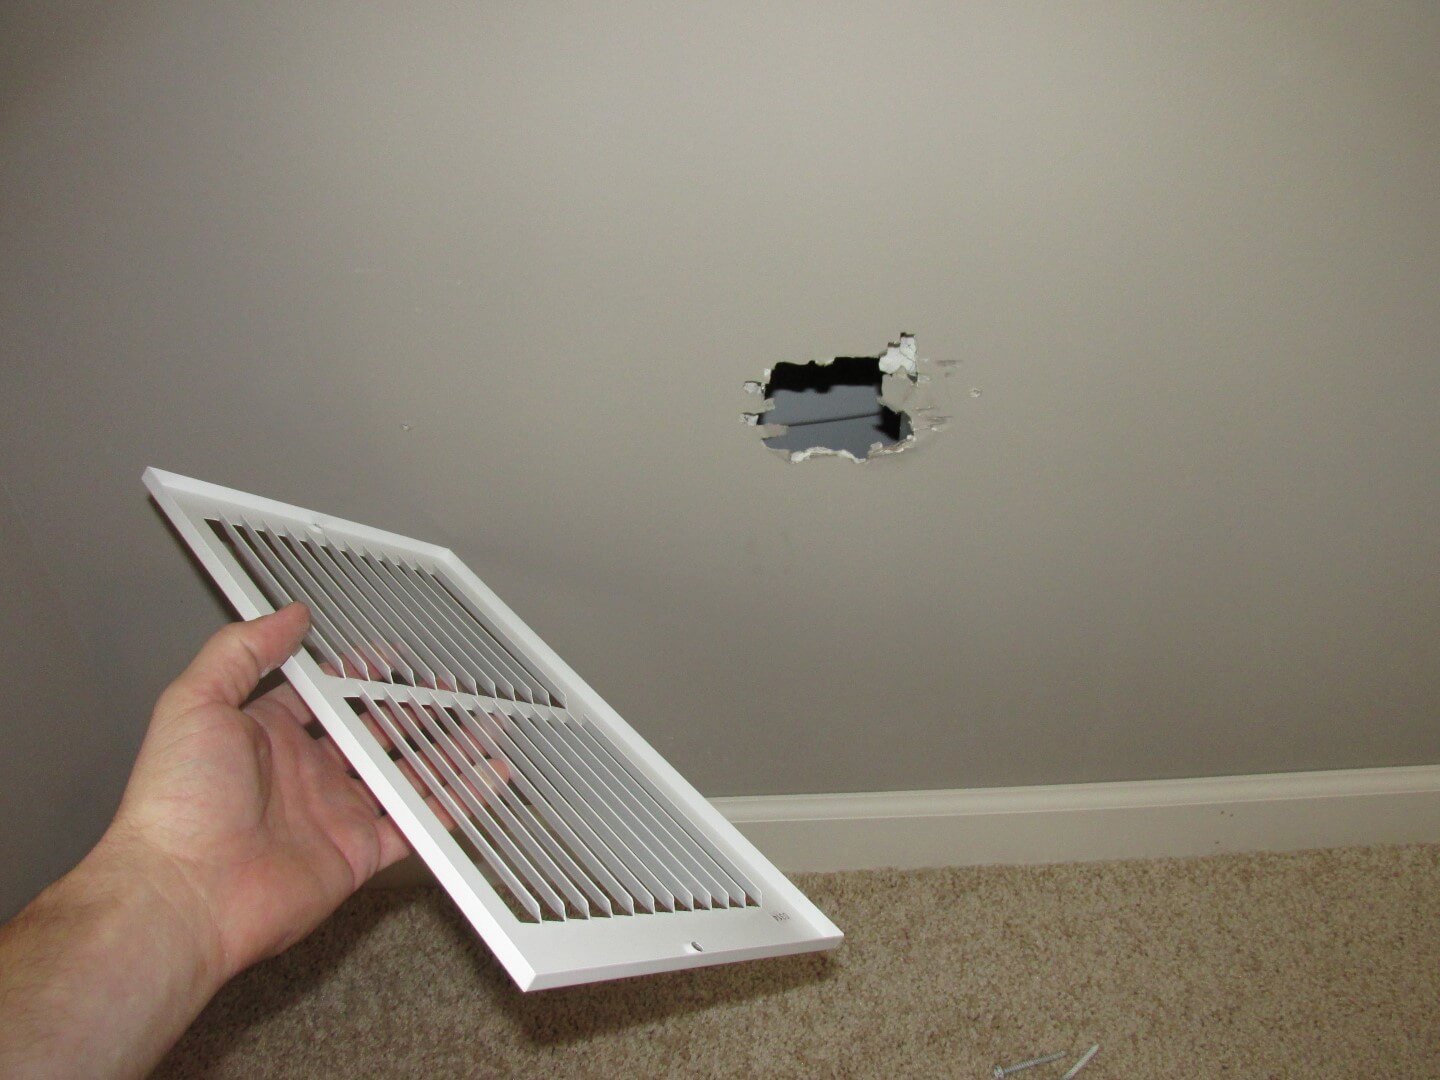
Unless one is proficient at building ships inside of bottles, that hole is pretty useless.
Electrical
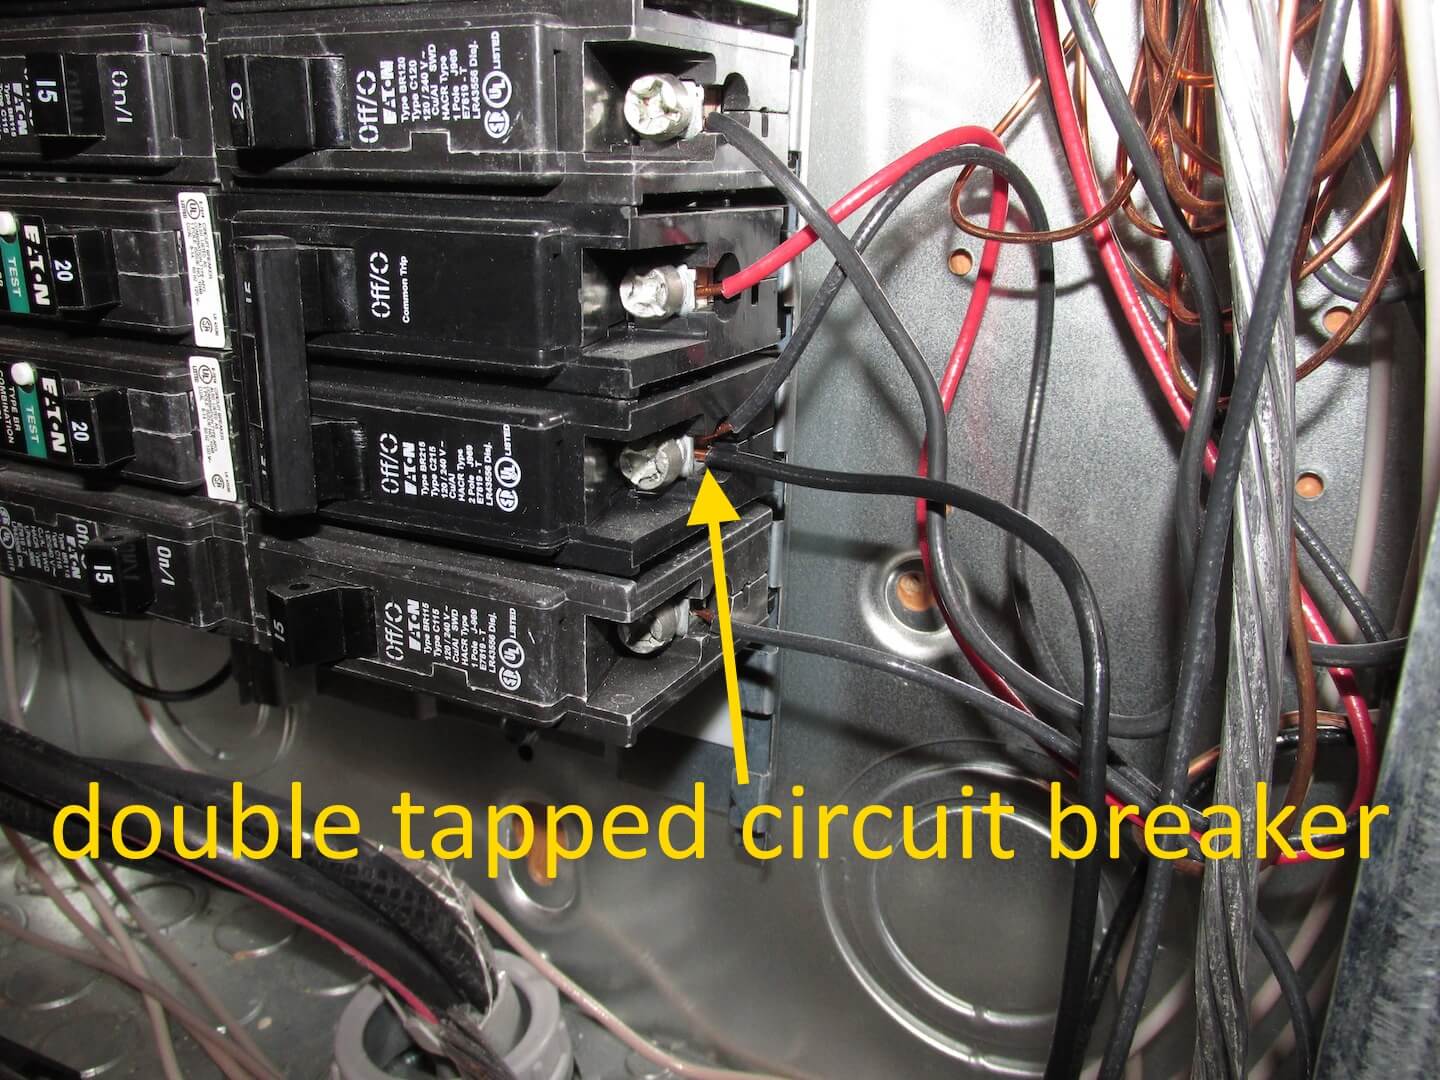
Most circuit breakers are only designed for one wire to be connected to the breaker, including the breakers shown below. One of these breakers had two wires connected. This is an unusual defect for new construction, but hey, that’s why we open panels. For more info on this topic, click here: Double Tapped Circuit Breakers.
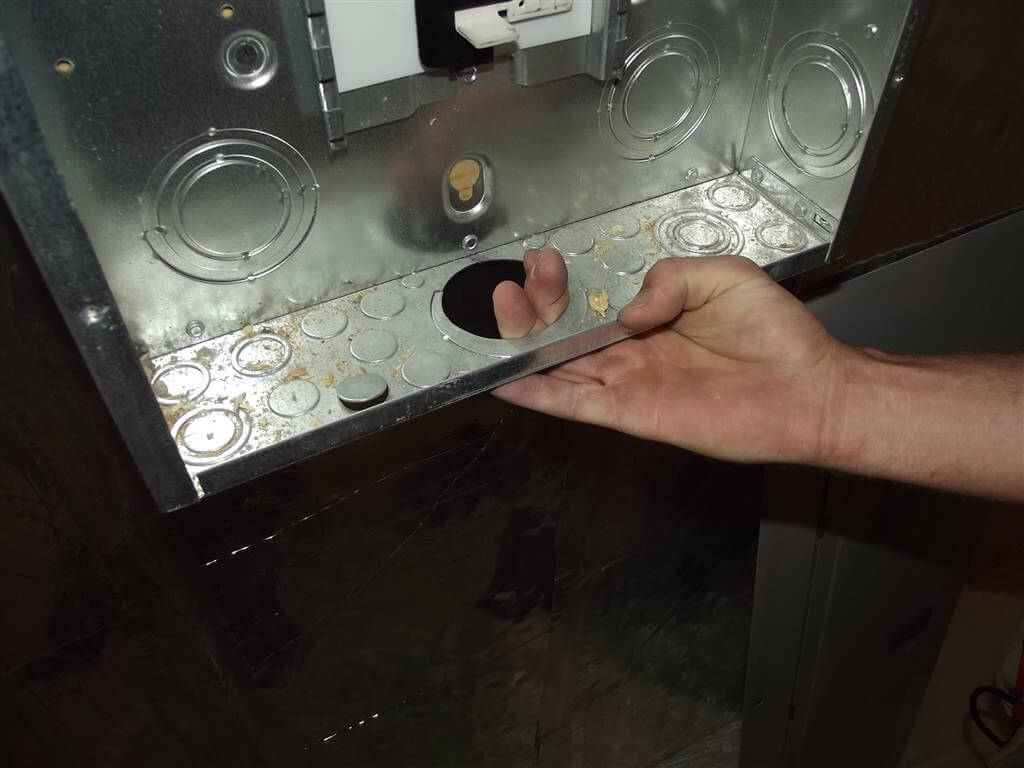
All unused openings in electric panels are supposed to be covered up to help contain any fires, and to prevent pests from getting into the panel. This doesn’t always happen.

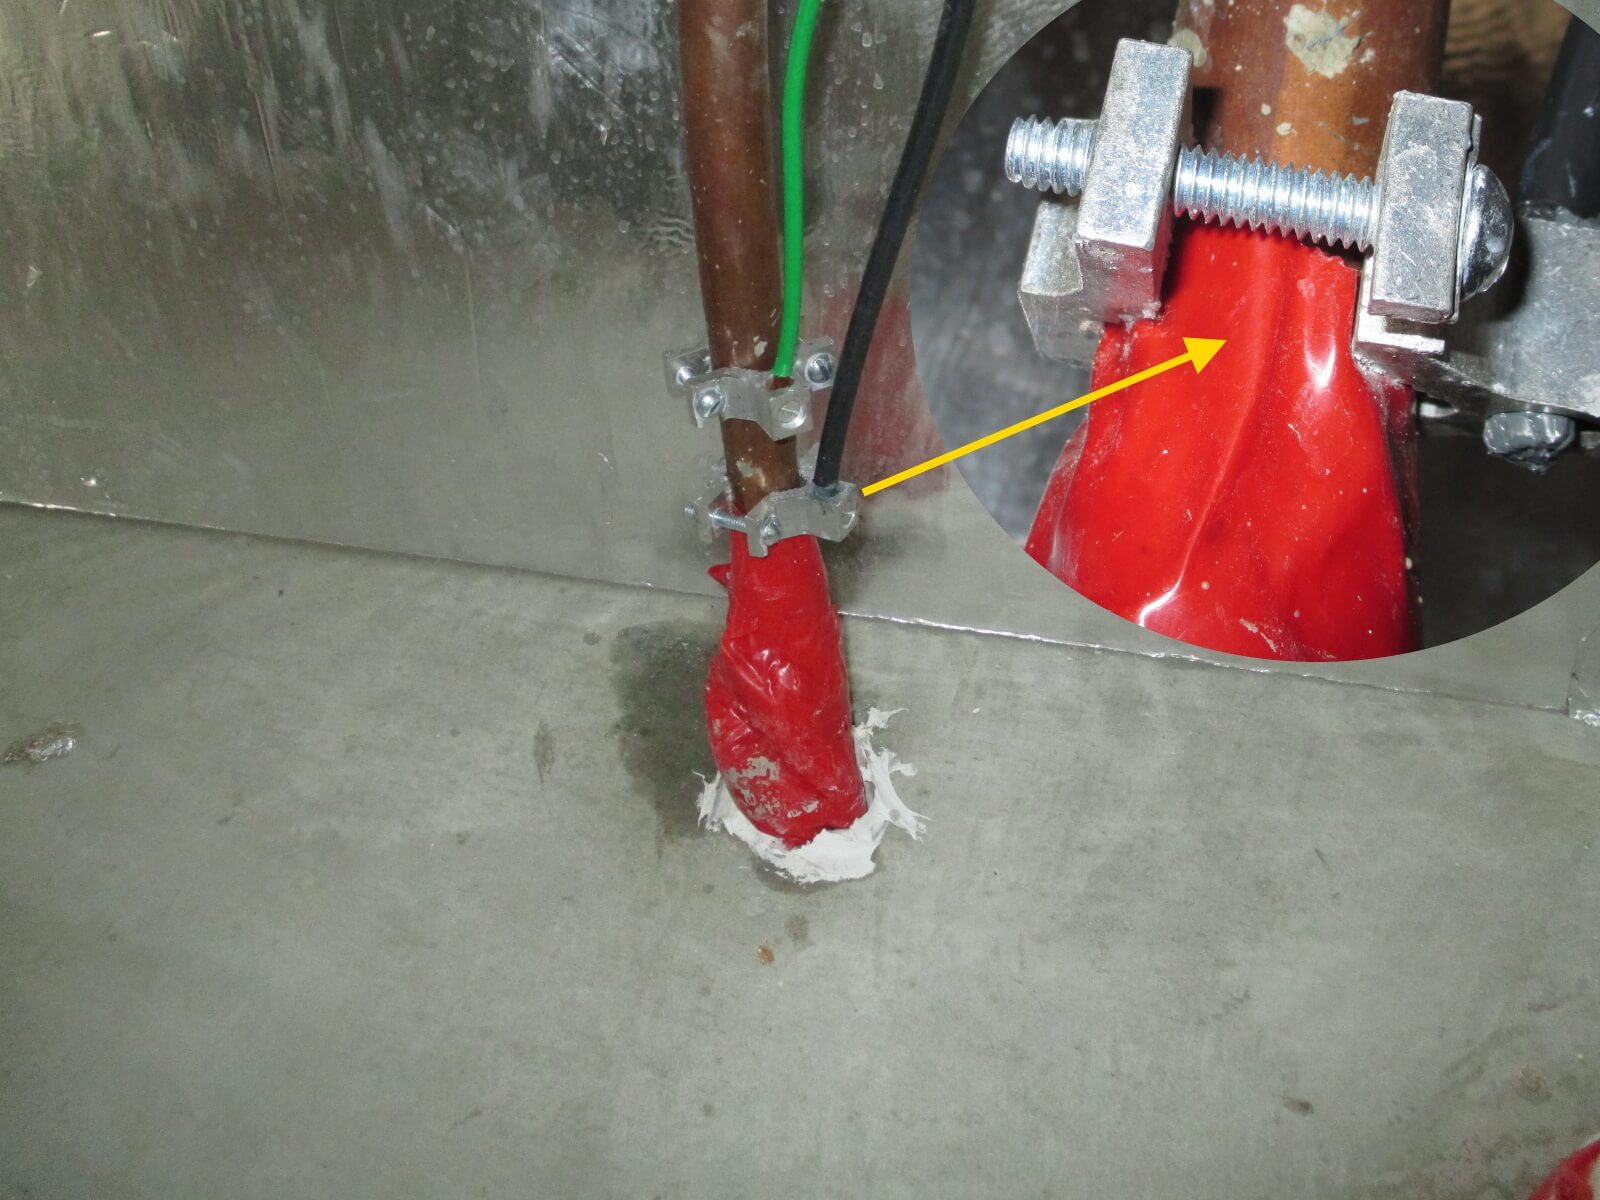
That ground clamp needs to be slid up about an inch so it makes full contact with the copper water supply tubing.
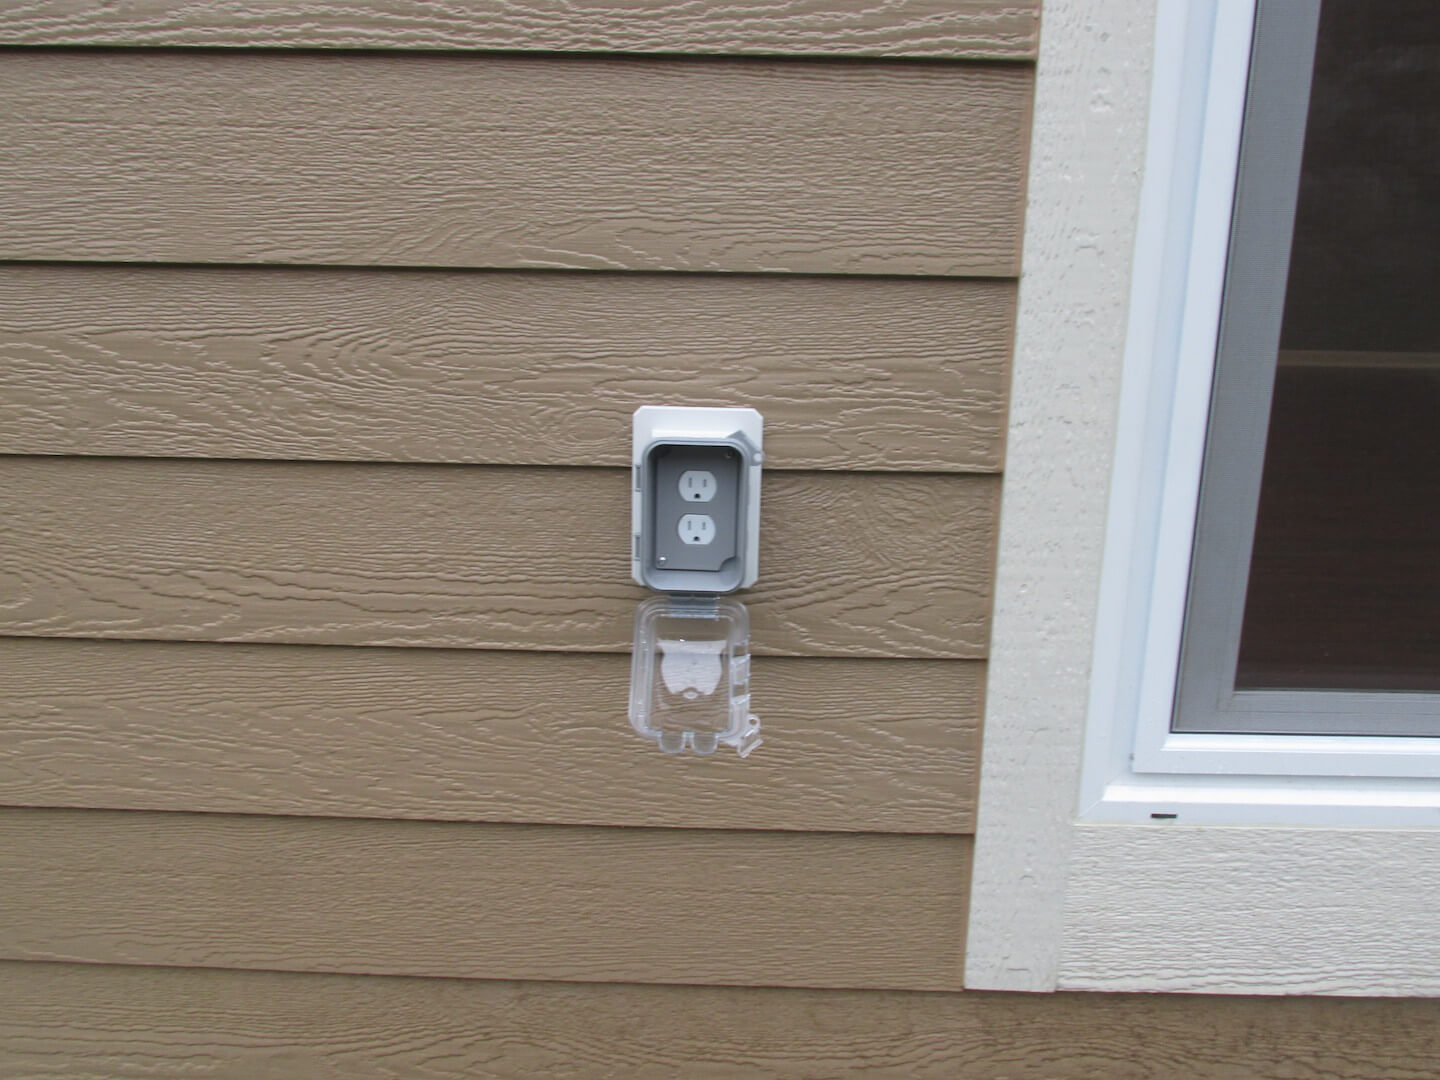
This weatherproof cover won’t keep water out when it’s installed upside down.
We had to check this one a couple of times to make sure we weren’t losing our minds. It was an outlet with reversed polarity. This is a very unusual defect for a new house, but again, that’s why we test the outlets.
Here’s an especially nasty defect; this outlet was located behind the kitchen drawers under a range top in the kitchen. The outlet is missing a cover plate, the outlet isn’t attached to the box, and the box isn’t flush with the surface of the cabinet like it should be.
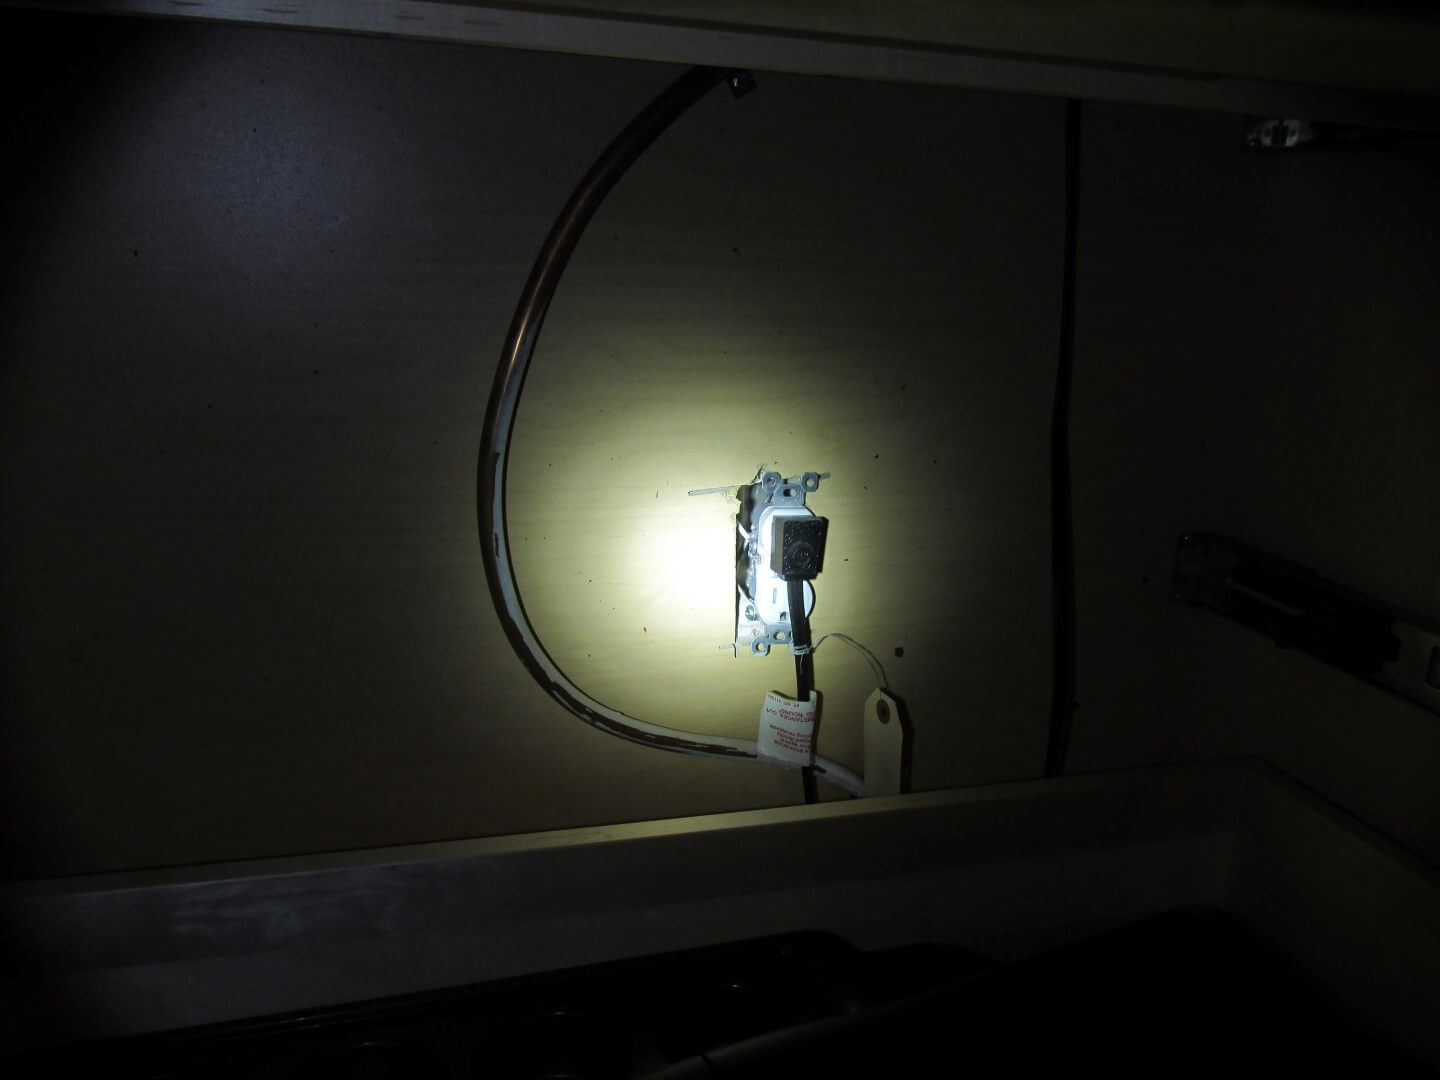
Here’s a missing cover plate at a junction box in an attic.
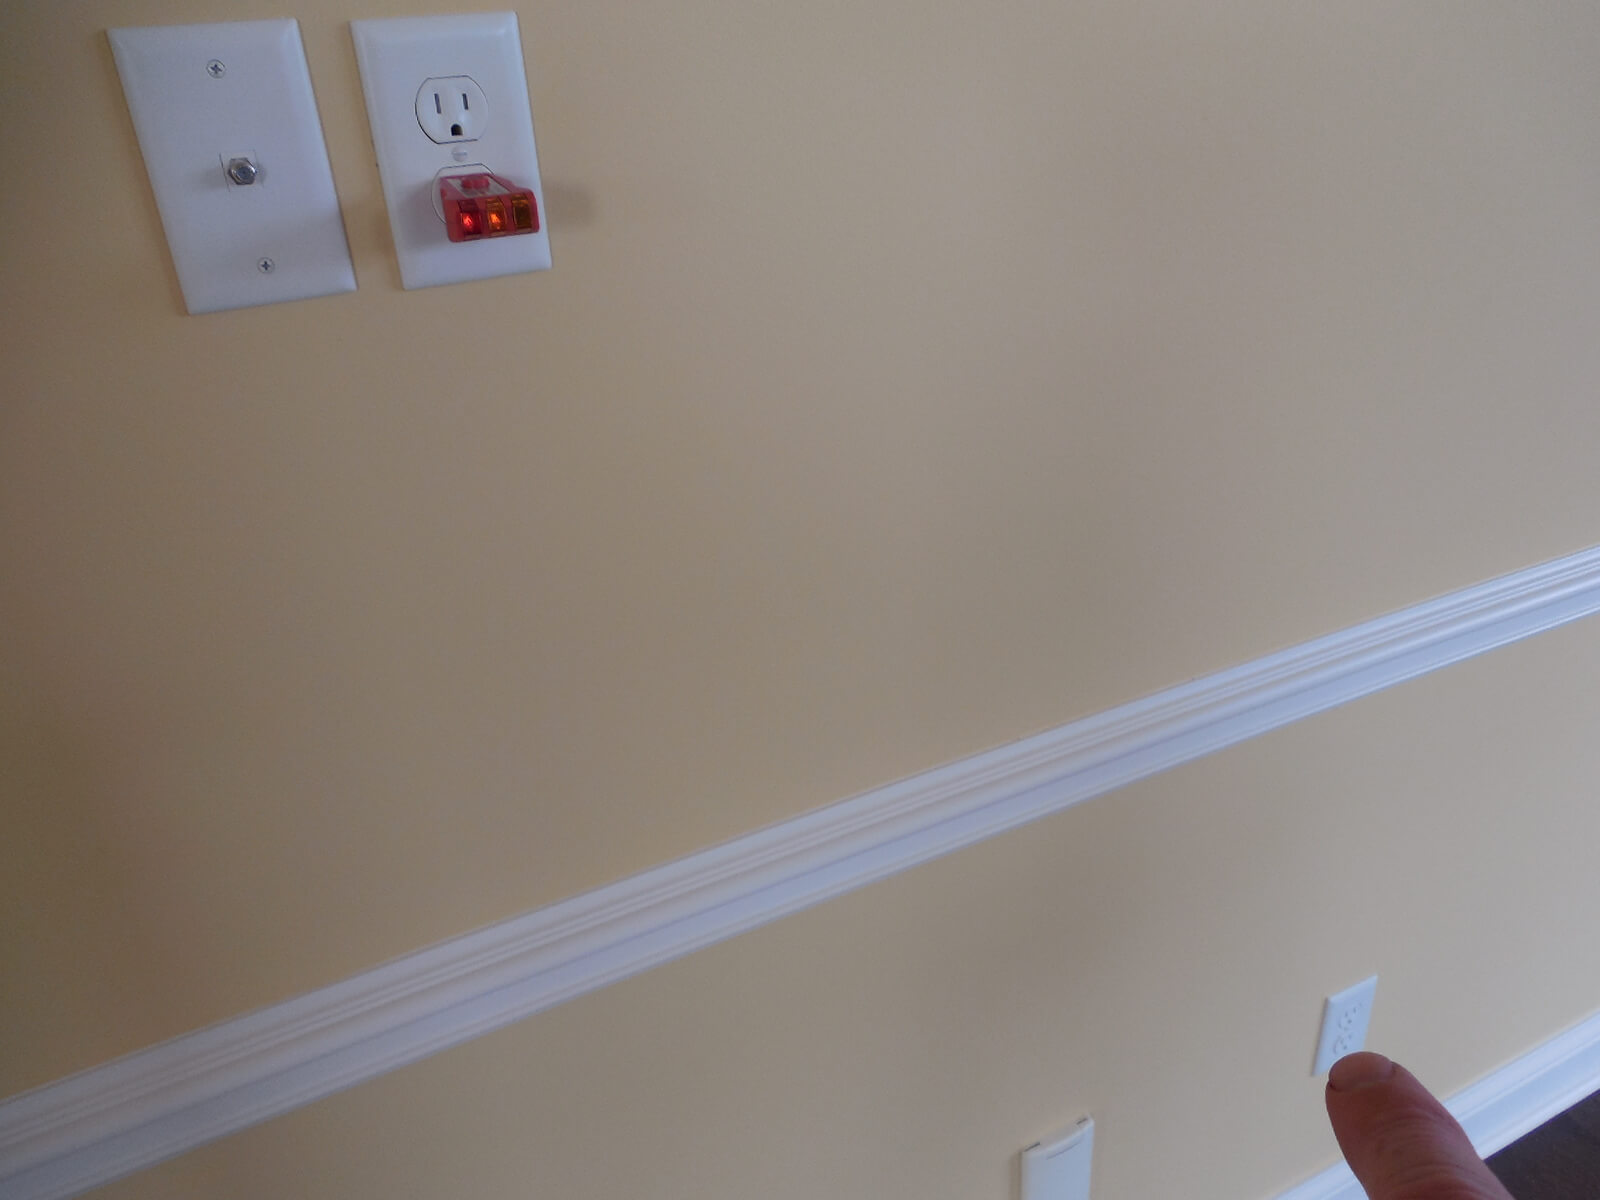
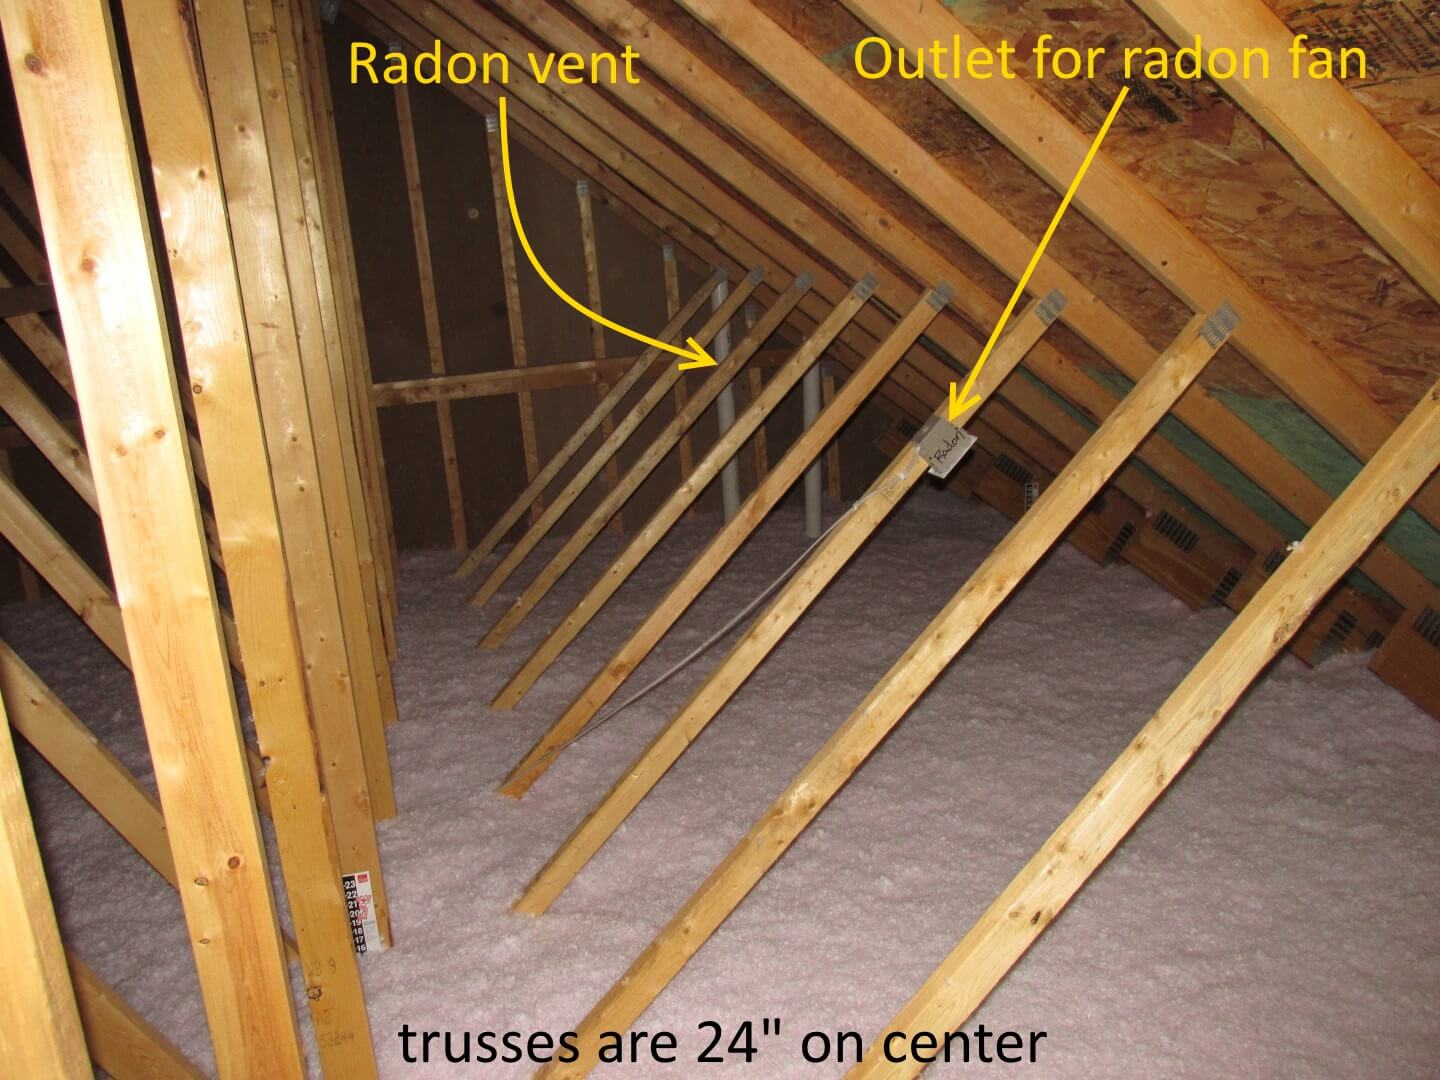
Check out the location of this outlet. It’s over ten feet away from the radon vent. The outlet is there so a fan can be installed if radon levels are high… but what good does it do if it’s ten feet away?
While we’re on the topic of radon fans, here’s a home where the builder agreed to install a radon fan, but installed the fan on its side. Radon fans should be installed vertically to help prevent water from accumulating, which can cause the motor to burn out prematurely.
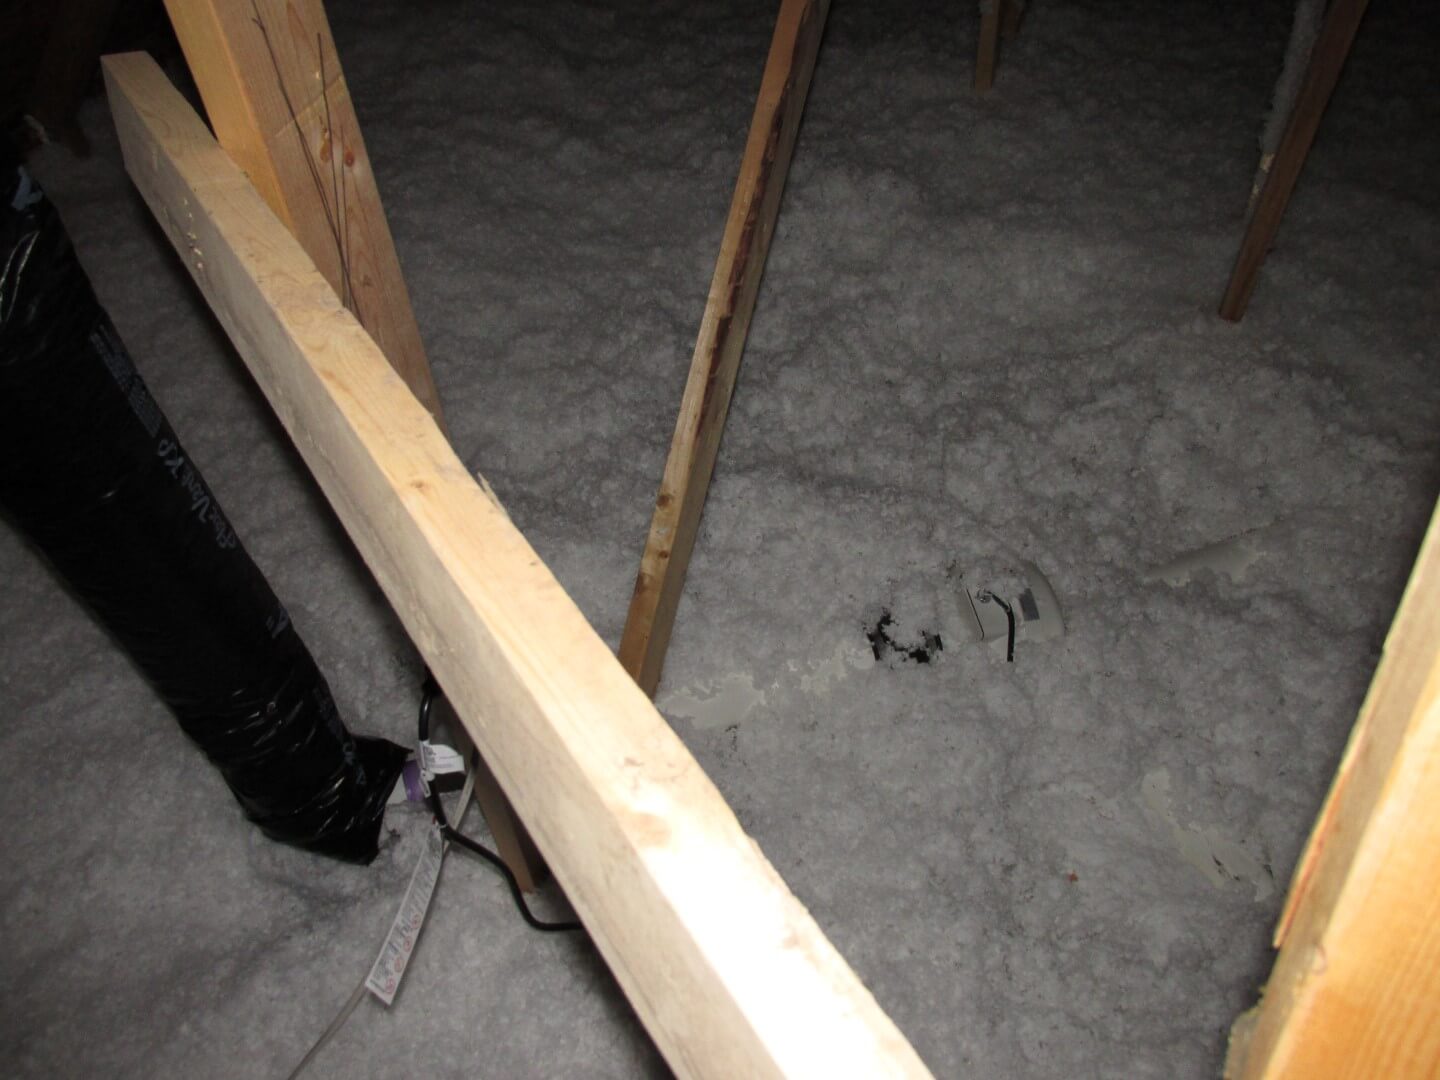
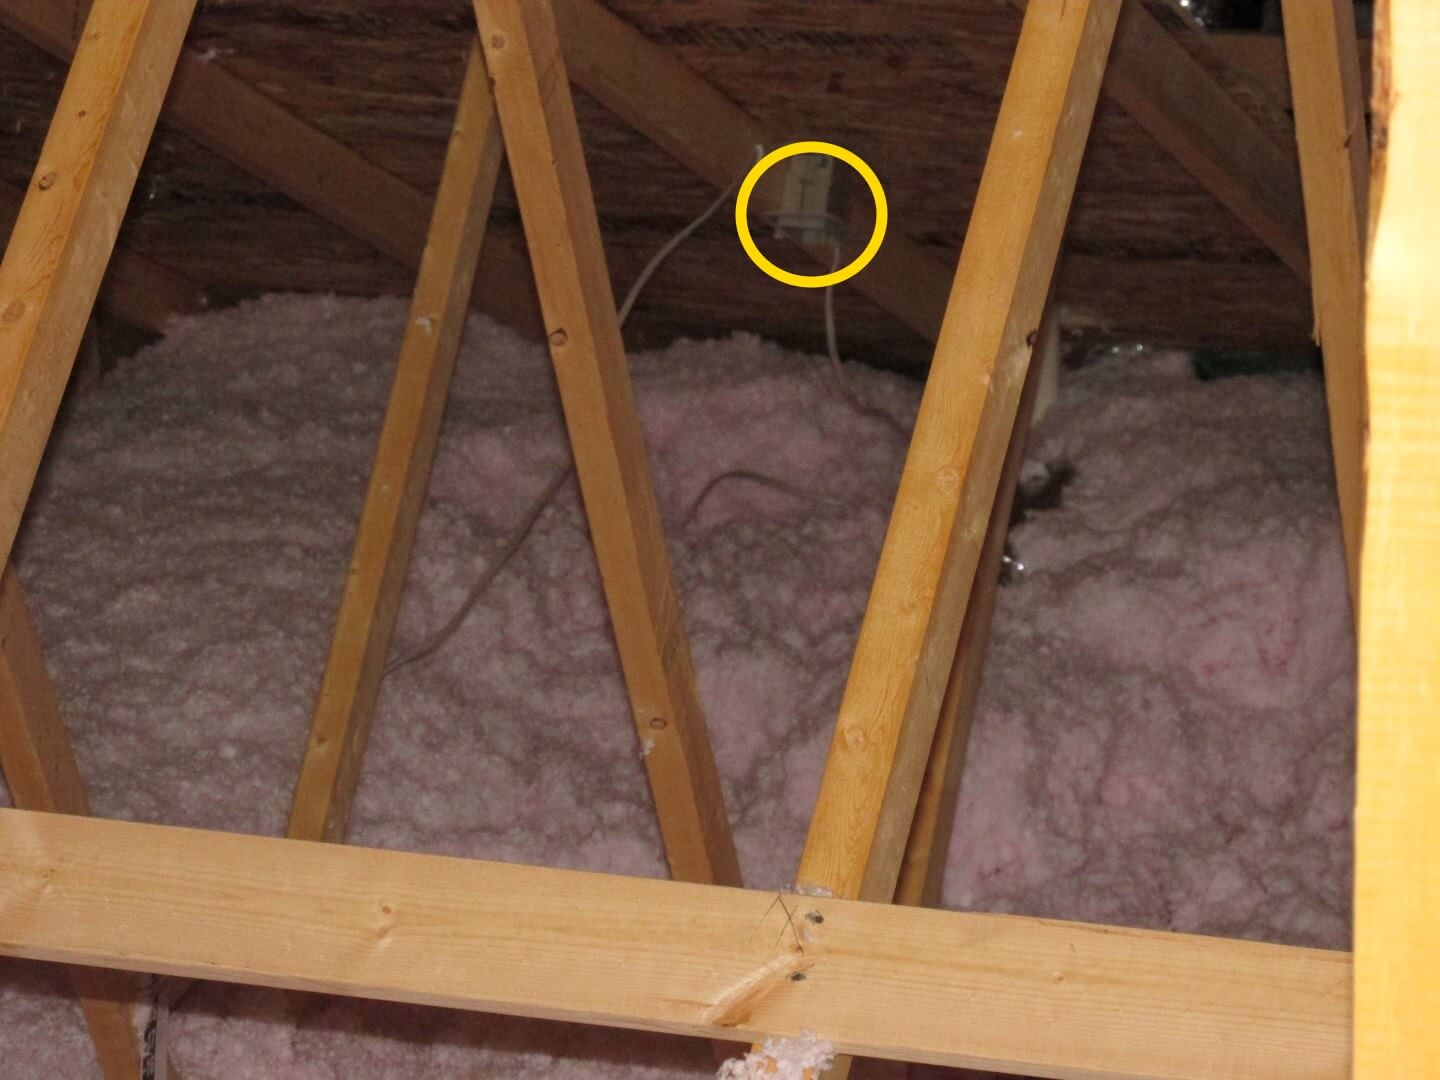
Here’s a GFCI outlet in the attic. GFCI outlets are supposed to be tested every month… not that anyone really does this, but just for the sake of argument, let’s say someone wanted to. Are they really supposed to go into their attic to do this?
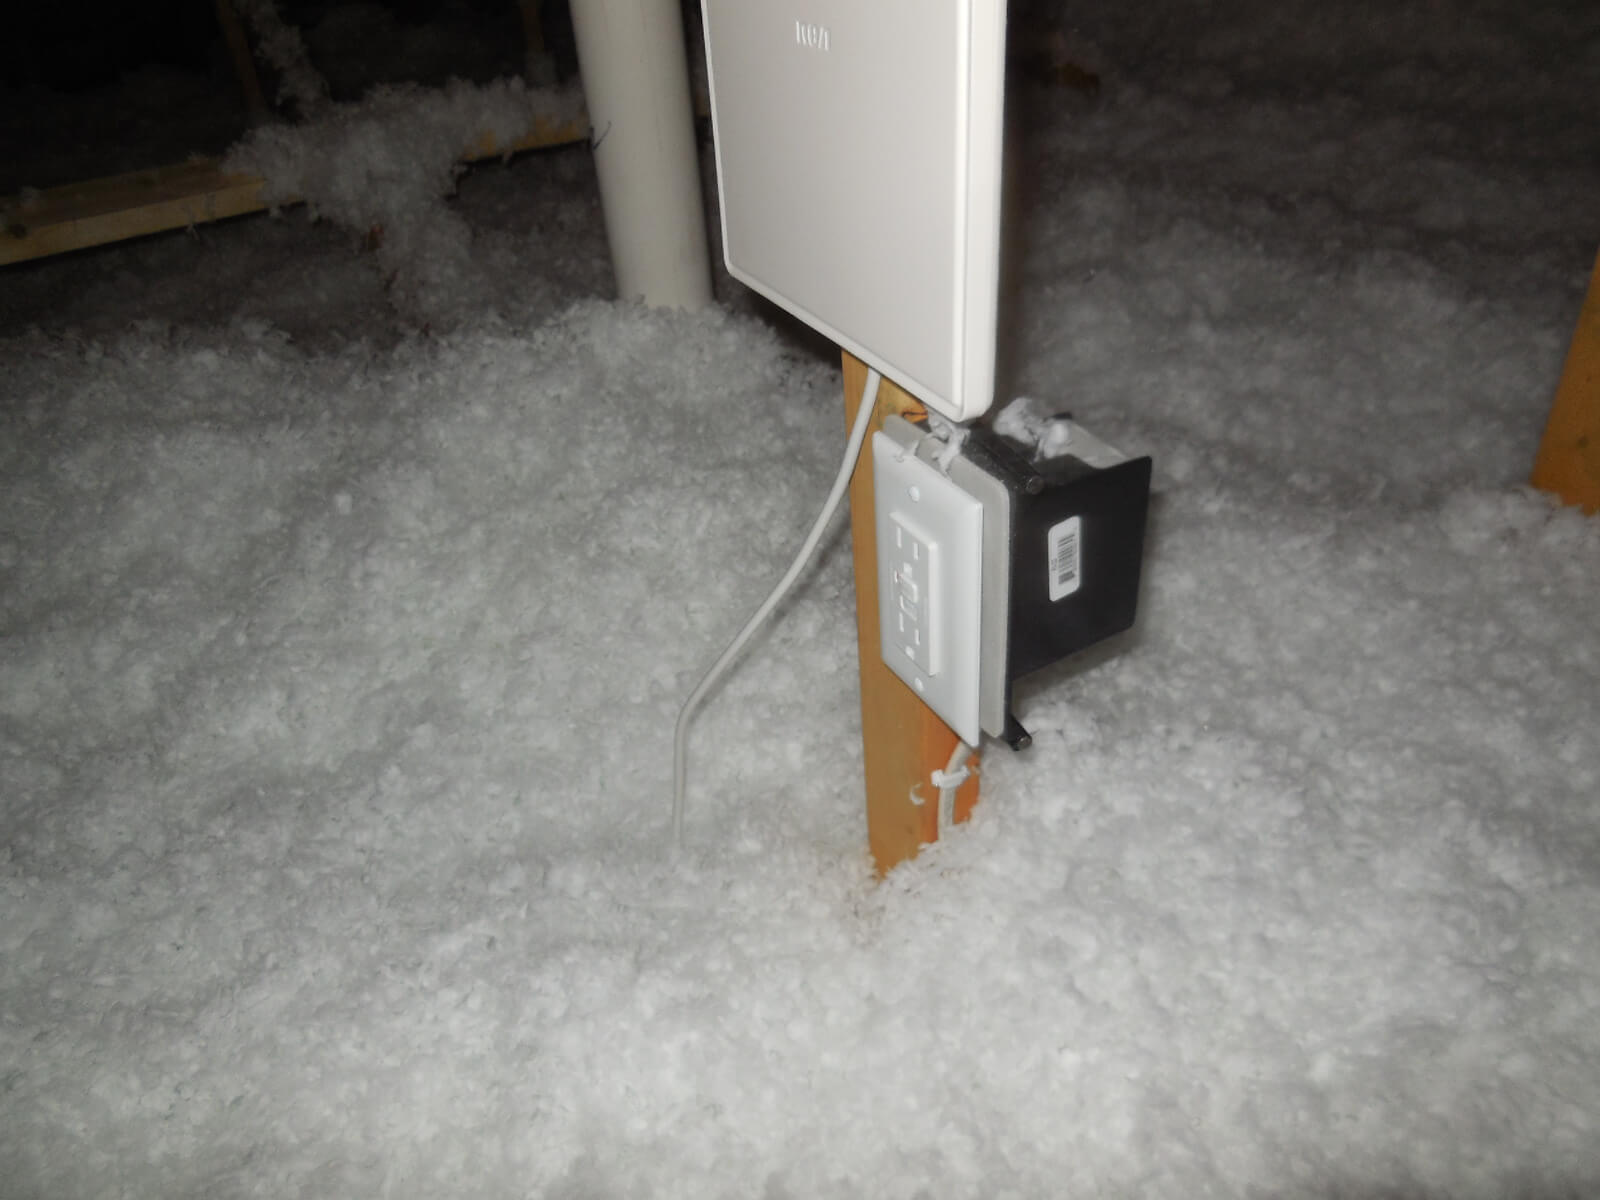
By the way, it’s very important for attics to be inspected. Even on new construction homes.
Attics
Same old, same old. We find a ton of new construction homes with way less insulation than they’re supposed to have.
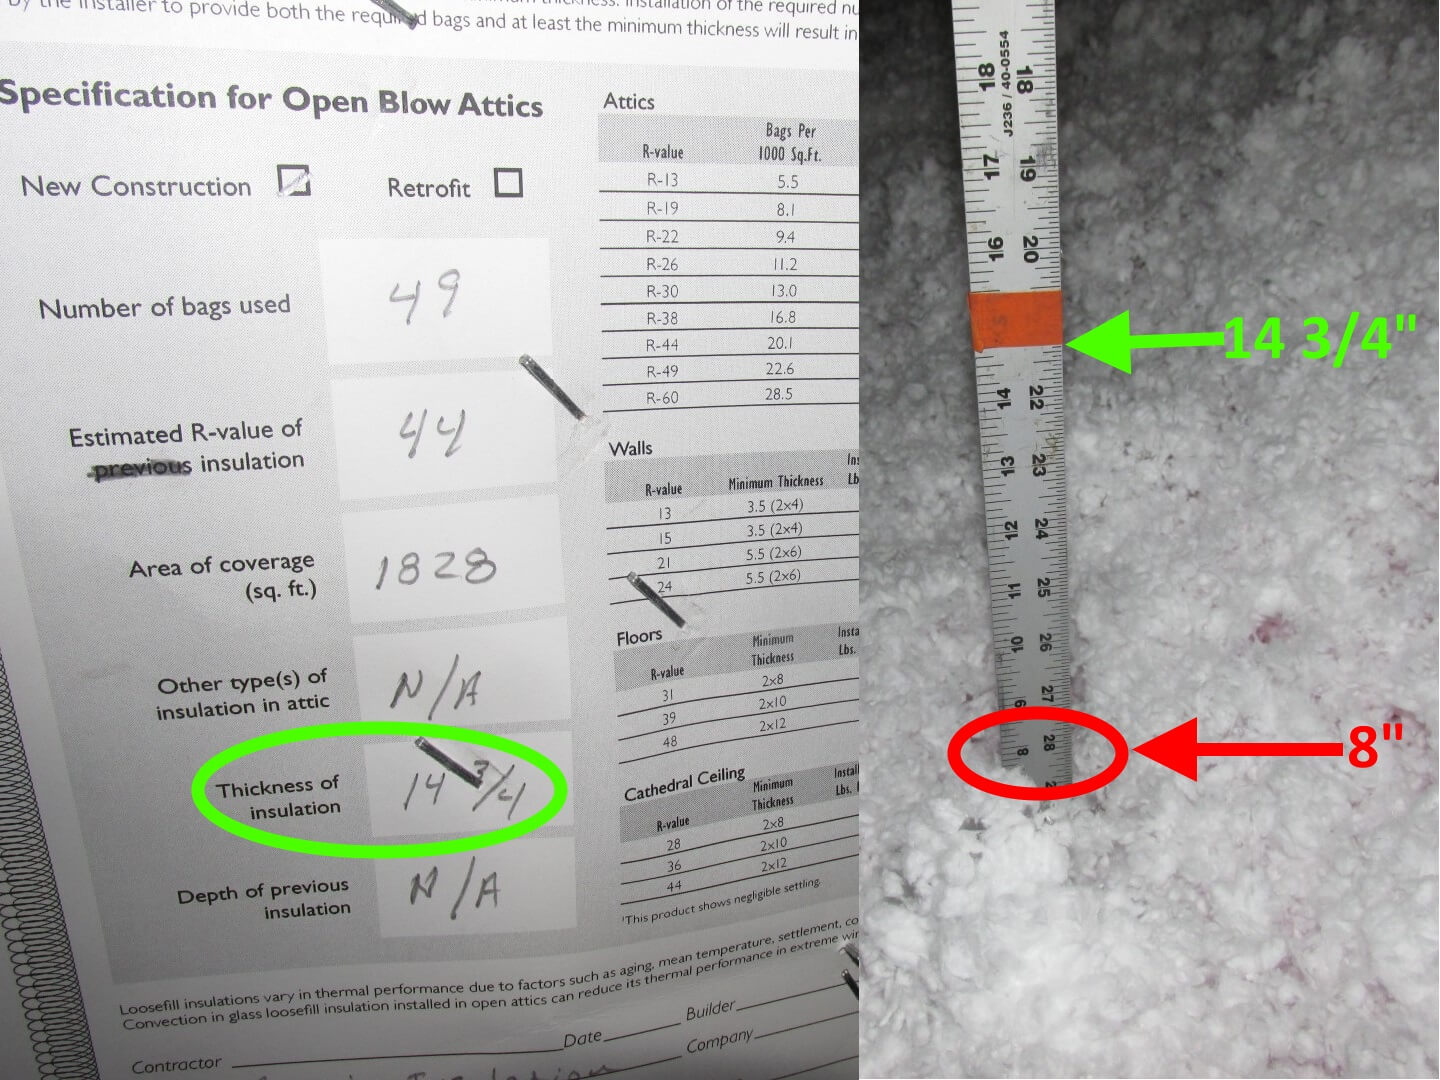
How does this happen? There is no such thing as an “attic insulation inspection” for new construction homes. No joke. See my blog post dedicated to attic inspections on new construction houses: Who Inspected Your Attic?
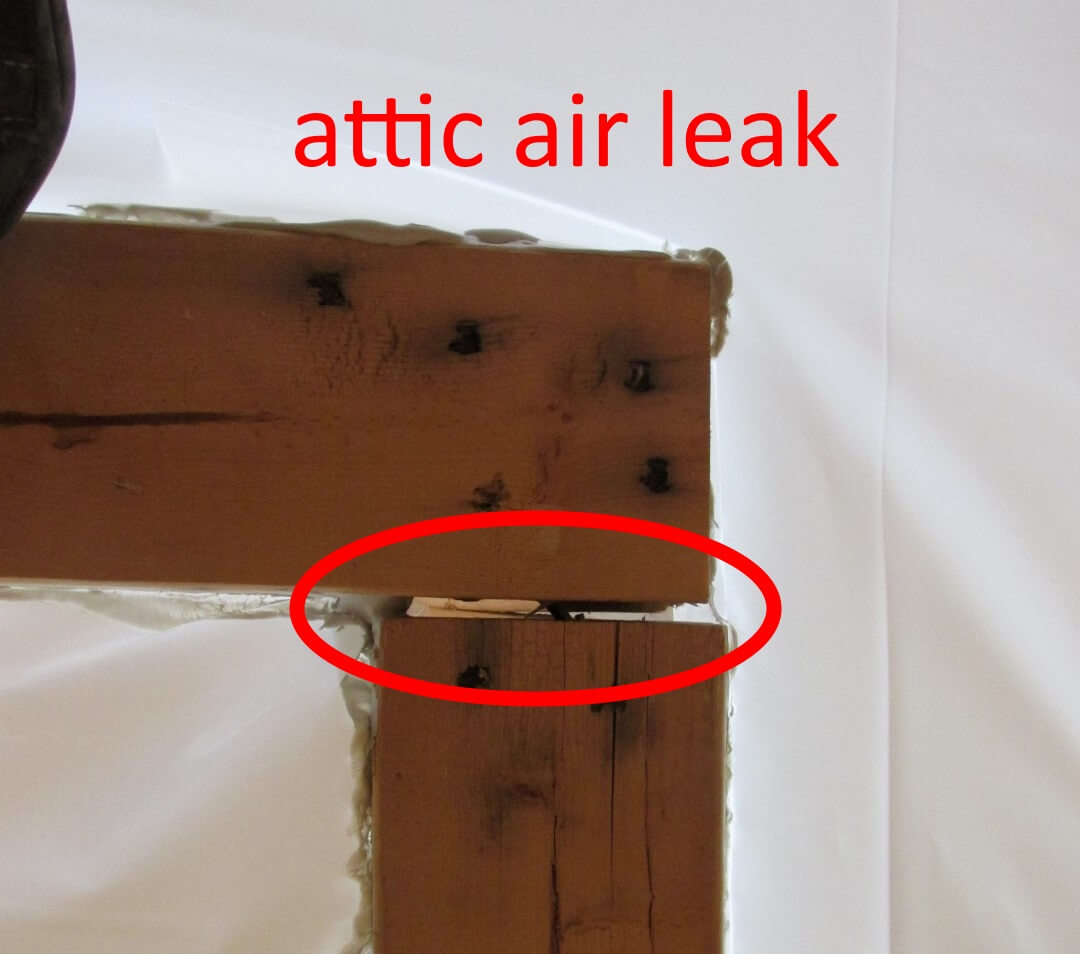
When we perform pre-drywall inspections, we frequently find gaps in the attic “lid” that will be attic air leaks once everything is finished. The gap between the two top plates (2x4s) shown below shows an example of a future attic air leak. It’s still very easy to fix these air leaks today, but it’ll be a P.I.T.A. to find them once there’s 14-3/4 inches 8+ inches of insulation throughout the attic.
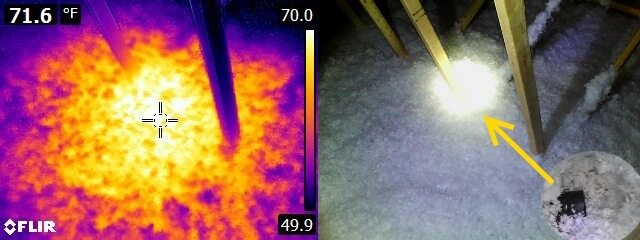
Here’s an infrared image of a disconnected bath fan duct below the insulation in an attic on a cool day. There were no visible signs of this defect, but a quick scan with an infrared camera made it quite obvious. The infrared camera also helped us to know exactly where to dig through the insulation to get a photo documenting the condition.
HVAC
Lots of air leaks in ductwork.
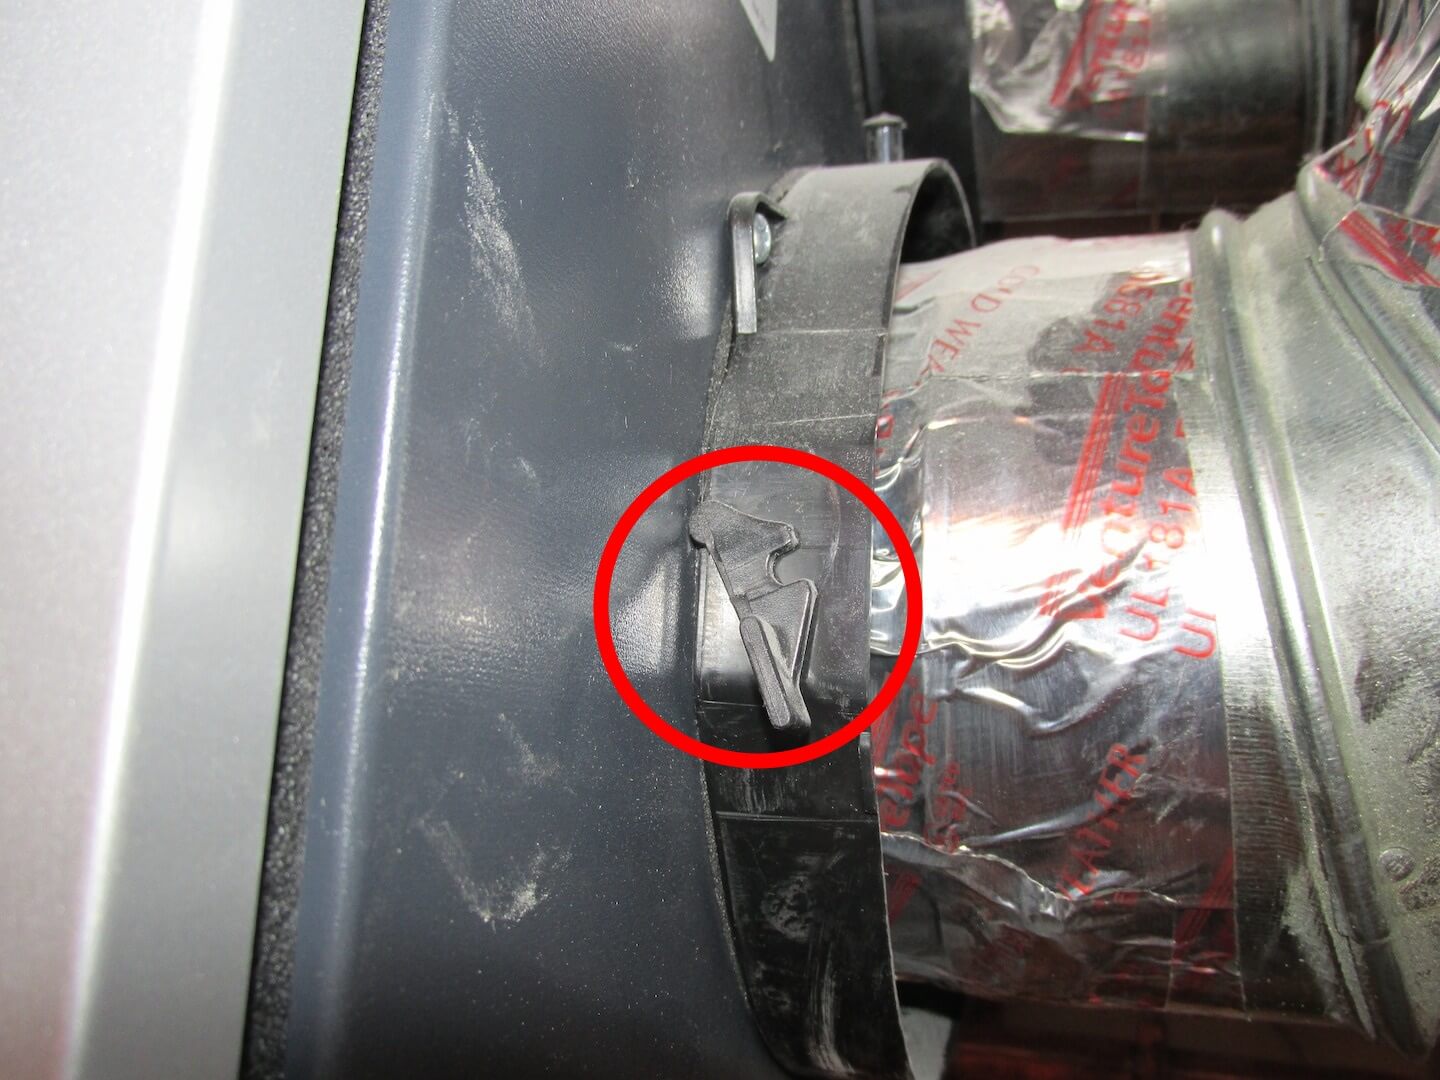
When HRVs aren’t balanced, they may either put the house under negative or positive pressure, neither of which is usually good. Check out my recent blog post about siding stains; putting a house under positive pressure would contribute to stains like that. If the balancing damper (circled below) isn’t screwed into place on the HRV, it hasn’t been balanced.
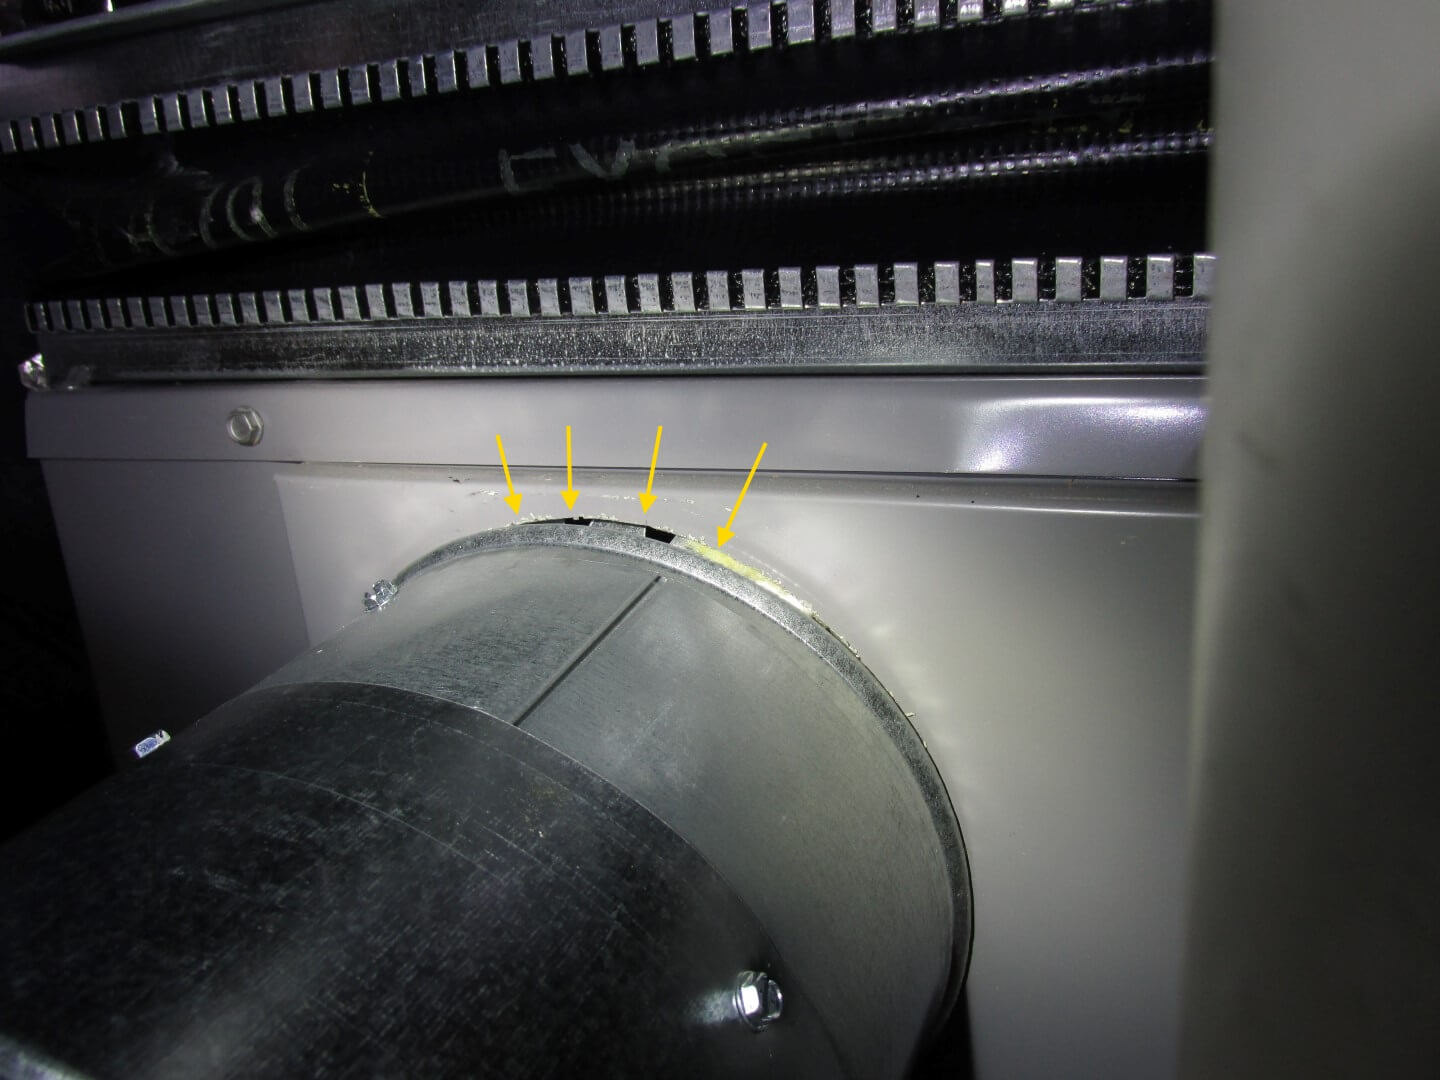
Someone installed a damper on this HRV intake, which prevents the HRV from pulling any fresh air into the home. Easy fix, bad mistake.
Here’s a furnace intake and exhaust flipped around. This will cause the corrosive exhaust gases from the furnace to get sucked back into the furnace. Again, easy fix, bad mistake.

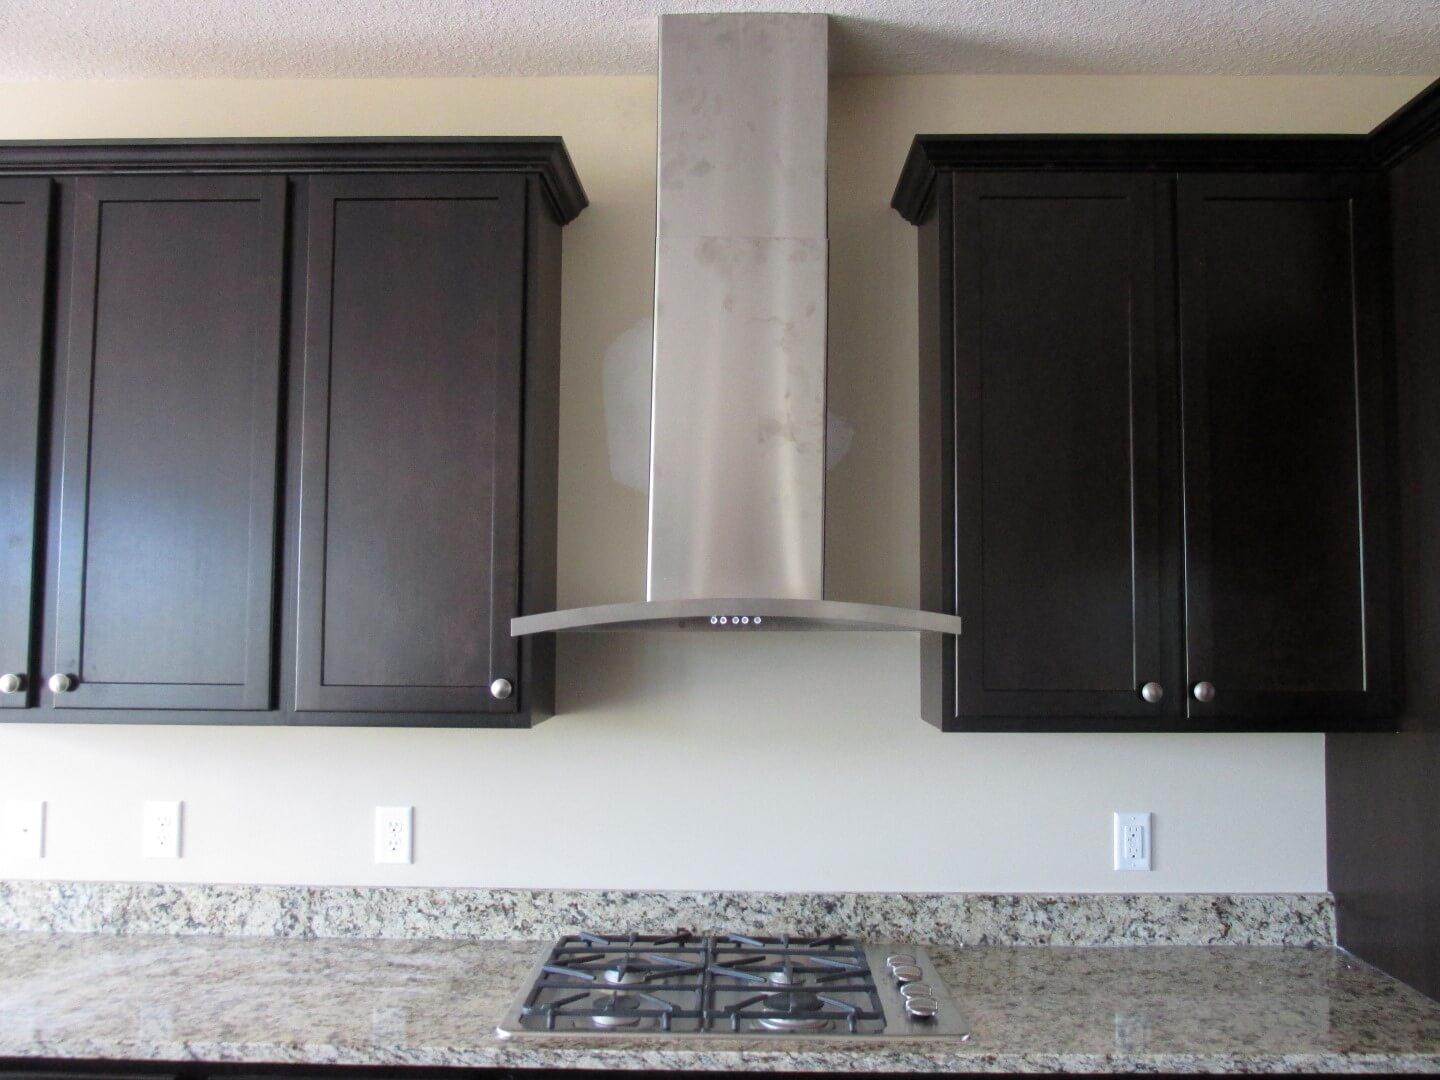
Would you accept this crooked hood fan installation? This is purely cosmetic, but still…
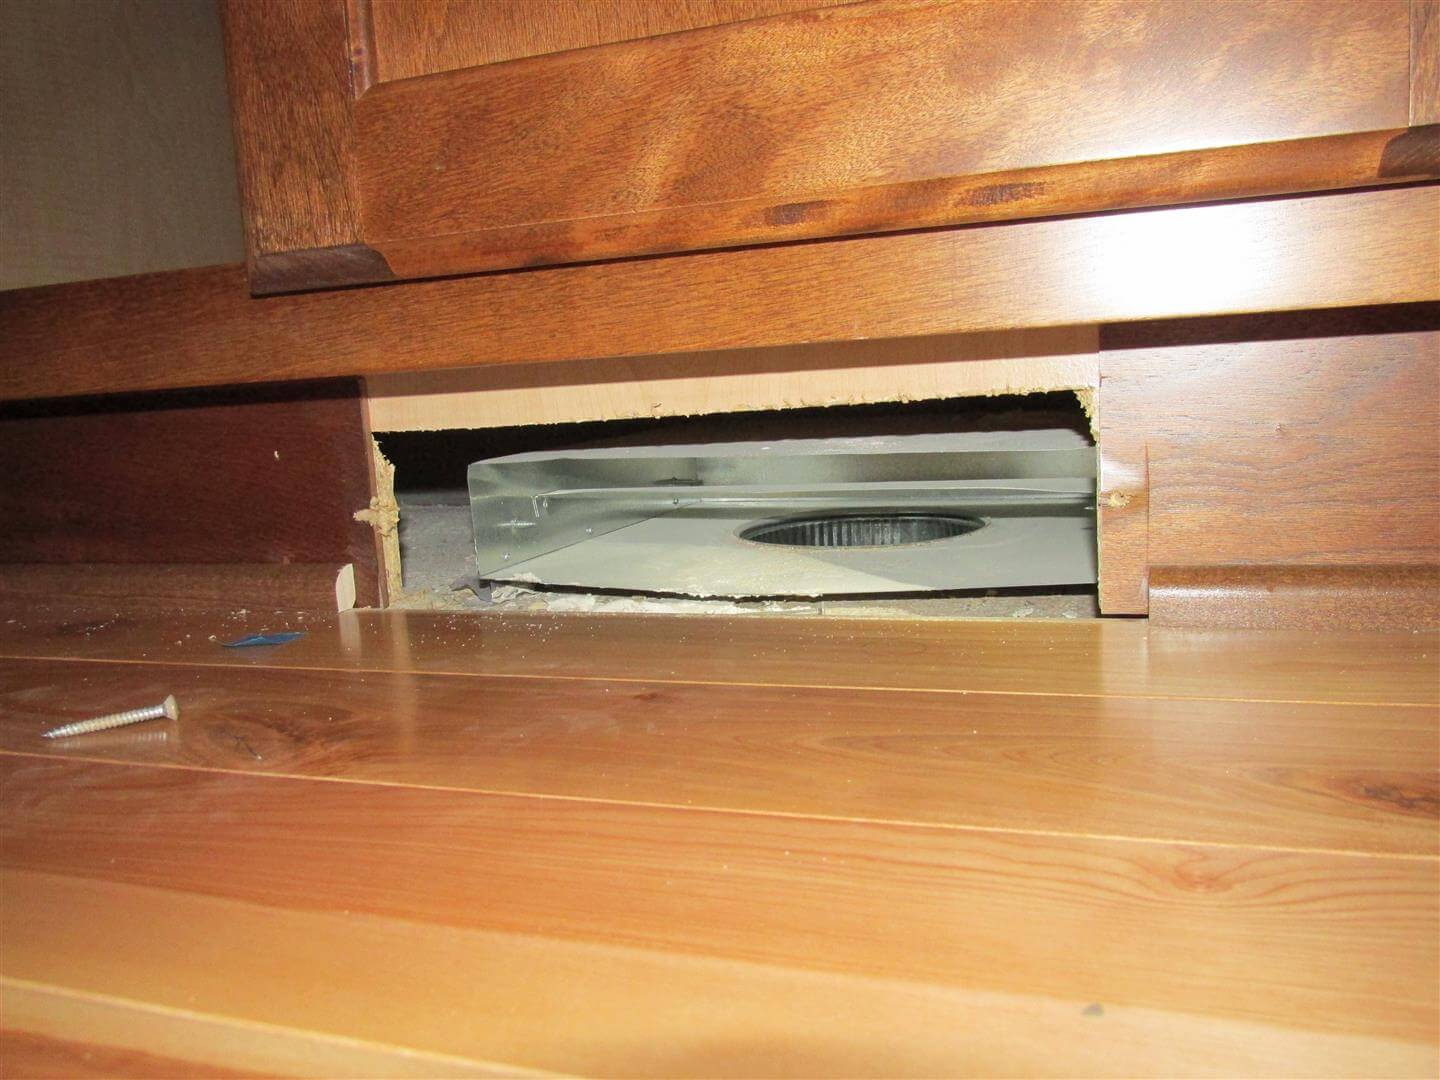
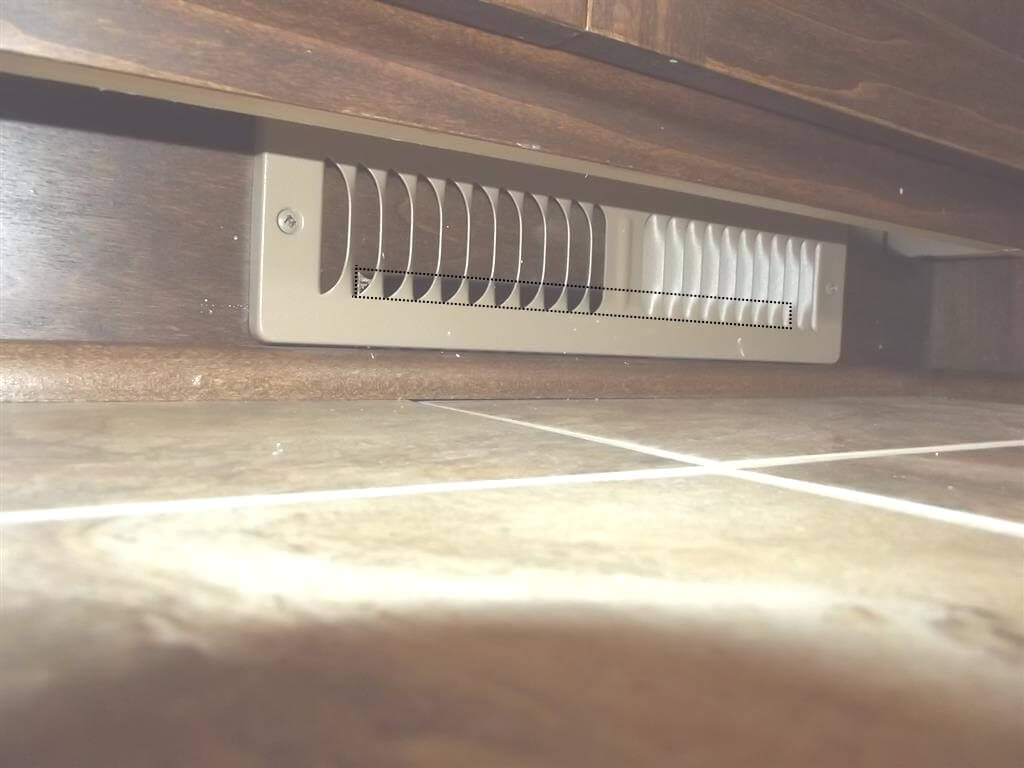
Toekick heat registers in kitchens and bathrooms are almost always done poorly in new construction homes. So poorly, in fact, that I put together a countdown of the top five worst toekick registers I’ve seen at new construction houses this year.
#5
#4
#3

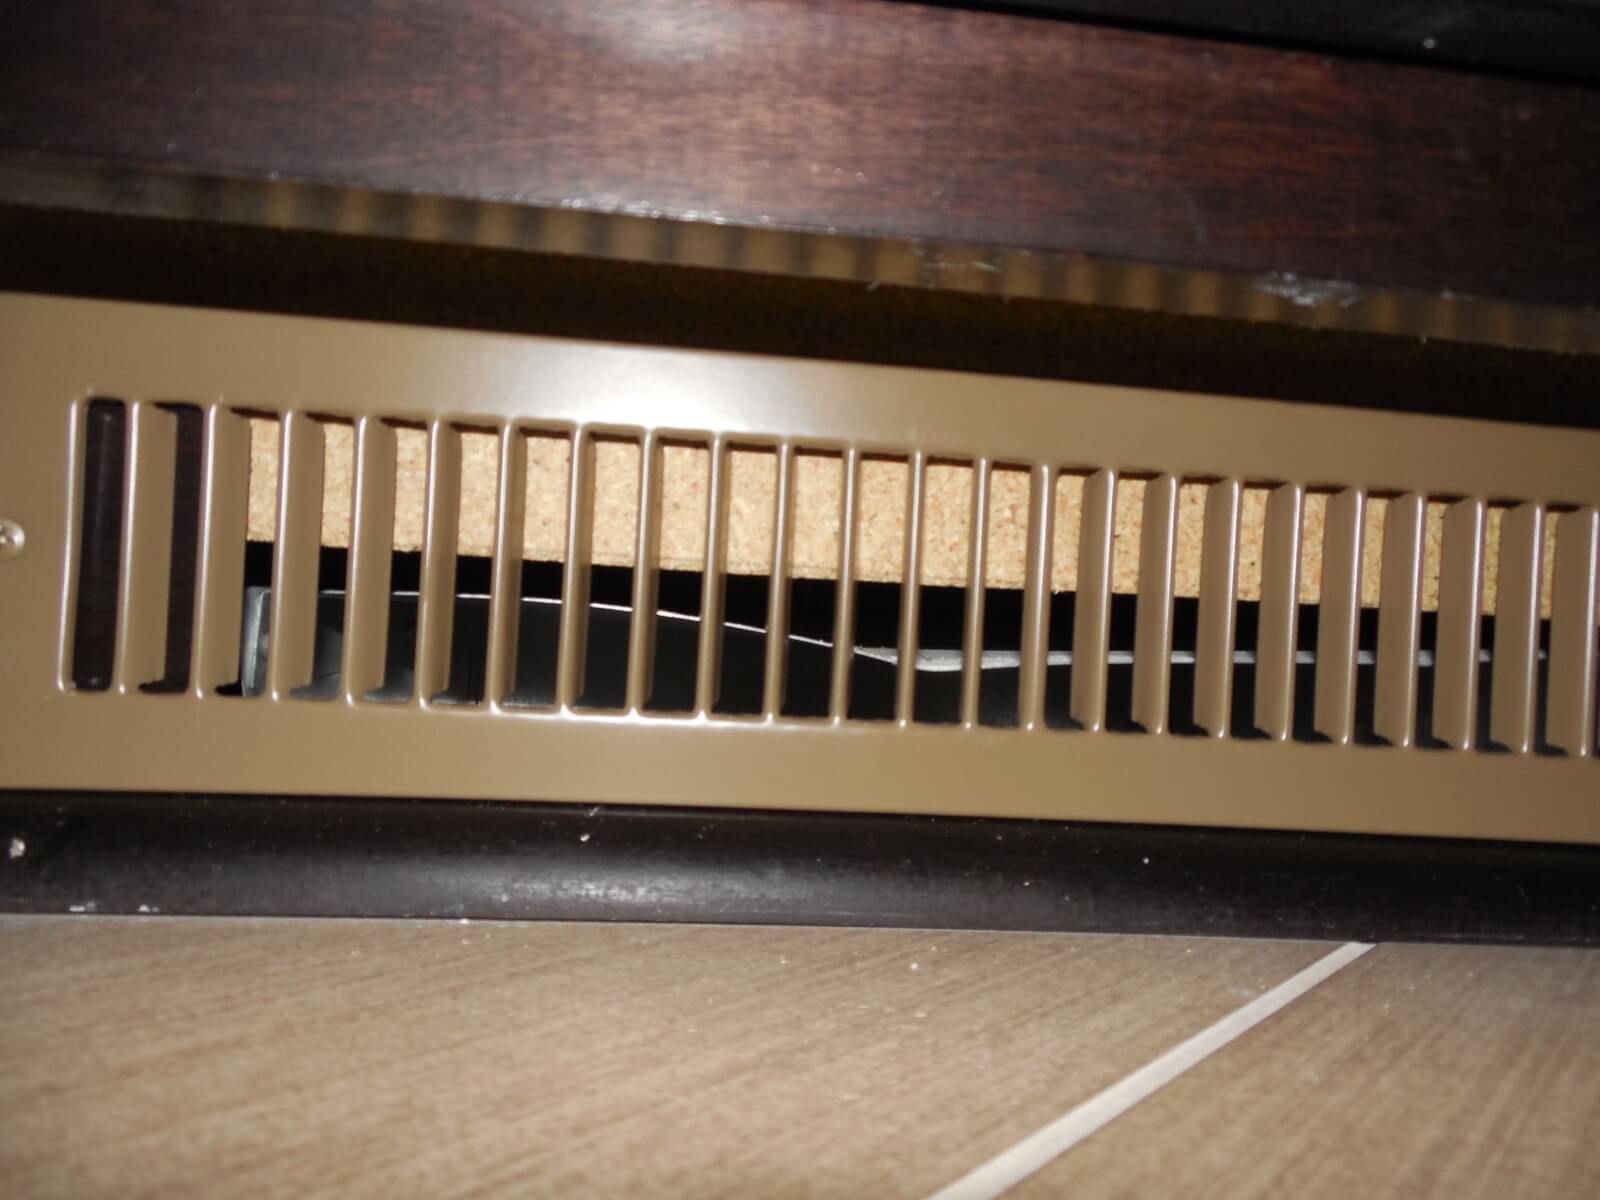
#2 – look carefully. I drew a thin black rectangle on this image to highlight the effective opening.
#1
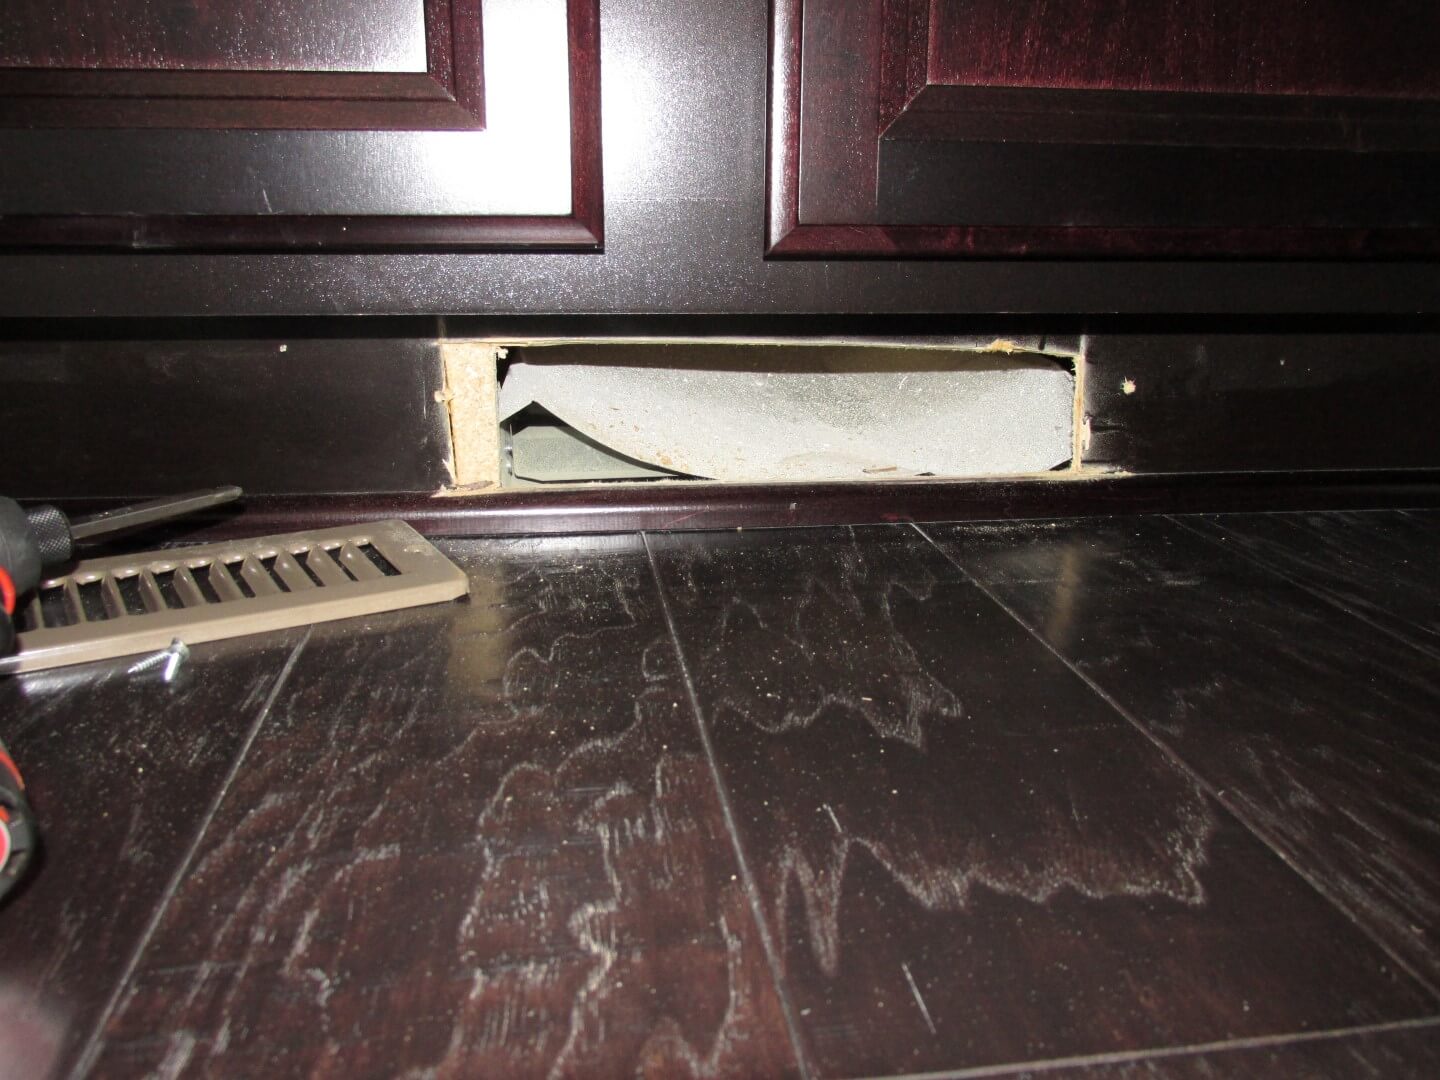
It’s toekick, not footstomp.
Interior Stuff
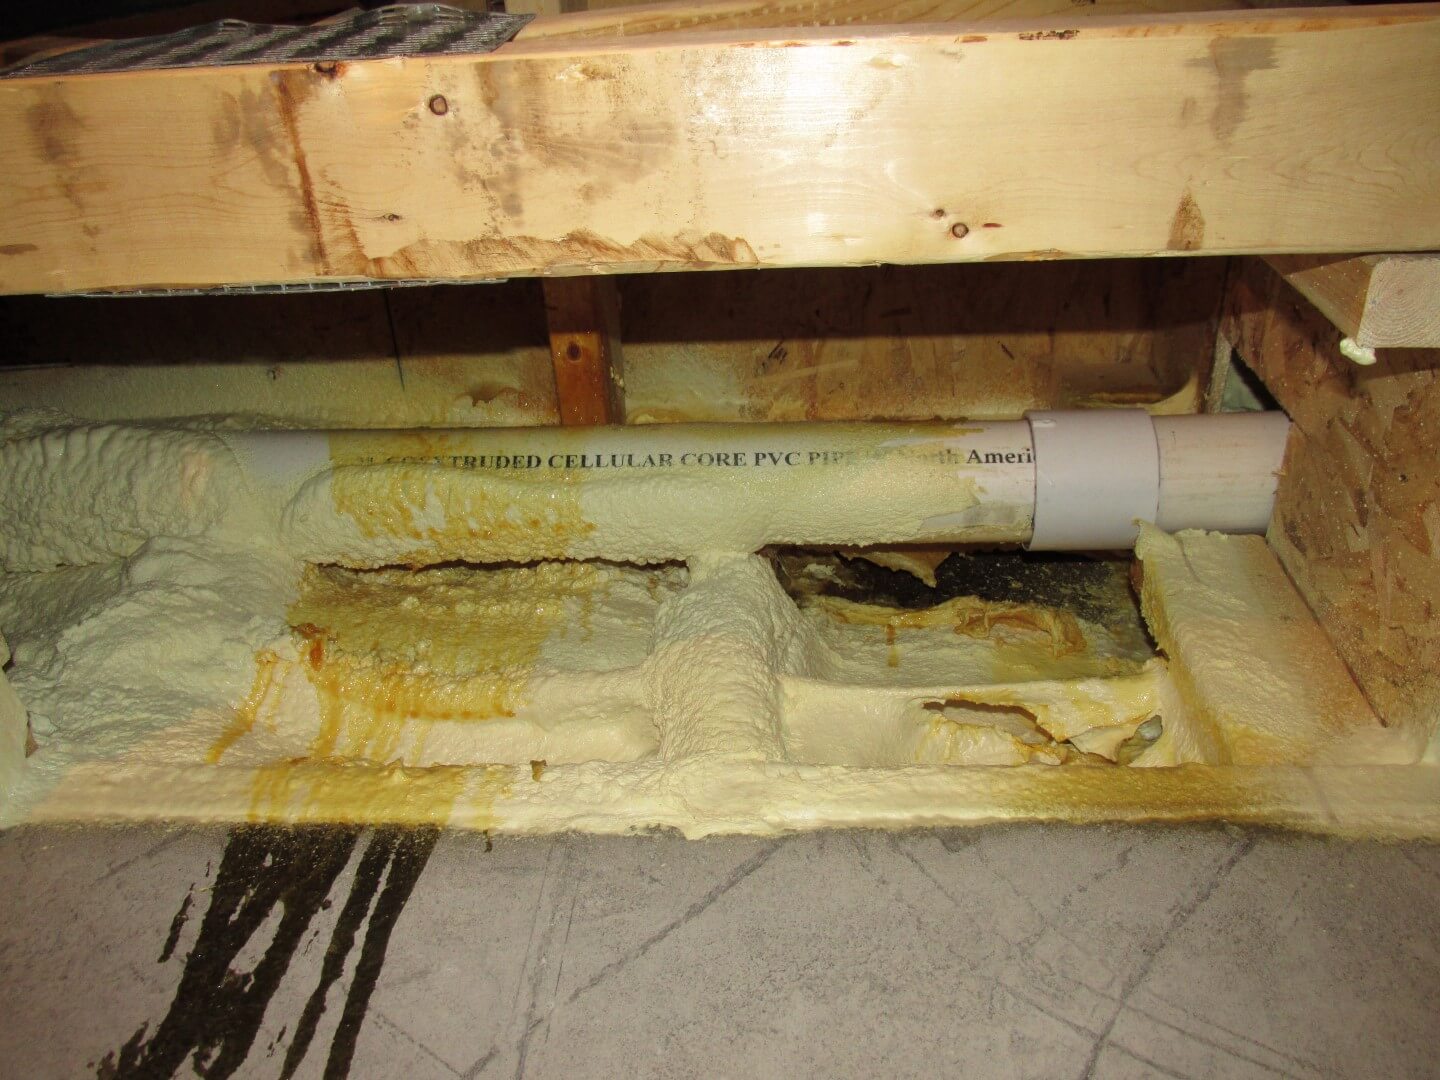
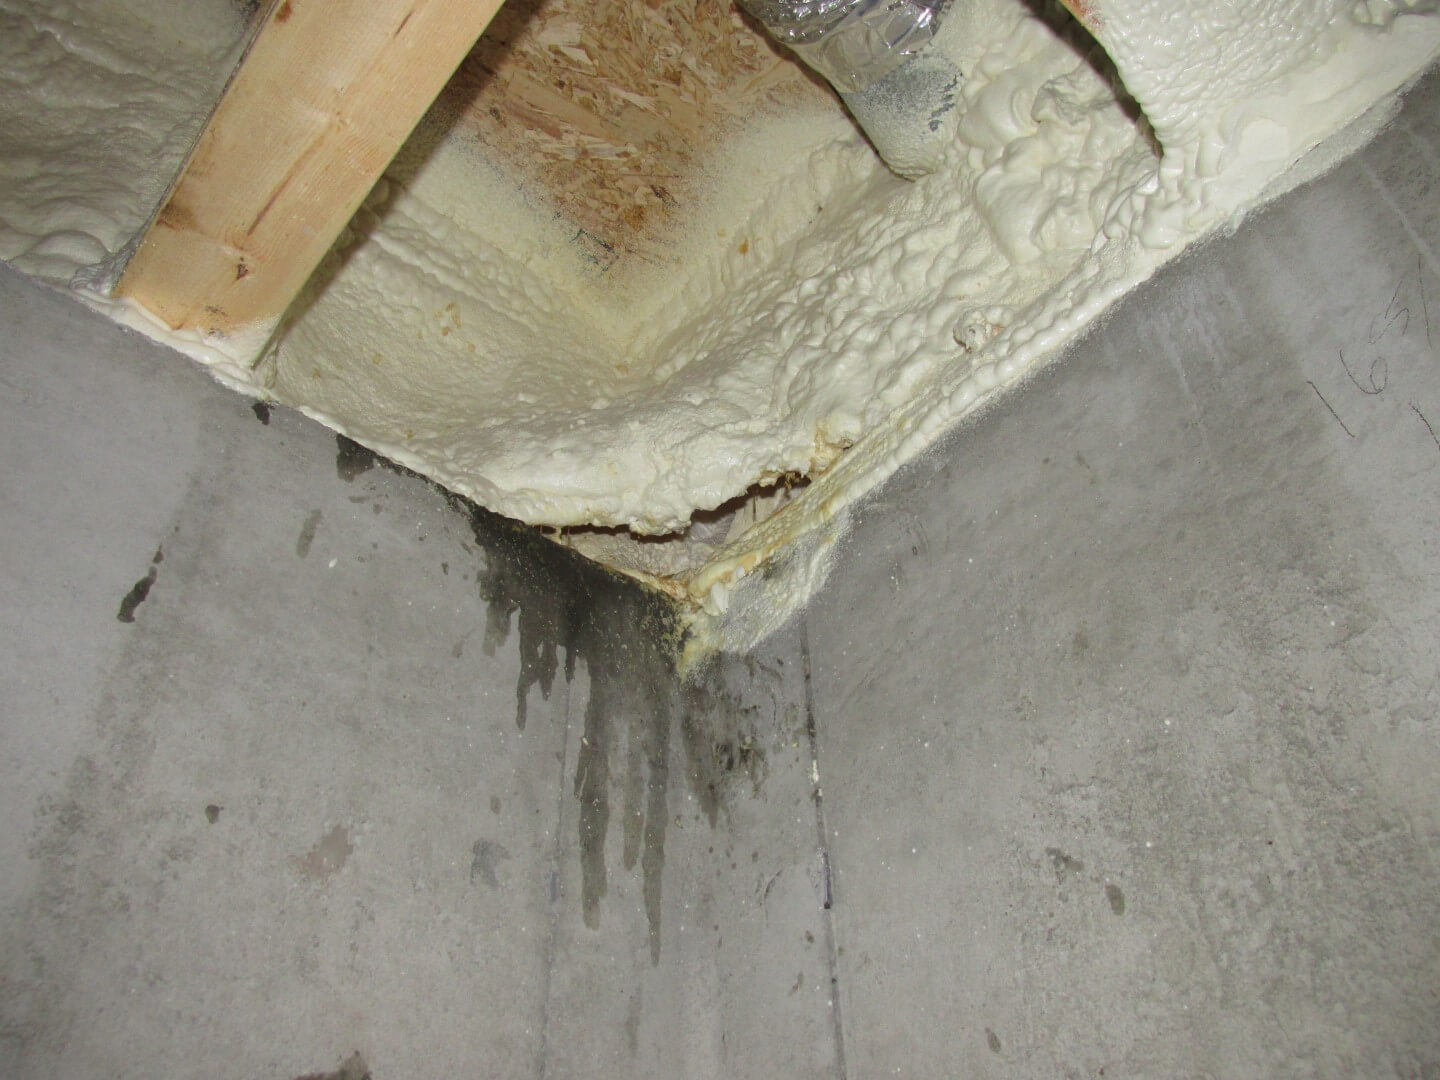
Spray foam insulation is great stuff and I’m a big fan of it, but it won’t work right if it’s not installed right. Check out this article on Spray Foam Insulation Problems at the Journal of Light Construction web site. I’m not exactly sure what went wrong with the installation of the spray foam at these rim spaces shown below, but I know wrong when I see it. There were obvious voids in the insulation at these houses that need to be addressed.
What happens during the summer when you build a home with an exhaust-only ventilation system and the poly on the wood framed portion of the basement wall isn’t perfectly sealed? Humid outdoor air will leak into the basement wall cavity and then condense on the relatively cold poly. There was so much condensation on the poly at this home that water was pooling at the base of the wall. The builder had already attempted to fix a supposed leak at the window twice, but this was simply condensation.
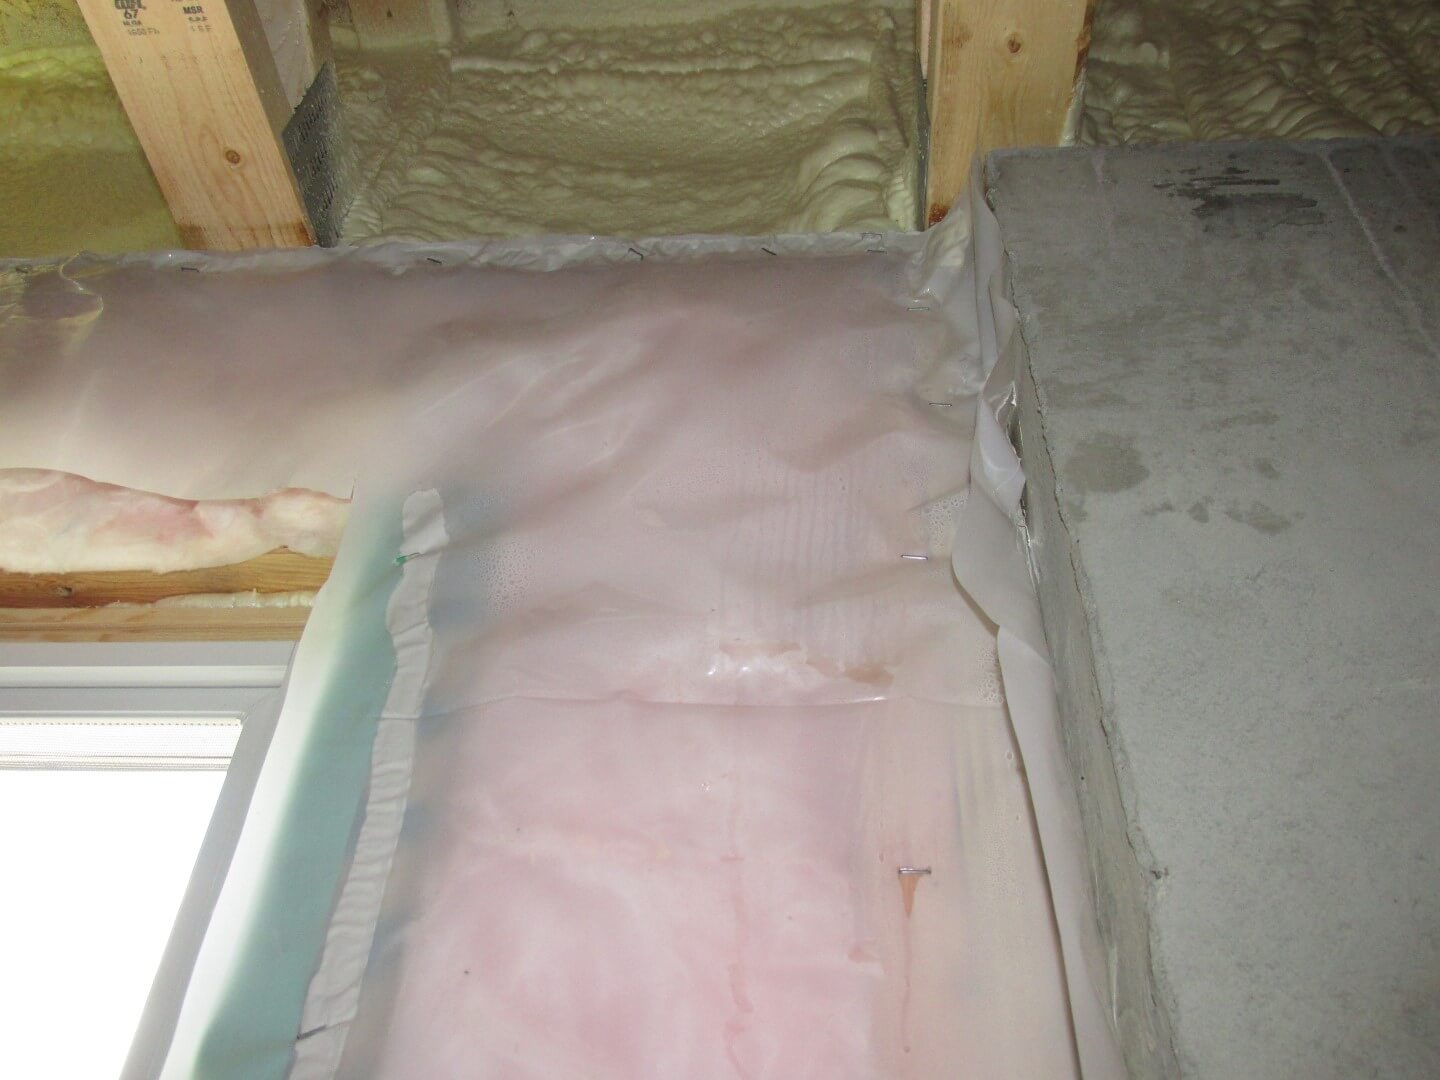
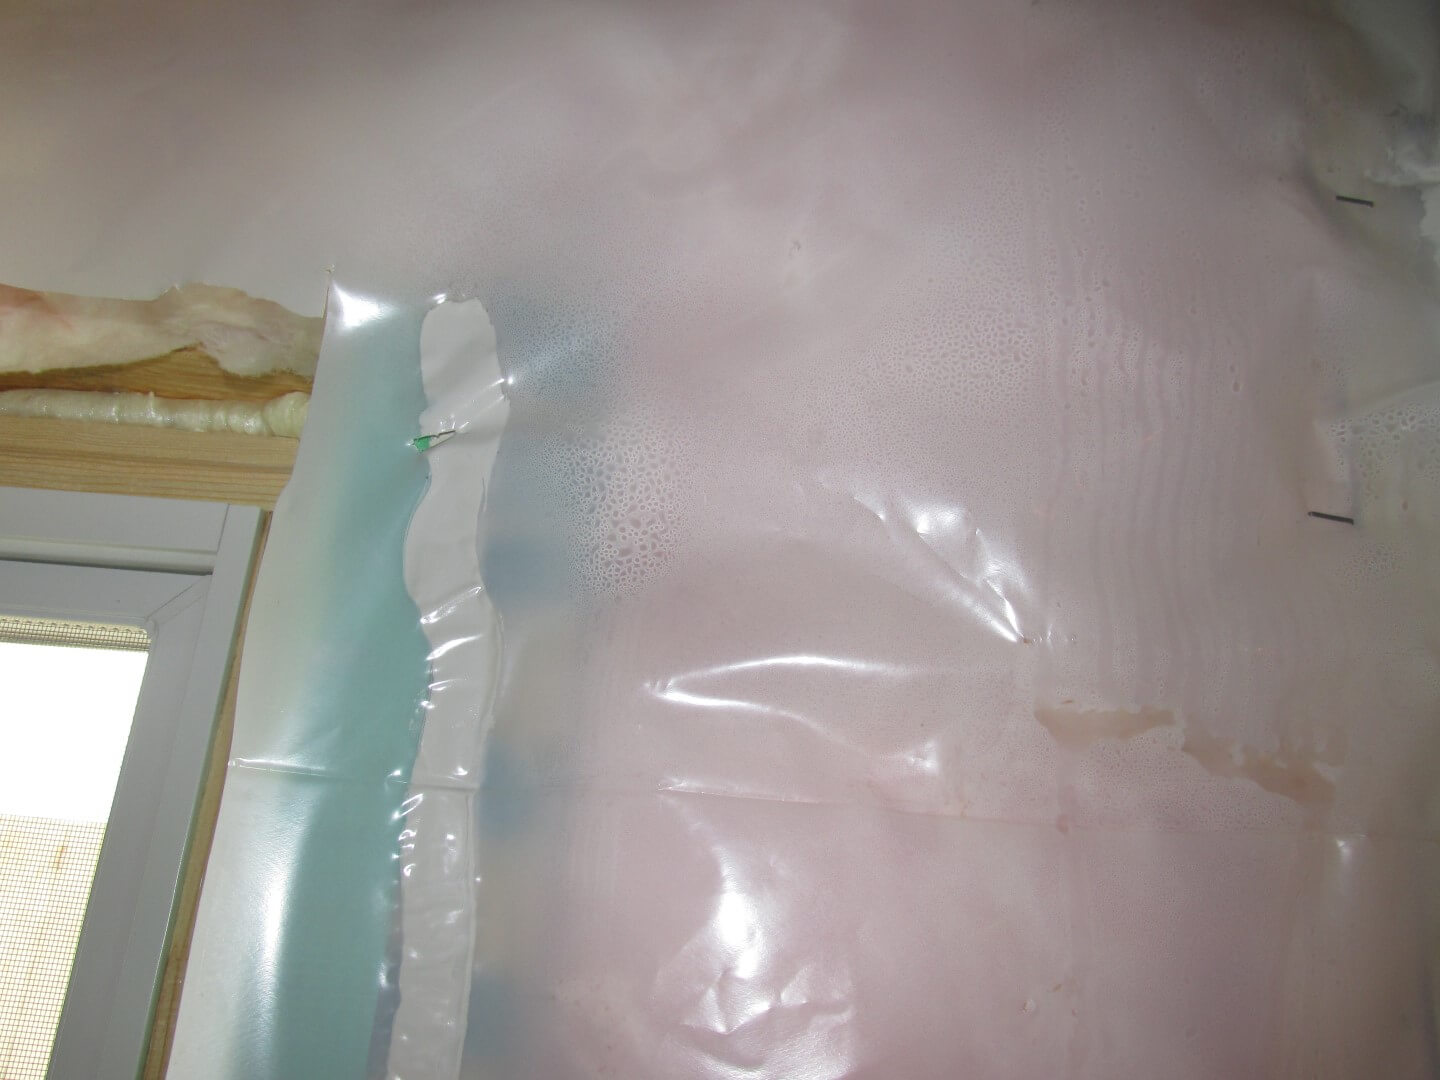
Side note: This is the opposite of what I blogged about last week. Siding stains show up during cold weather at the upper levels of the home, and ‘supply-only’ ventilation will exacerbate this condition. Good stuff, huh?
The fix is to make the poly 100% airtight, or to insulate the wood-framed portion of the wall with closed-cell spray foam insulation. For the record, I’m no hypocrite; I had that done at my own house three years ago: Spray foam insulation at Reuben’s house.
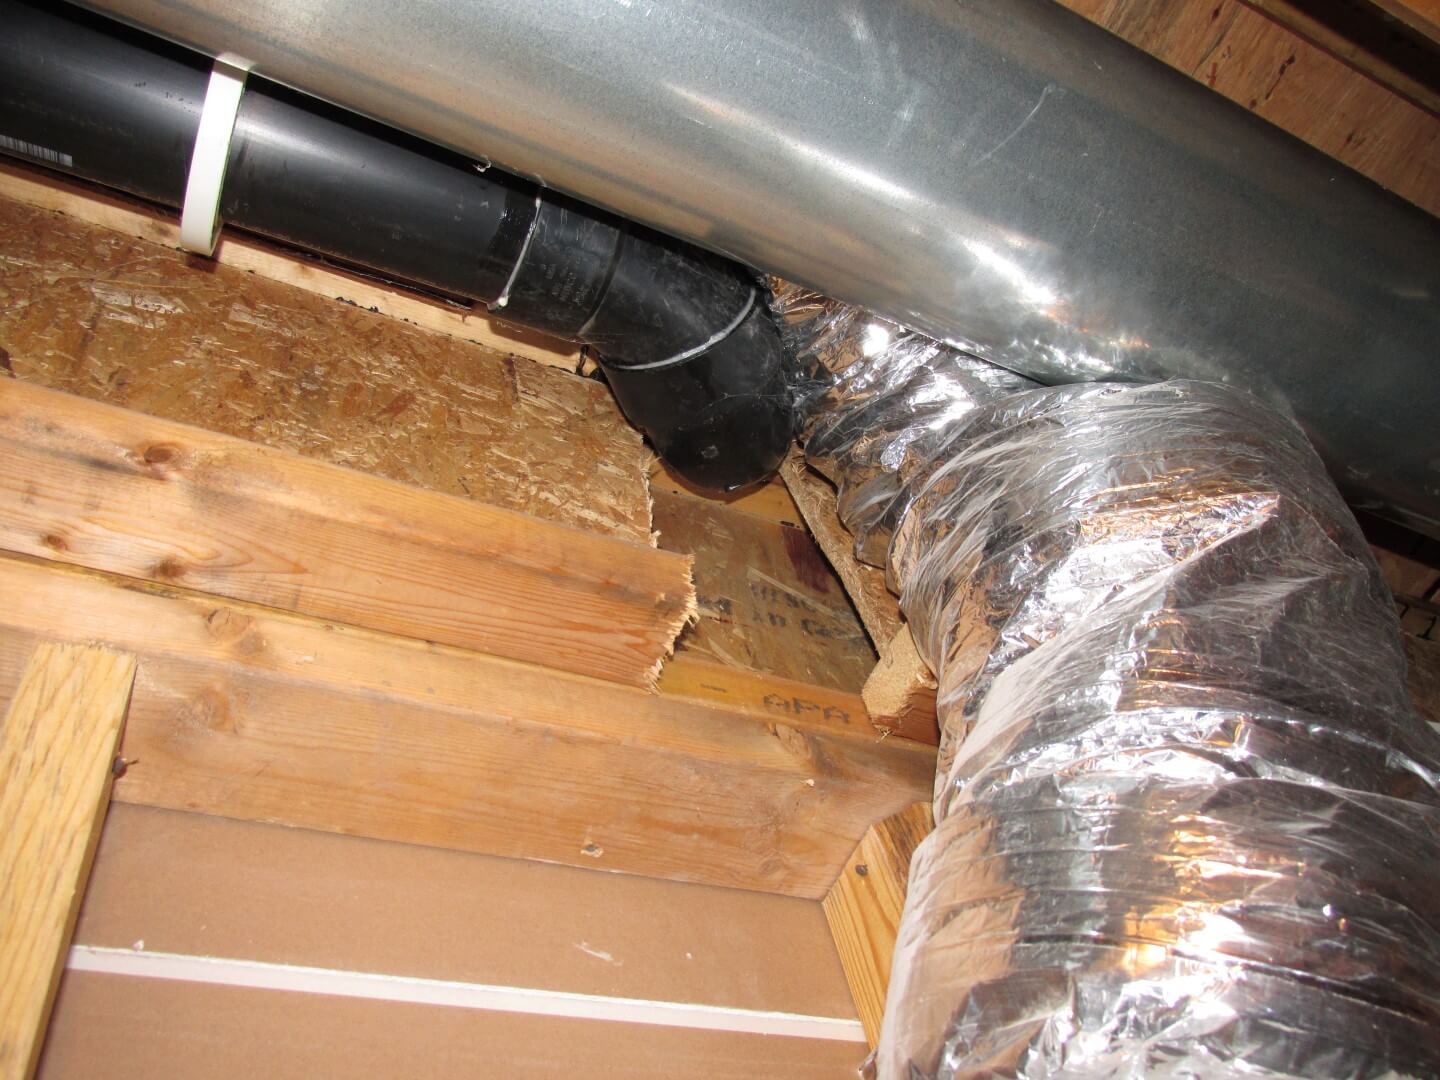
Here’s a joist cut all the way through.
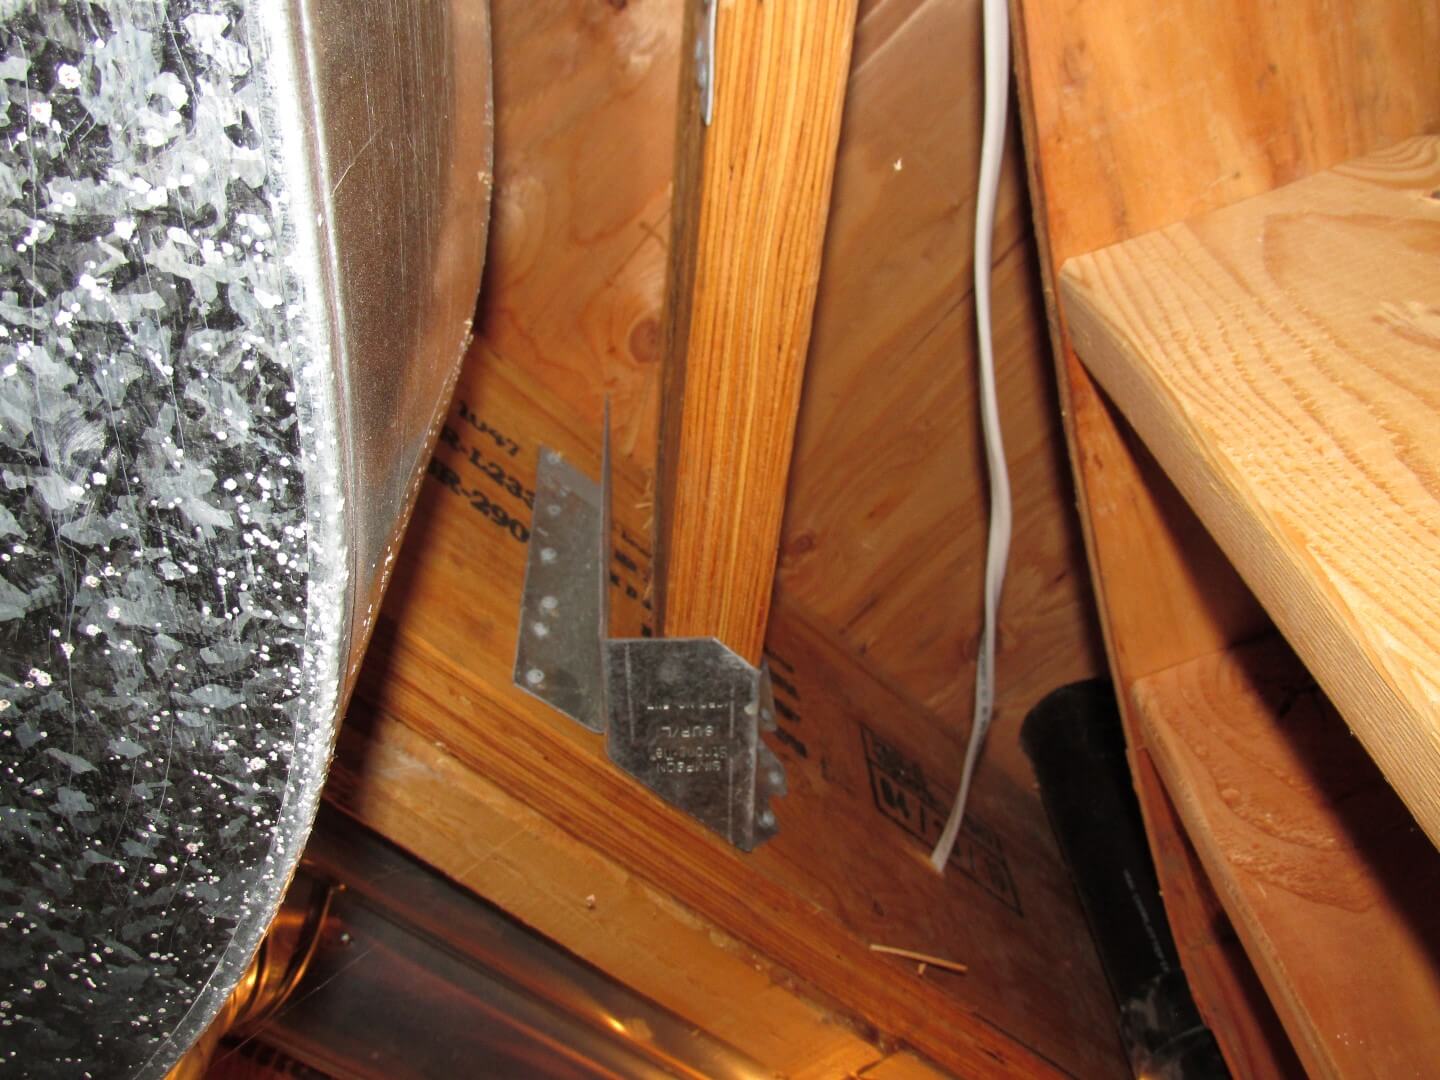
That’s obviously the wrong joist hanger.
These metal brackets aren’t right either.

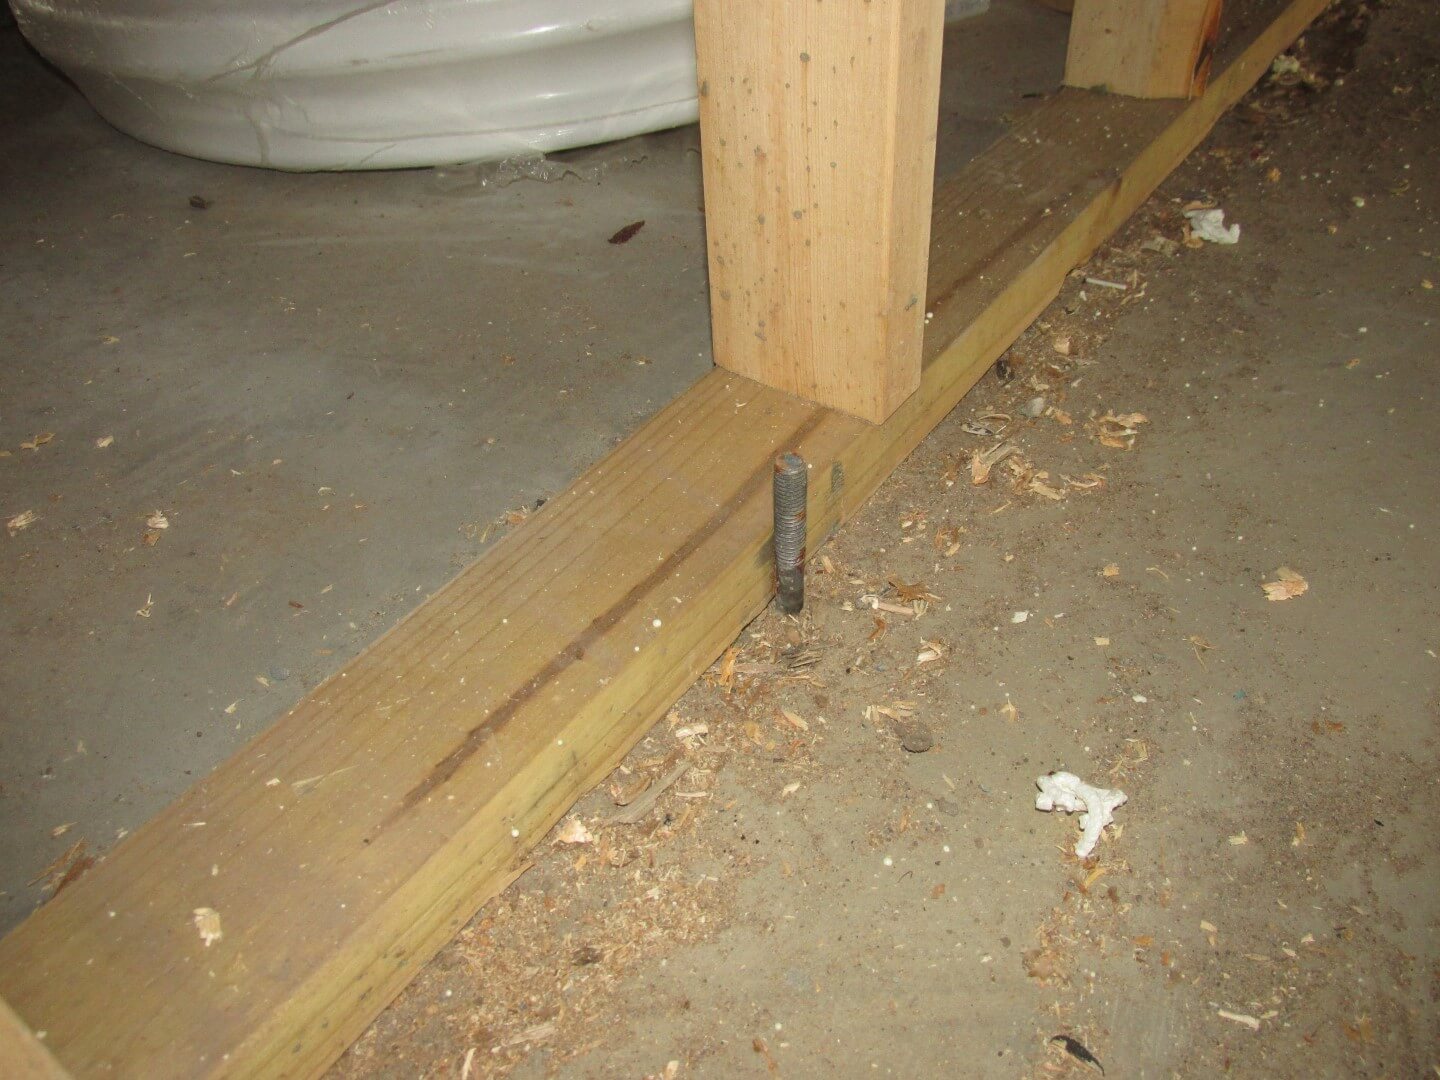
Here’s a wall that completely missed the anchor bolts, or more likely, the anchor bolts weren’t properly located.
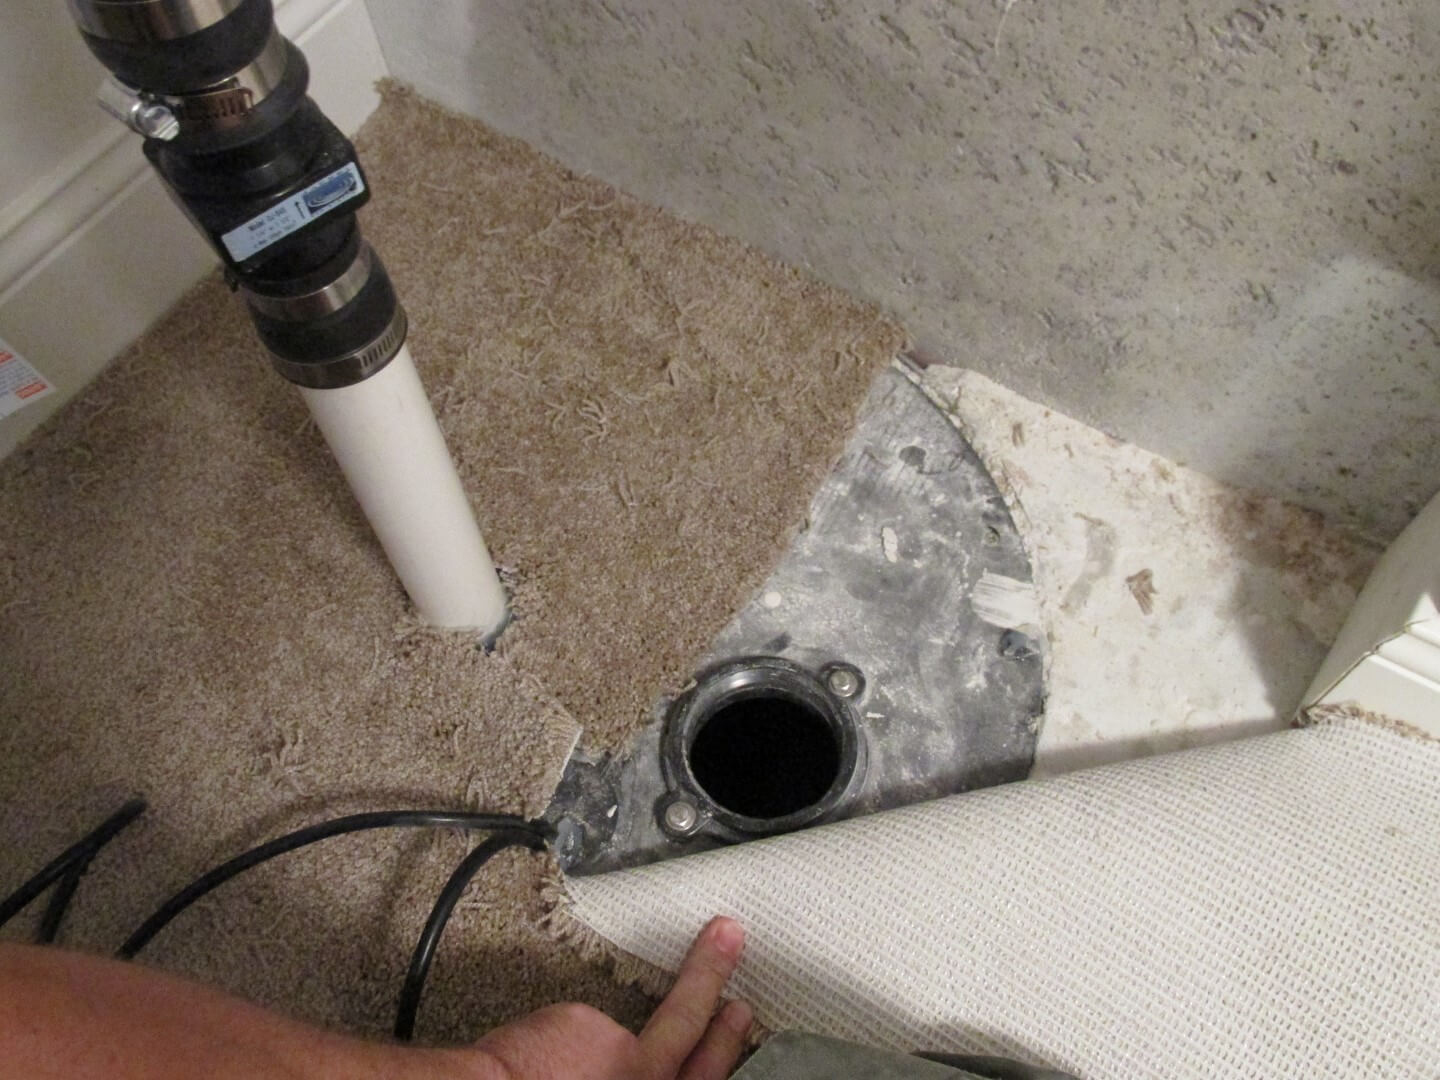
Here’s a sump basket cover that isn’t sealed. An unsealed lid will allow humid air into the basement, as well as radon gases.
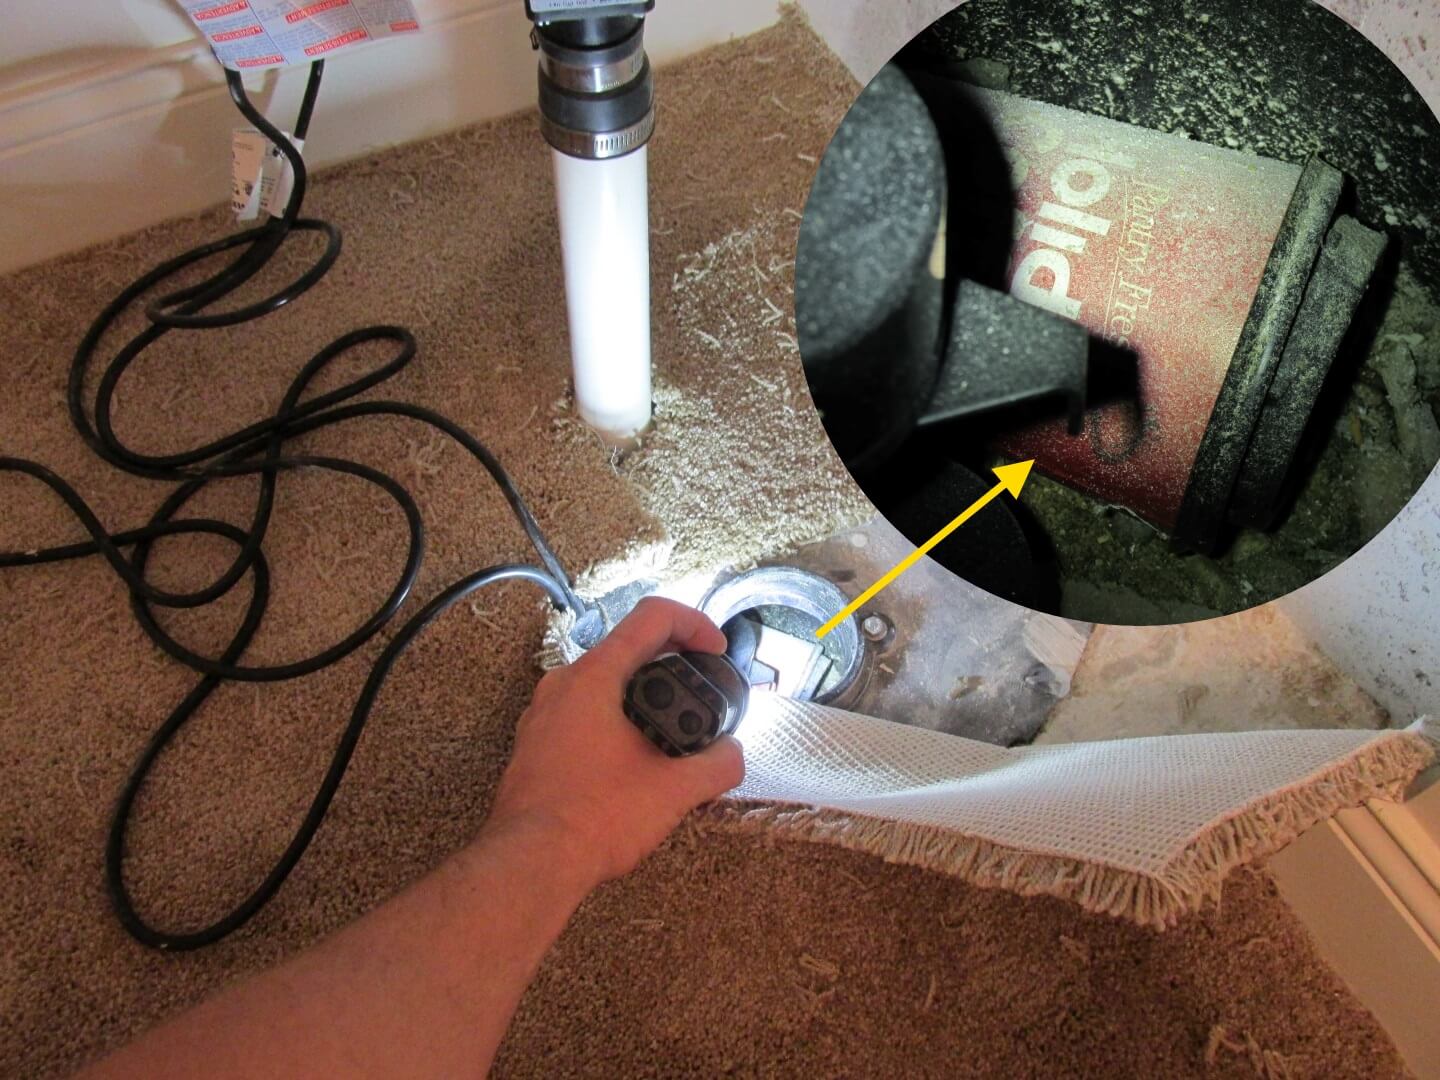
Not only was this sump lid not sealed, but someone used that hole in the sump basket to dispose of their coffee cup. That coffee cup could float into the wrong spot and prevent the float from operating the sump pump… which could lead to a flooded basement. Get the trash out.
Whew. That’s enough for this year. These blog posts on new construction inspections keep getting longer and longer. Again, this isn’t a knock against builders. The point here is that a new house doesn’t mean a perfect house. Even new houses should be inspected by private home inspectors. If you already own a new home and never had it inspected, consider having your home inspected before your one-year warranty is up. We do a lot of those inspections.
Related Posts:
- Photos From New Construction Home Inspections, part I
- Photos From New Construction Home Inspections, part II
- Photos From New Construction Home Inspections, part III
Author: Reuben Saltzman, Structure Tech Home Inspections
![]()
![]()
![]()
![]()
![]()
![]()
Scott T
November 11, 2014, 7:54 am
Great stuff! This may be a stupid question, but what I wrong with toe kick #5? Too small?
Reuben Saltzman
November 11, 2014, 11:35 am
Hi Scott, the problem with #5 is that the duct wasn’t brought all the way to the face of the cabinet. This means air will also fill the space underneath the cabinet, potentially leading to mold growth while the AC is running. More info on that exact topic here: http://www.energyvanguard.com/blog-building-science-HERS-BPI/bid/72958/The-Case-of-the-Duct-That-Wasn-t-There
Josianne Bessette
November 11, 2014, 9:40 pm
I’m a new home inspector in Québec city and I really like your article or the picture you’re posting daily on Facebook. It’s my personal training!!! Good job Reuben! Long life to your career!!! 🙂
Reuben Saltzman
November 13, 2014, 2:11 pm
Thanks Josianne!