Dirty bathrooms are a huge turnoff for home buyers. Mold is another huge turnoff. Combine the two and the ‘yuck’ factor multiplies. I think everyone has seen moldy bathroom caulk before, and if you’ve tried cleaning this stuff, you know it’s impossible.
I was reminded of this topic while blogging about the top 5 places to find mold in your home last week, so I’m doing a re-blog on this topic, along with a video.
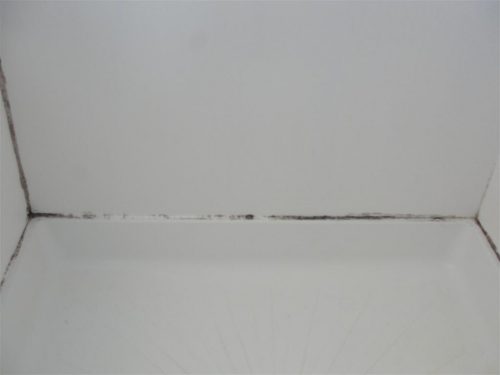
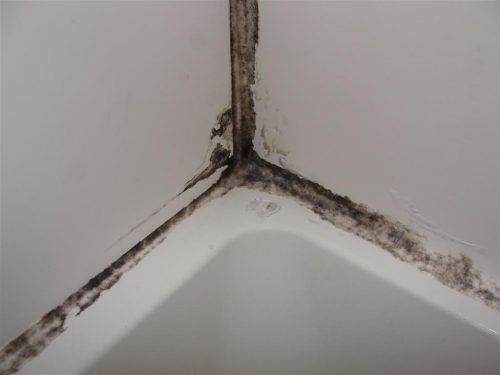
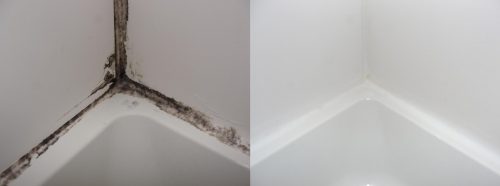
Back in 2011, I moved into a somewhat distressed property that needed some TLC. Among the list of neglected items was some nasty-looking caulk in the master bathroom shower. Yep, that’s my shower pictured above. I figured I would need to remove all of the moldy caulking and re-caulk my shower walls to get them looking good again, but after doing some online research, I found a cleaning method that worked surprisingly well and wasn’t much work. I was so happy with the results that I had to share the process.
How to do it
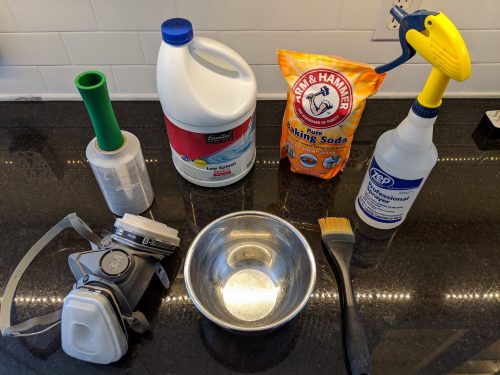
Gather supplies. You’ll need a small mixing bowl, fresh* bleach, baking soda, a brush, a roll of plastic wrap, a spray bottle, and a respirator. The plastic wrap (green handle, clear plastic) shown in the photo below is the stuff you use to wrap things together, but you can also use the same plastic wrap you keep in your kitchen. Also known as Saran Wrap. Also, wear old clothes that you wouldn’t mind spilling bleach on. It will happen.
*Bleach loses its effectiveness over time. If your bleach is over 6 months old, get some fresh stuff.
Mix up your cleaning solution. The cleaning solution consists of a bleach and baking soda paste. You make it by mixing bleach and baking soda in a bowl until it’s about the consistency of pancake batter. The baking soda doesn’t do any cleaning; it’s just a cheap powder that will help make the bleach pasty. Don’t skimp on the cleaning solution here; go ahead and make way more than you think you’ll need. Bleach and baking soda are both inexpensive. Be sure to wear your respirator while doing this.
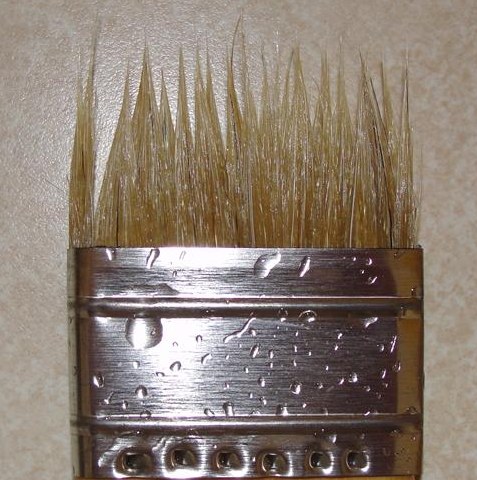
Apply the cleaning solution to the moldy caulk. Use your brush to apply the bleach paste onto the moldy caulk. Again, don’t skimp here; it’s cheap, so cake it on. If you happen to use a disposable paintbrush, I suggest working quickly. The bleach might disintegrate the bristles on your brush.
Cover the cleaning solution with plastic and wait. Covering the cleaning solution with plastic will help to keep the bleach from drying out. Now you wait. If you have a white porcelain kitchen sink or white porcelain whatever-else, spread the extra cleaning paste on it. You can just let the paste sit for about 10 minutes, and then your sink will look brand new when you rinse the bleach off. No scrubbing required.
Check on it. After the bleach has been sitting for an hour, it will probably have dried out, despite the plastic covering. At this point, if the caulking looks as good as new, great! You’re done. If you still have moldy caulk, put some bleach in a spray bottle and wet the walls down right above the plastic wrap. The bleach will run down underneath the plastic and re-saturate the paste. You can do this as many times as it takes, but even with my super-nasty caulk, I only needed to re-apply the bleach one time.
Now clean up. At this point, your caulk should look brand new and bleachy fresh, or at least pretty close to it. Now you can clean up the mess with water. Click on the before and after photos below for a larger version to see how well this worked. If I were a better photographer, all of the whites would have looked the same, but oh well… I think you get the point.
I was amazed by how well this worked. The entire project probably involved about 20 minutes of work and required no elbow grease whatsoever.
And now, a word of caution: do this project at your own risk. Bleach is powerful stuff. Read the warning label on the bleach. It says to use in a well-ventilated area, don’t let it touch your skin, don’t breathe the vapors, etc. Bleach can also cause pits in metal. I used it on the metal trim ring for my shower faucet and no pitting occurred, but other people might not be so lucky. Also, I’m not kidding about wearing a respirator.



Bib
January 14, 2020, 7:41 am
Does this work on moldy grout too?
Reuben Saltzman
January 14, 2020, 2:29 pm
I’m guessing so, but I think you would likely change the color of your grout, not just restore the original color. I haven’t tried it, however. If you do end up trying it, please report back on how well it worked for you.
john
January 14, 2020, 10:21 am
Can you give a suggestion about a respirator for this job . There are so many out there to choose from.
Reuben Saltzman
January 14, 2020, 2:29 pm
Hi John, I think this one would do the trick: https://www.homedepot.com/p/3M-Medium-House-Hold-Multi-Purpose-Respirator-65021HA1-C/202080143
Kim Black
January 14, 2020, 12:03 pm
Great post, Reuben, because EVERYONE fights mold in their shower!
Question — could you apply the same technique to GROUT in the shower?
Reuben Saltzman
January 14, 2020, 2:30 pm
Hi Kim!
I’m guessing this would work on grout, but I think you would also lighten the color of your grout, not just restore the original color. I haven’t tried it, however. If you do end up trying it, please report back on how well it worked for you. And of course, try in a small, inconspicuous area first.
Shelly Lovegren
January 17, 2020, 10:38 am
I just tried this on my grout. Sadly, it didn’t do anything
Reuben Saltzman
January 17, 2020, 10:43 am
Good to know, and thank you for sharing.
Brendan
January 14, 2020, 12:50 pm
May want to edit your first mention of respirator. You’ve got it as strikethrough font, I’m guessing you wanted it underlined.
Great blog! Can’t wait to do this tonight!
Reuben Saltzman
January 14, 2020, 2:32 pm
Thank you for the heads up. The link still works, so I don’t know why it’s showing up with the ‘strikethrough’. That happened to one of my blogs last week too.
Ben Franske
January 15, 2020, 1:50 pm
It’s actually been going on for longer than that, we just haven’t been commenting about it 😉 I suspect it is a problem with the CSS styles being applied on the site.
Reuben Saltzman
January 15, 2020, 3:48 pm
Aha! That’ll all be fixed with our next website re-design. Coming soon.
Gail Parker
January 18, 2020, 6:24 pm
Astonished, this really, really works. Saved me cutting out and resealing. Am telling family & friends Thanks so much!