When it comes to getting your house ready for a home inspection, there are two schools of thought. The first is to make everything in your home ready for the inspector to come through, as I mentioned in last week’s blog post, How to prepare your home for the inspection. This should always be done, without exception. But some people don’t just stop at making things accessible; they also want to minimize the amount of stuff that a home inspector could potentially come up with. This involves a two-part approach: 1) Find out what’s wrong. 2) Fix it. I can help you with the first part.
Of course, the easiest way to know exactly what’s happening with your home is to hire a home inspector, but many homeowners like to do things themselves, and I’m here to support them. I tried to write a blog post on how to conduct your own home inspection many years ago, but it turned into a 9-part series. There’s just too much to talk about. So without further ado, here’s part 1, which covers the roof and the chimney.
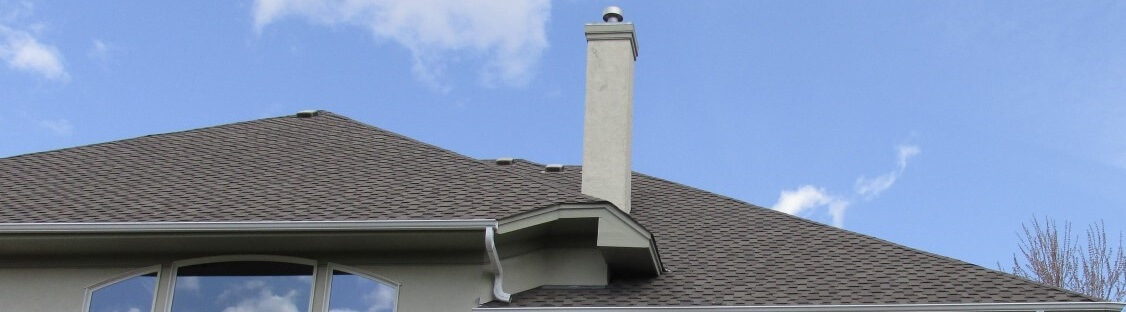
Roof
The best way to inspect a roof is by walking its surface. If it’s safe to do so, get on the roof to inspect it. If you need a ladder, get a Little Giant. If it’s not safe to walk the roof, inspect it by leaning a ladder against the edges in several places to get a close look. If that’s not possible or not safe, walk around the exterior and carefully inspect all sides of the roof, using either a camera with a powerful zoom lens or binoculars. If you have a drone with a high-quality camera, use your drone to fly above the roof and take high-res images of the entire roof. When you’re done, study those photos on your computer. Pay special attention to the south-facing portions of the roof; these areas almost always fail first. If there are curled or deteriorated shingles, it’s probably worth having a follow-up inspection done by a trusted roofing contractor.
Loose or missing shingles should be addressed right away. Identifying loose or missing shingles can sometimes be tough to do from the ground though. Click on the photo below for a zoomed-in version; do you see the missing shingles?
The missing shingles were located at the ridge, right by the tree. Again, if you’re using binoculars to inspect the roof, scan everything slowly. This type of inspection should be conducted at least once a year.
I have several examples of other roof defects that can typically be seen from the ground at the very beginning of this post: Home Inspection Checklist – Exterior.
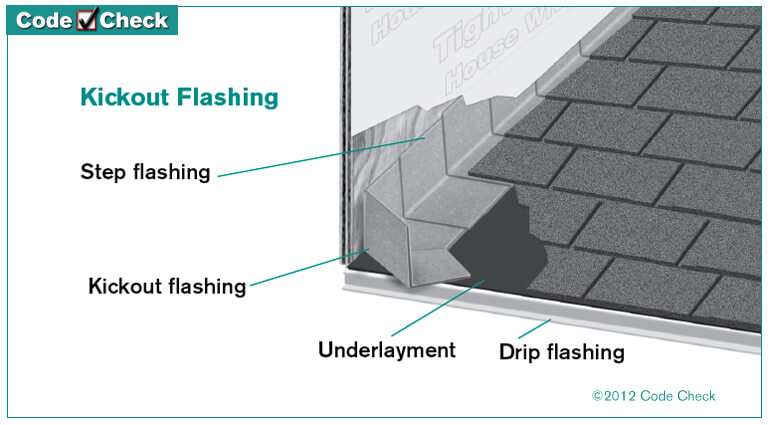 Also, make sure kickout flashing is installed at all of the locations where the roof edges end at walls. Kickout flashing is one of the most inexpensive, easiest, and most critical parts to preventing major water damage to your home. I wrote a whole blog post about kickout flashing here: Kickout Flashing.
If there are any tree branches in contact with the roof or even close to the roof or siding, trim them away. Tree branches prevent the roof from properly drying, provide an easy way for pests such as raccoons to get on the roof, and can easily rub holes right through the shingles.
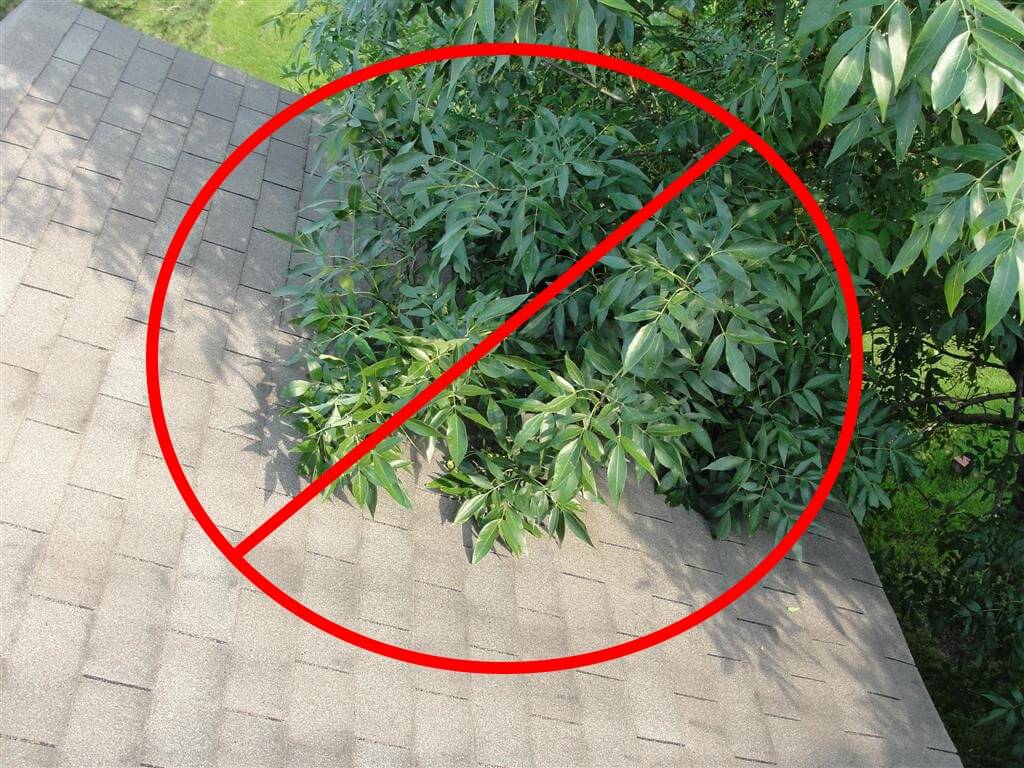
If the roof is covered with debris, such as leaves and tree branches, clean the roof off.
Masonry Chimneys
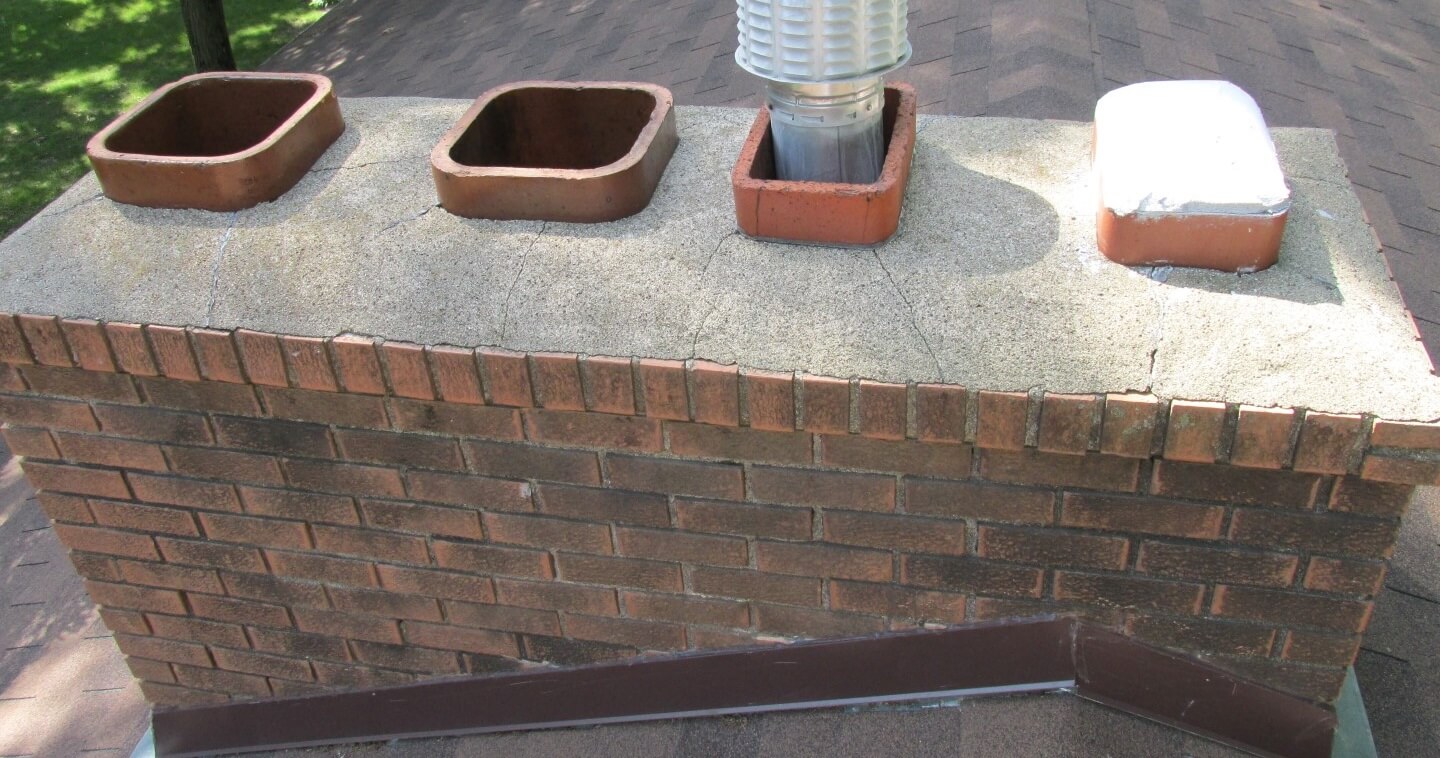
Chimneys can only be fully inspected by getting up on the roof or by using a ladder that’s as tall as the chimney, provided the chimney is located along an outside wall. The most important part to inspect is the crown, which is the top of the chimney that sheds water and prevents water intrusion. If the crown is cracked or washed out, water can get into the chimney and cause deterioration as well as water leaking into the house. The photo below shows a chimney crown in need of repair or replacement.
 If the chimney flues have missing rain caps, have them added. Rain caps can make a big difference when it comes to preventing moisture intrusion and moisture damage. Here’s a nice pdf from Kuhl’s Contracting with more information on this detail: http://www.kuhlscontracting.com/wp-content/uploads/case42-Chimney-Caps-Frost-Wedging.pdf. Also, it’s a good idea to use one with a built-in spark arrestor, which will help to keep out pests.
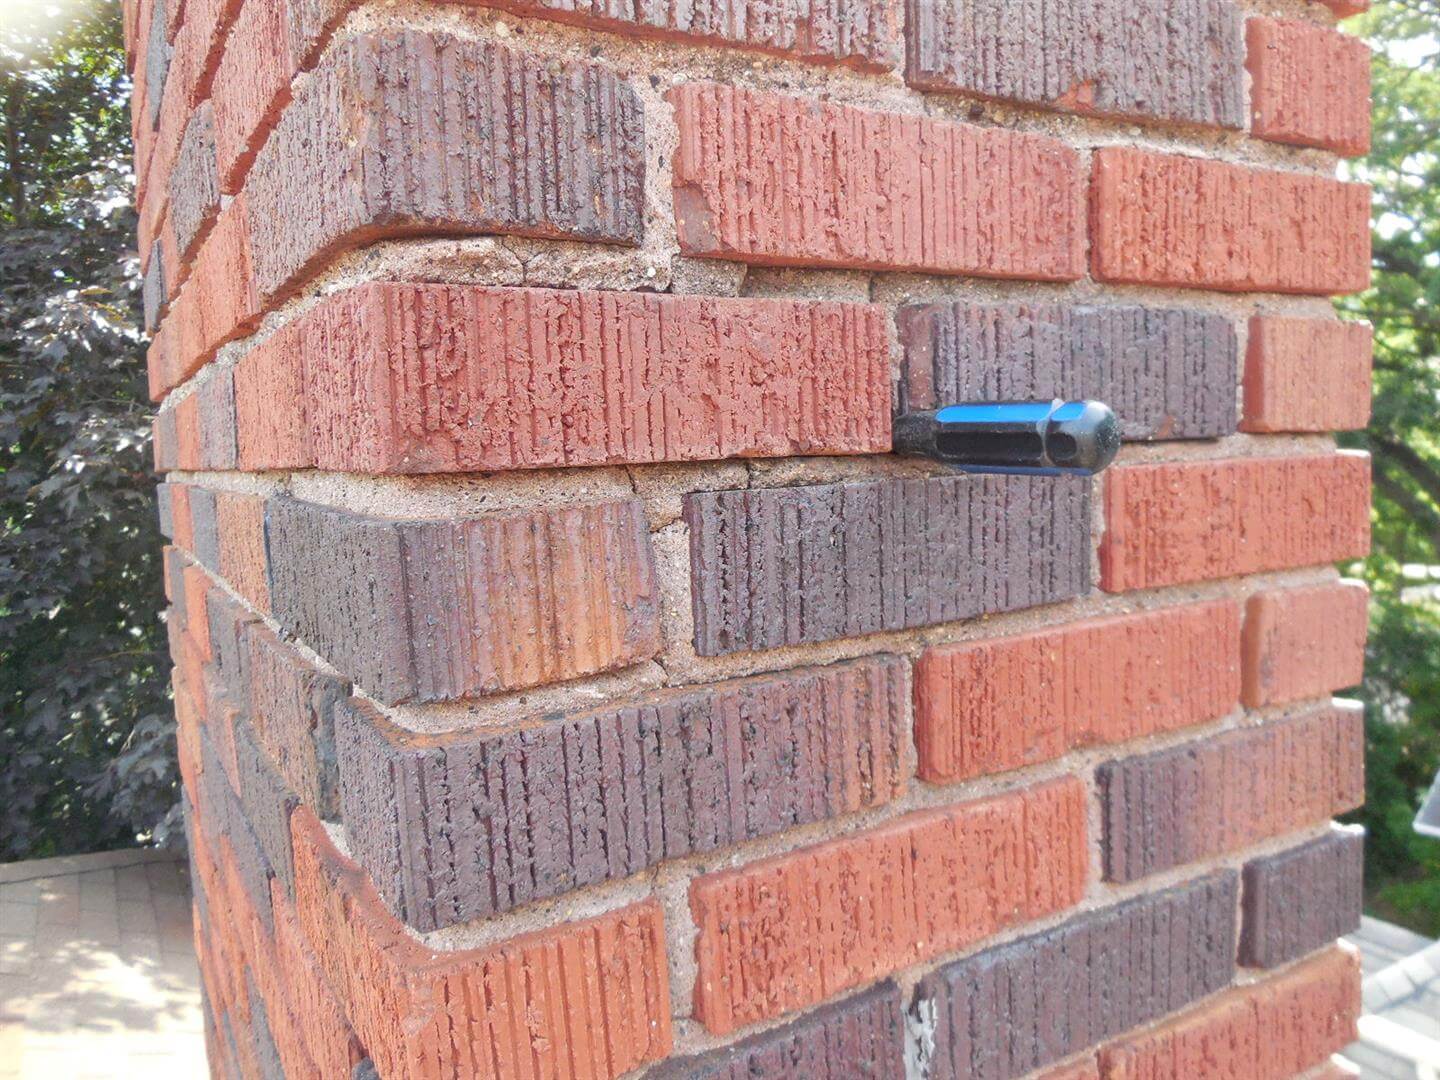
Look for damaged or missing bricks, cracks, and missing mortar at the walls of your chimney. If I can stick my awl through a hole in the side of the chimney, I recommend repair.
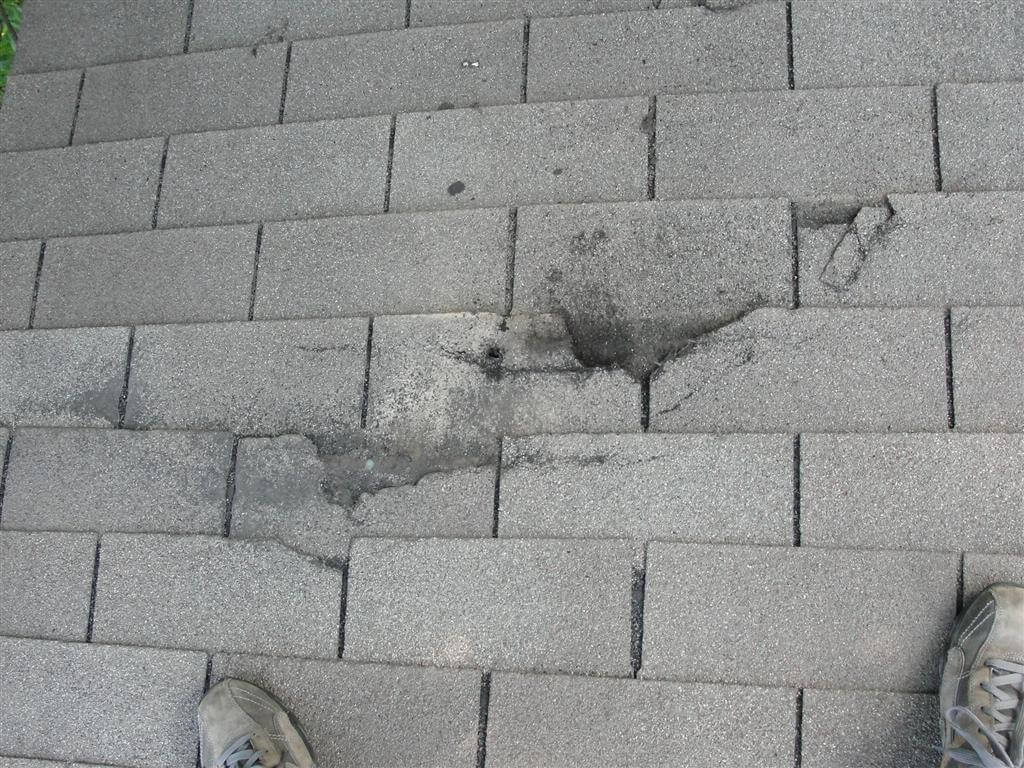
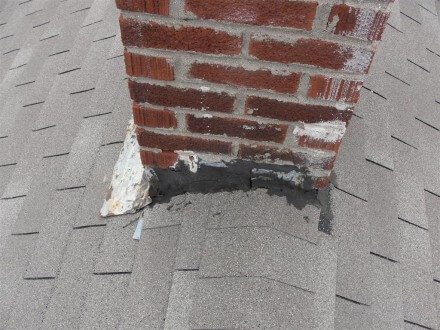
If your chimney has a bunch of black goop at the intersection between the chimney walls and the roof, it’s an unprofessional installation or a hack repair that will probably leak soon. Hire a professional to have the flashing redone before it leaks.
Other Chimneys
Wood chimneys, or wood chimney chases, are especially vulnerable to moisture intrusion and rotting at the walls because they’re completely exposed to the elements on all four sides; no soffits, no gutters. Get up on the roof or use a ladder to get a good look at any wood chimney chase, especially if the chimney is clad with some type of siding that needs to be caulked at the ends, such as lap siding. Wood and older wood composite siding are especially prone to rot.
If there is rotted siding, replace it. If the siding needs caulk at the ends, get out your caulking gun and go to town. For more info on wood chimney chases, click here: Inspecting Wood Chimneys.
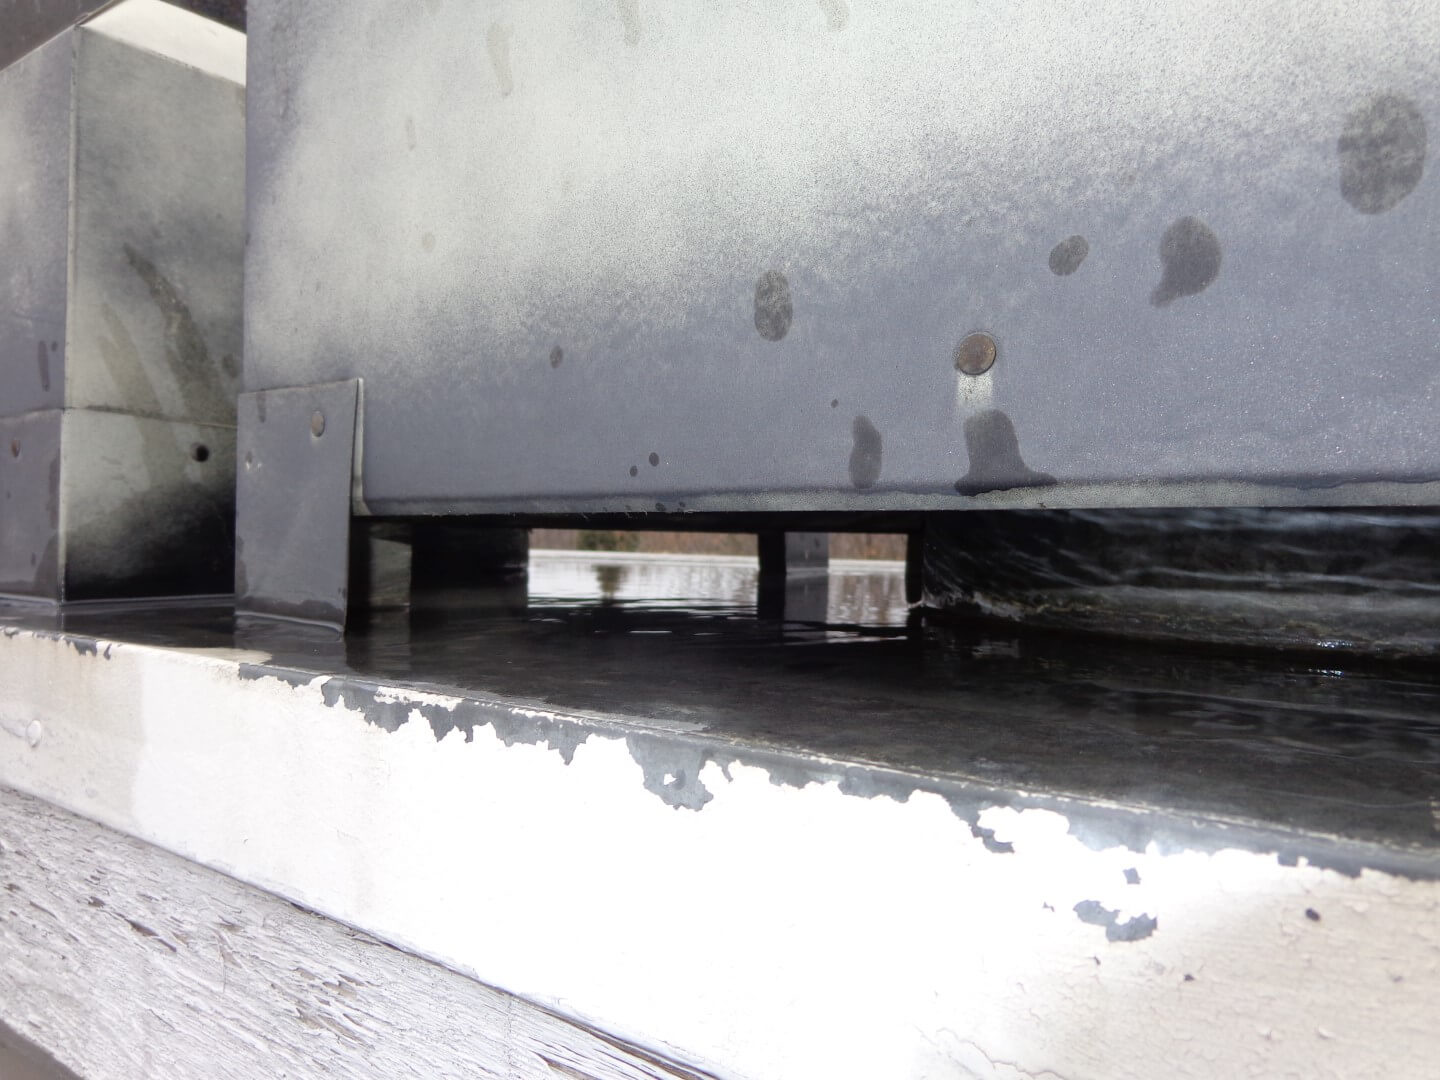
For chimney chases with a metal top, make sure that the top slopes away from the center of the chimney to prevent water from ponding on the top of the chimney. If water ponds, it will only be a matter of time before water starts to leak down through the center of the chimney. I’ve inspected several wood chimney chases for gas fireplaces where water was leaking in right at the vent because the metal cap wasn’t properly sloped away from the center, which allowed water to pond and leak. The photos below show a metal chimney cap that was leaking.
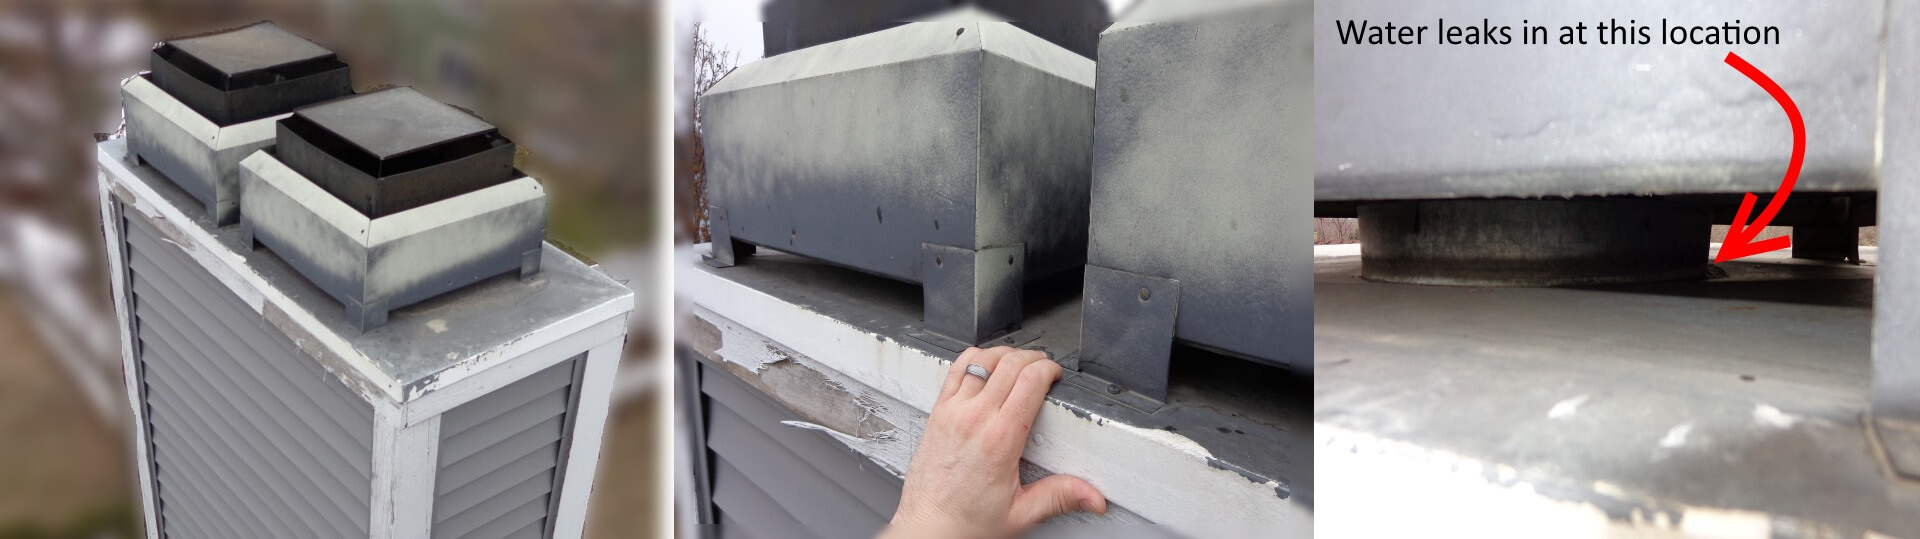
To verify the cause of the leaking, I simply dumped a few gallons of water on top of the chimney; water began to drip into the fireplace shortly after that. For the record, this was at a signle-item inspection, where the owner hired me to get to the bottom of the leaking. This wasn’t a traditional home inspection.
That’s all for today. Next week I’ll post about how to inspect the exterior of your home for proper water management.
Mark
July 25, 2014, 2:33 pm
Test.