Concealed damage was the focus of last week’s blog post, and that’s what I’ll be talking about this week, as well as stinky bees. To be specific, this week’s topic is about tracking down a nasty odor. Every once in a while, we get calls from frustrated homeowners who are hoping to have us come out to solve a mysterious odor in their home. We do a lot of single item / troubleshooting inspections for homeowners, but getting to the bottom of odors is one type of inspection that we’re never excited to take on. It can turn into a guessing game, and we probably only have about a 50% batting average when it comes to definitively nailing down the source of an odor. We’re up front about this when scheduling these types of inspections, but many people are already at their wit’s end, so they’re happy to have us try.
We all have problems
As I said last week, home inspector’s houses aren’t immune to concealed damage and bad odors any more than anyone else’s. Just recently, my dad (Neil) discovered a funky odor in the corner of his walkout basement bedroom. Being the house detective that he is, he couldn’t let this linger. His first thought was that it might be dog pee in the carpet, but after pulling back the carpet and giving the pad a thorough sniff test, no such luck. The odor was coming from an electrical outlet.
This home was built in 1980, and back then it wasn’t standard practice to have sealed outlet boxes at exterior walls. The stink wasn’t originating from the outlet; that’s just where there was a hole in the wall, so that’s where the odor was most noticeable.
Side note on air leakage at outlets and switches: foam covers probably aren’t worth installing. If you want to stop air leakage at outlets and switches, the best way is to use fire caulking inside the boxes. Check out this blog post at Energy Vanguard for more info on this topic: Air Leakage at Electrical Switches and Outlets
Time to open the wall
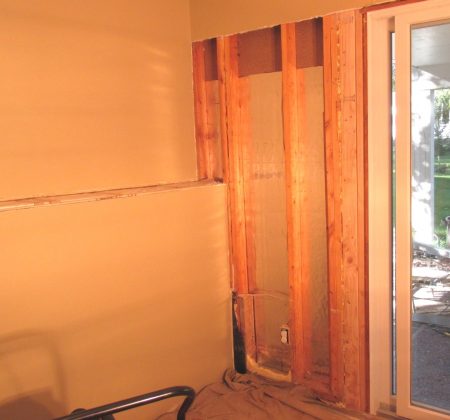
After pulling the outlet and finding nothing out of the ordinary, he began tearing into the drywall. He got very close to the source of the odor, but the worst area seemed to be right around the corner from the concrete block wall, which is the section of wall that sticks out a bit in the lower left quarter of the photo. The only way to get there was to remove the siding at the exterior. So that’s what came next.

By the way, the black stuff in the lower left corner of the photo above is poly, not mold.
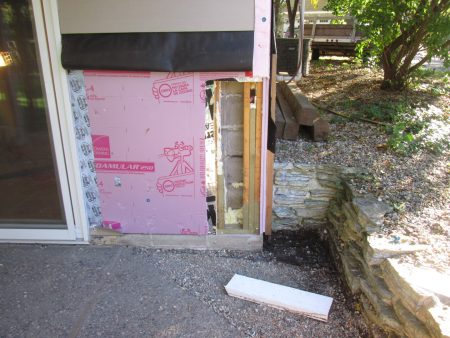
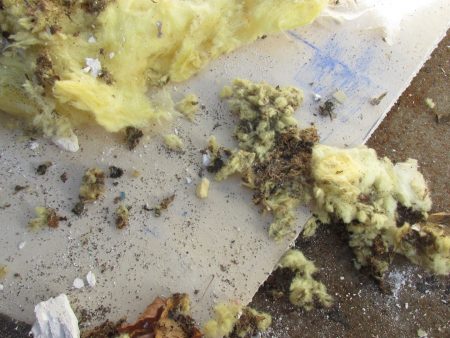
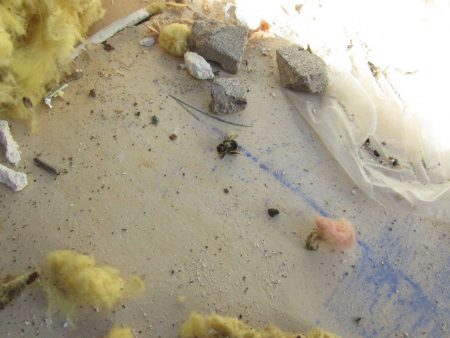
Neil got close to the source of the odor by removing the interior drywall, but the odor seemed to be coming from the last stud bay. The only way to access that last stud bay was to remove the siding at the exterior, so that’s what came next. After the exterior siding, insulation, and wall sheathing was removed, Neil found dead bees strewn throughout the fiberglass insulation. They apparently stunk to high heaven.


Once Neil removed the infested insulation, the odor went away. Problem solved. All that was left was to put the wall back together and make sure there weren’t any gaps between the foundation and the wall that could allow for pests to get in again. That’s what ultimately allowed this to happen; a very small opening at the bottom of the wall, which Neil was unaware of until he tore his wall apart.
The total cost of materials for this project was approximately $45, which went to new paint and new insulation. The real cost for this project was the amount of time spent taking the wall apart and putting it back together, which totaled about 20 – 25 hours. If we had been hired by a homeowner to get to the bottom of this odor, there’s not much that we would have been able to help them with, short of telling our client to open the wall up to see what was going on. Sometimes that’s the only option.

Ian Cull, PE, CIH
October 25, 2016, 9:30 pm
I love hearing your honesty about the difficulty in finding odors. Many clients expect us to have a magic sniffer that will lead us right to the problem. We can go in with $10,000 worth of air quality equipment, but the solution is often a matter of taking things apart.