James Hardie lap siding is great product, but it only performs as well as it’s installed. I’ve heard several complaints about this product from various home buyers, mostly anecdotal evidence about how the material deteriorates, but I’ve found improper installations on every damaged section of siding I’ve ever seen. James Hardie siding is a fiber-cement product that comes with a 30 or 50 year warranty, but any warranty will be void if the product is improperly installed. James Hardie isn’t the only manufacturer of fiber cement siding, but it’s certainly the most popular.
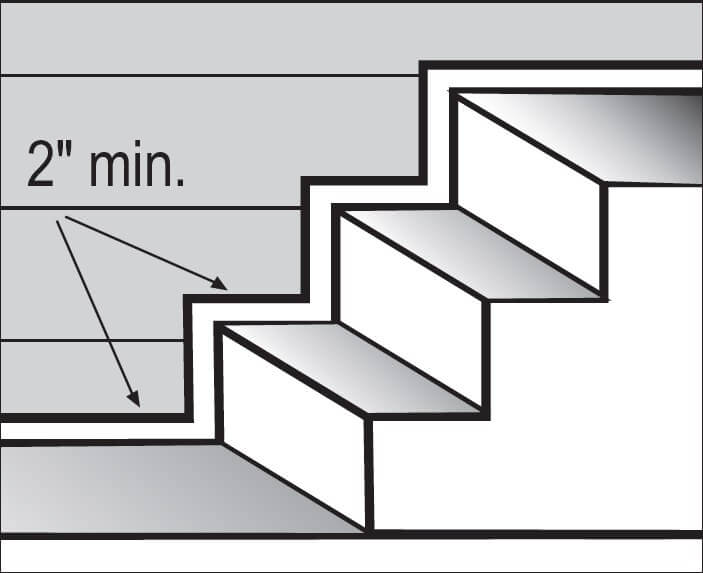
Listed below are a few of the most common installation defects that I find. The funny thing about these installation defects is that the installation instructions are very clear and very specific – the diagrams below all come directly from James Hardie. The other manufacturers of fiber cement siding have nearly identical installation instructions.
Improper Clearances
- Must be kept 2″ away from roof surfaces, decks, driveways, steps, and other similar hard surfaces.
- Must be kept 6″ above the finished grade.
- Gutters must be kept 1″ away from the siding, and kickout flashing needs to be installed.
- Must be kept 1/4″ above flashing above windows, and not caulked here.
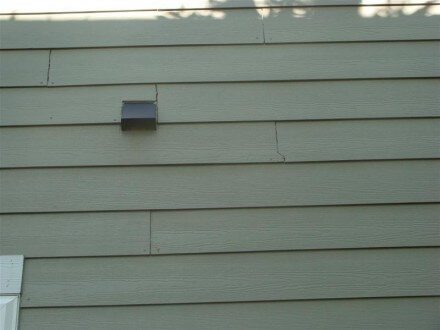
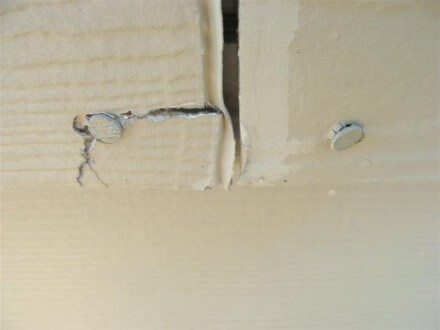
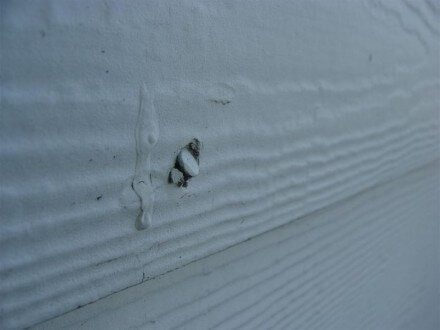
- Must be blind nailed or face nailed, but not both. The photos below show blind nails and face nails used together, and clearly shows what happens.
- The proper size nails must be used (6d or siding nails). Framing nails (16d) were used in the photos below.
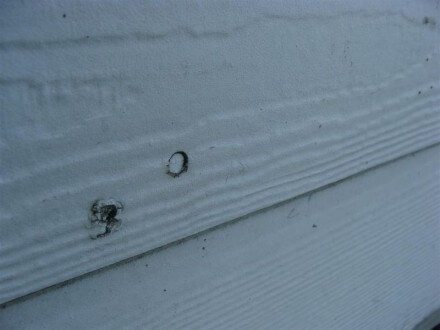
- The nails must be driven in straight, and must not be over-driven or under-driven. The nails pictured were driven at an angle or driven in too far.
What Do These Defects Mean?
If you’re buying a house with improperly installed James Hardie siding, be aware that damage caused by an improper installation will not be covered by their warranty, and your siding will be subject to premature damage and deterioration. If the proper clearances haven’t been met, they can often be fixed. If the siding has been improperly attached to the house, there isn’t any practical way to fix this. You’ll have to take your chances and hope it doesn’t turn out like the photos above, or you’ll need to have the siding redone. For a full list of current installation requirements for the HZ5 plank, click here.
If you have an existing installation and you want to know if it was properly installed, you can view some of their older installation manuals here:
- 1998 Hardiplank Lap Siding Installation Instructions
- 2000 Hardiplank Lap Siding Installation Instructions
- 2001 Hardiplank Lap Siding Installation Instructions
- 2004 Hardiplank Lap Siding Installation Instructions
- 2005 Hardiplank Lap Siding Installation Instructions
- 2007 Hardiplank Lap Siding Installation Instructions
- 2008 Hardiplank Lap Siding Installation Instructions
- 2010 Hardiplank Lap Siding Installation Instructions
- 2011 Hardiplank Lap Siding Installation Instructions
- 2012 Hardiplank Lap Siding Installation Instructions
- 2013 Hardiplank Lap Siding Installation Instructions
- 2016 Hardiplank Lap Siding Installation Instructions
- 2019 Hardiplank Lap Siding Installation Instructions
There may be other editions of installation instructions published in-between these dates, but I don’t have records of them.
Reuben Saltzman, Structure Tech Home Inspections – Email – Minneapolis Home Inspector


