According to Underwriters Laboratories, clothes dryers are responsible for approximately 15,000 home fires each year. It’s not hard to believe. Improperly installed and improperly maintained clothes dryer ducts are one of the most common issues that home inspectors find, but it’s not that difficult to keep your clothes dryer safe. Today I’ll discuss dryer duct installations and maintenance.
Installation
In Minnesota, the installation requirements for clothes dryer ducts can be found in Section 504 of the Minnesota Mechanical Code. I won’t go over all of the requirements, but I will mention a few of the items that most people have questions about.
Dryer duct length – the maximum allowable length for a clothes dryer duct is 25′. Each 90 degree turn in the duct is worth 5′, and each 45 degree turn is worth 2.5 feet. For a typical basement in Minneapolis or Saint Paul, the clothes dryer has a 90 degree turn in the duct right behind the dryer, then another 90 degree turn at the ceiling. Assuming it’s a 7′ ceiling, this leaves 8′ of run before the dryer duct needs to terminate at the exterior, according to these requirements.
While many clothes dryers have a longer run than this, it’s not always a problem. There’s an exception to the rule which says “where the make and model of the clothes dryer to be installed is known and the manufacturer’s installation instructions for such dryer are provided to the code official, the maximum length of the exhaust duct, including any transition duct, shall be permitted to be in accordance with the dryer manufacturer’s installation instructions.”.
In other words, if the dryer manufacturer allows a longer duct, no problem.
I’ve read a lot of dryer installation manuals, and in every case the dryer manufacturer allowed for a much longer run than what’s allowed by code; for instance, a 29″ Maytag clothes dryer allows for a 100′ duct when two elbows are used.
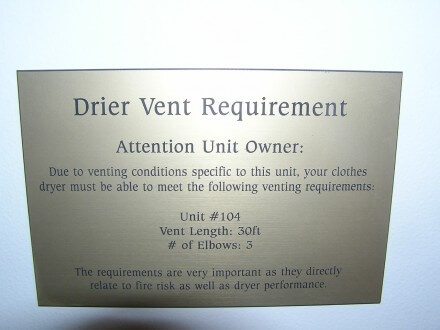
I once inspected a condo conversion building in Saint Louis Park where the contractor had attached a placard to the location where the dryer would go, warning that the maximum length of the drier (sic) vent was limited to 30′ with three elbows.
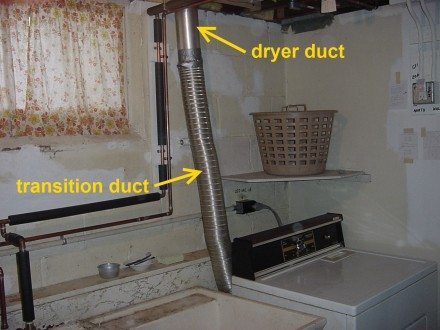
Dryer duct construction – dryer ducts need to vent to the exterior, be made from metal, be at least 4″ in diameter, and have a smooth interior. The entire duct needs to be supported and secured, and no screws are allowed on the joints because they could accumulate lint. Flexible materials, such as foil, plastic, and semi-rigid metal aren’t allowed. Those are all common materials used for a dryer transition duct – the material that can be used to get from the dryer to the duct.
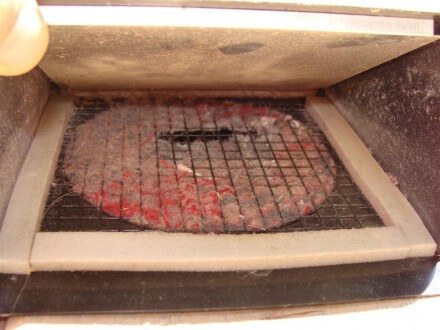
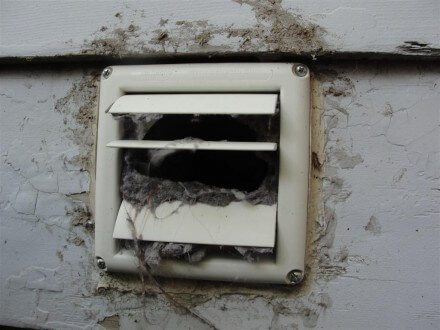
The terminal for the dryer needs to have a backdraft damper, and no screens are allowed at the dryer exhaust. When screens are installed, they get clogged with lint. This reduces the performance of the dryer and creates a potential fire hazard.
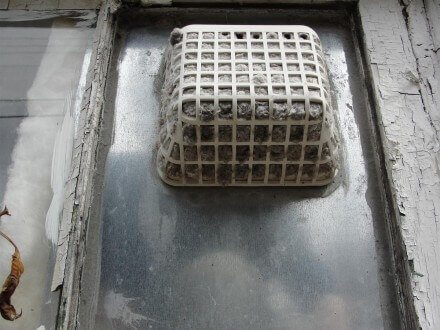
I’ve heard concerns about pests getting in to the clothes dryer duct if a screen isn’t installed, but if the backdraft damper at the exterior is kept clean, this shouldn’t be an issue.
Transition Ducts are a big enough topic to deserve their own post. I’ll write about these next week.
Clothes Dryer Maintenance
Clothes dryer maintenance is actually quite simple: keep it clean. Dryer lint is flammable, and the more that accumulates in the dryer and the duct, the greater the risk. The most obvious and routine part of this is keeping the lint screen clean – it should be cleaned after every load.
Periodically check the damper at the exterior to make sure it’s clean; when lint accumulates at the damper it will eventually cause the damper to stay open.
If you’re unfortunate enough to have a dryer that exhausts through the roof… I’m sorry to hear it. Someone needs to get up there on a regular basis to clean the damper.
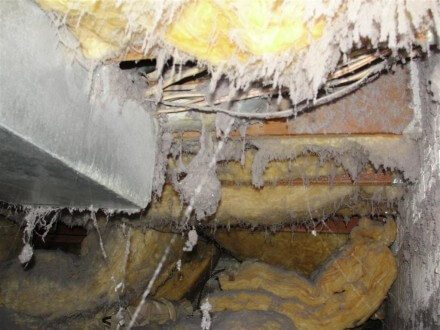
If you have a dryer duct that passes through a concealed or infrequently visited space, such as an attic or crawl space, you should check on it periodically to make sure that everything is still properly connected. A disconnected clothes dryer duct will exhaust a ridiculous amount of lint and moisture in to the home.
Take a peek behind your dryer with a flashlight periodically – it’s quite common for the dryer to come disconnected from the duct, which makes a big mess of flammable lint behind the dryer. The dryer duct itself needs to be cleaned periodically as well. You can find instructions for cleaning your own dryer duct here – http://www.wikihow.com/Clean-a-Clothes-Dryer-Vent. This sounds like a good project for the next rainy weekend.
I’ll have plenty more to discuss next week, on the topic of clothes dryer transition ducts.
Reuben Saltzman, Structure Tech Home Inspections



Burning Dryer Transition Ducts | Structure Tech Home Inspections
August 14, 2012, 5:58 am
[…] 14th, 2012 | No comments Last week I blogged about clothes dryer ducts, and this week I’m going to follow up with information on dryer transition ducts. As I […]