It’s been about seven years since my company purchased our first infrared camera. Since then, we’ve amassed quite a collection of infrared images. We used to have one infrared camera that was shared by me and Milind, but it got too difficult to juggle one camera, so we bought a second. Those two cameras became too difficult to juggle, so we bought cameras for everyone. Today, all of the inspectors in my company have the same infrared camera, the FLIR E6, and we use our infrared cameras during home inspections as we see fit for no additional fee. This is a change that we implemented at the beginning of this year.
The things that we find and report on through the use of an infrared camera have evolved over the years, and so has our use of infrared cameras. I just finished going over all of the infrared images that my company has captured over the last year, and I’ve put together a compilation of common things that we use our infrared camera for during home inspections.
Verifying heat or lack thereof
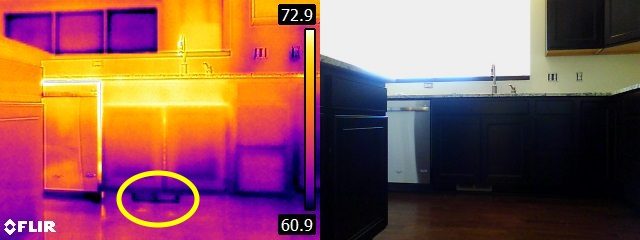
The quickest way to verify airflow at heat registers throughout a home is to turn on the heat or AC and then run around the house with an IR camera about 10 minutes later. The image below shows a non-functional kitchen toe-kick heat register at a new construction inspection.
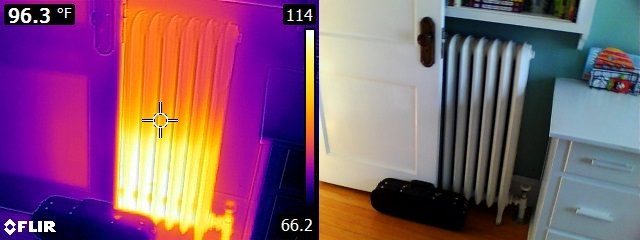
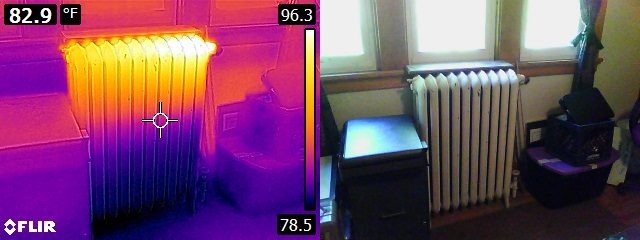
It’s a snap to inspect radiators with infrared cameras. When a radiator doesn’t heat up properly, part of the radiator stays cool.
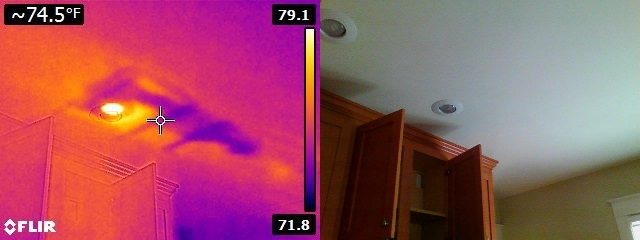
Ceiling stains
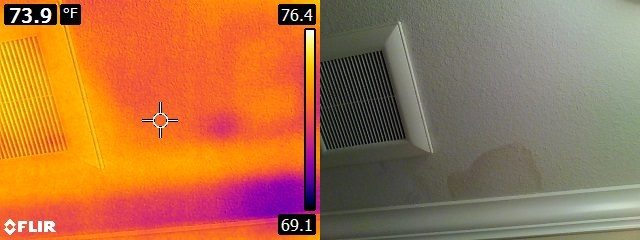
Infrared cameras can be used to quickly determine whether ceiling stains are active or not. This isn’t a definitive test for moisture, but when a ceiling is all the same temperature, it’s highly unlikely that the ceiling is wet. In the image below, the stained portion of the ceiling was dry at the time of the inspection.
Collapsed glass
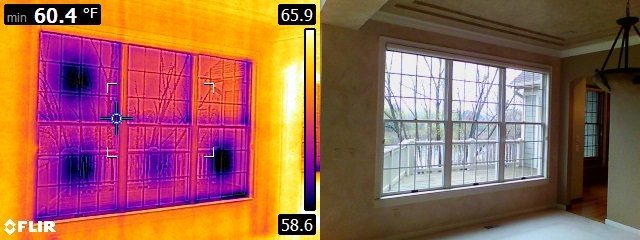
Collapsed glass is actually a new one for us. It’s a condition caused by the gas between two panes of glass escaping, which pulls the two panes of glass toward each other. In extreme cases, the glass panes can actually touch each other. This is not the same thing as a failed seal. When viewed with an infrared camera, collapsed glass appears as dark blue circles or ovals in the center of the glass. We’ll have a blog post about this in the near future.
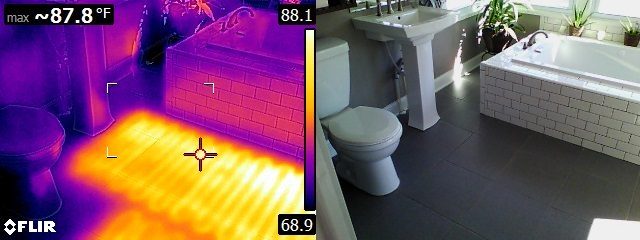
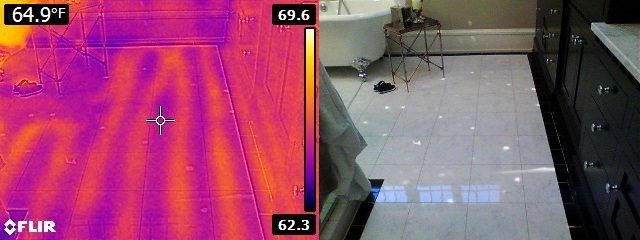
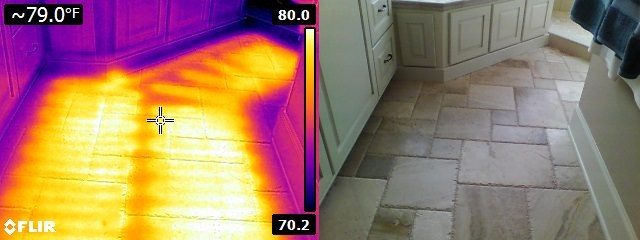
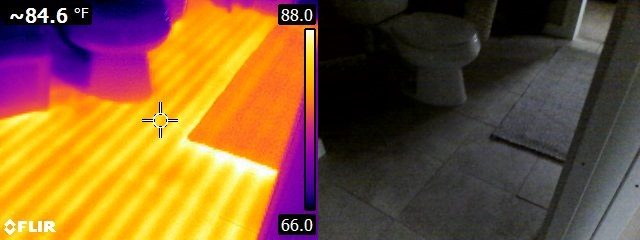
Heated floors
There is no other great way to inspect heated floors.
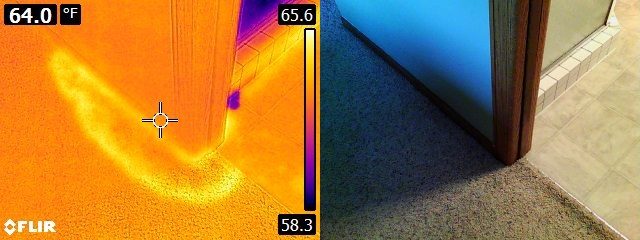
Tiled shower leaks
We use a shower dam to test tiled showers for leaks, and we use an infrared camera below to identify the leaks before water leaks out of the ceiling… most of the time. That doesn’t always happen, as some leaks are so severe that water starts pouring out before anything becomes visible with our camera, but we catch most of them first.
Insulation problems
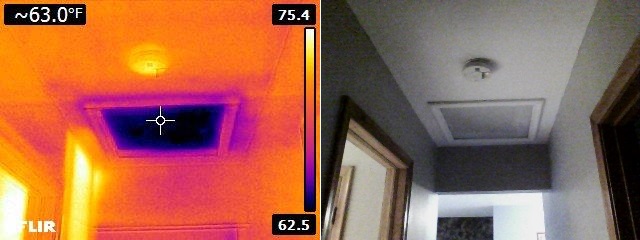
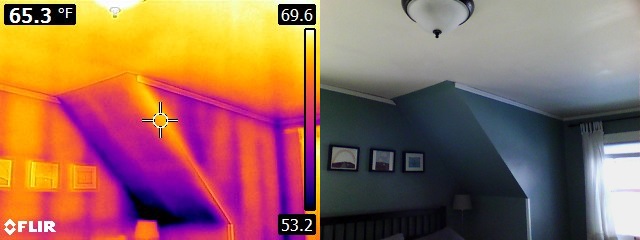
Insulation problems are probably the most obvious use for an infrared camera. When insulation is missing or not installed properly, it’s quite obvious. This first image shows missing or improperly installed insulation at an attic access panel.
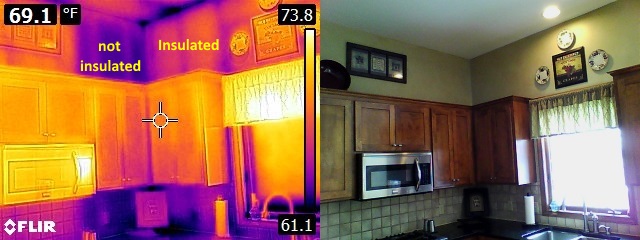
If a wall is not insulated, the studs will be the warmest part of the wall. The image below shows a nice comparison between an insulated and uninsulated wall.
Insulation that is missing or improperly installed is also quite easy to spot.
Hot spots in attics
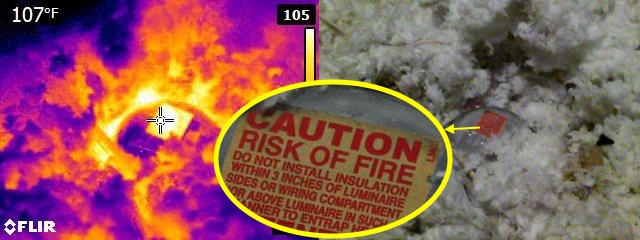
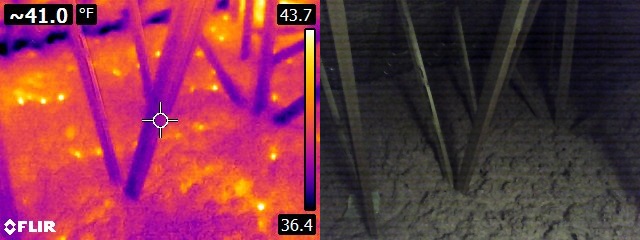
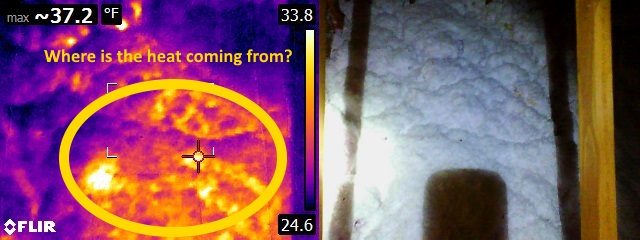
During the winter, infrared cameras make it extremely easy to spot places where excessive heat is transferred to attic spaces. In cold climates like ours, this can lead to ice dams, which is a big deal here. One of the worst offenders is recessed lights; especially those that aren’t supposed to be in contact with insulation.
Missing exhaust ducts on bath fans are quite obvious with an infrared camera; they appear to be a big heat explosion.
Mouse holes in insulation are also quite obvious. They turn the insulation into swiss cheese.
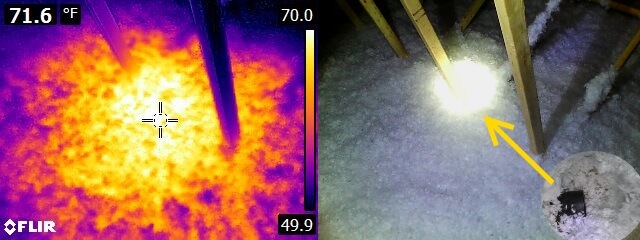
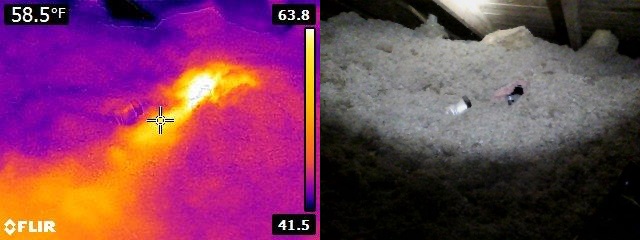
Attic bypasses are especially easy to find with an infrared camera. This is the first really useful “find” that we discovered with an infrared camera, and it changed the way that we talked about ice dams and attic problems. This first image below shows an attic air leak, or bypass, covered with insulation. It’s pretty obvious that something is happening under the insulation, right?
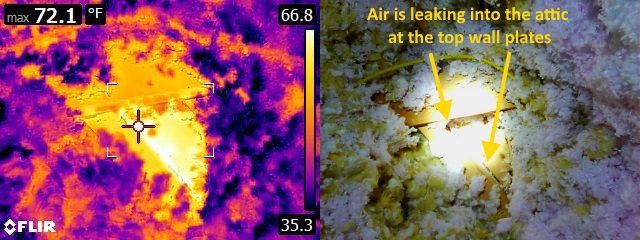
After pulling the insulation away, we found that the top plate of a wall wasn’t air sealed. This is just one of about a dozen common places for air to leak into the attic.
Electrical Problems
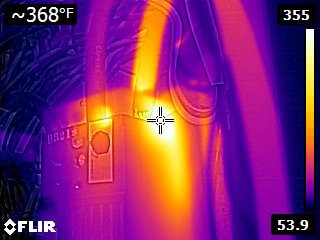
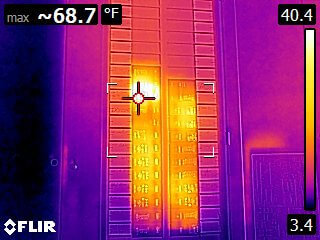
We don’t find a ton of electrical issues with infrared cameras, but we do find them. The image below shows a very hot main breaker; over 350 degrees! This was unquestionably a problem.
When breakers are simply warm, sometimes it’s no big deal, sometimes it is. To know the difference, one must also use an amp meter to determine whether or not the circuit is overloaded. I blogged about that topic here: http://structuretech1.com/using-an-infrared-camera-to-find-an-overloaded-circuit/
Random
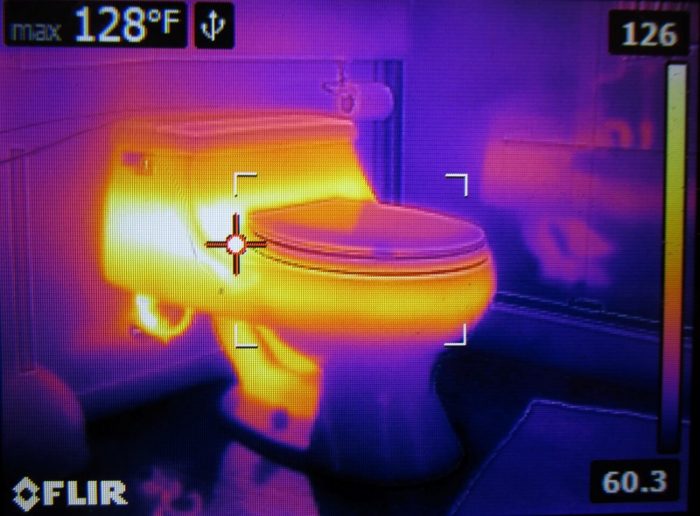
One of my favorite infrared images ever is this hot toilet. I stumbled across this by accident while scanning the room for a heat source. I may have given the toilet an extra flush or two just to make sure the heat showed up nicely on my camera. Maybe. Edit 1/11: I should have explained what caused this. The toilet was plumbed with hot water instead of cold, and the water heater also happened to be cranked up much higher than normal.
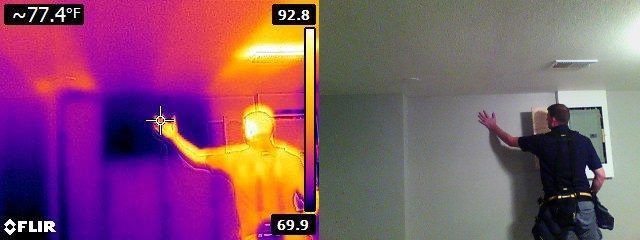
Finally, here’s a basement window that was covered over when the basement was finished.
If your home inspector uses an infrared camera during their home inspection, these are the kinds of things they might find. If you’re a home inspector who doesn’t use an infrared camera, this is the stuff you might not be finding. If you’re a home inspector who does use an infrared camera, this is stuff that you might want to look for. Did I miss anything that should be added to this list? If so, please leave a comment.

Doug Grover
January 10, 2017, 11:48 am
I’m impressed that you valued the information gained from IR cameras enough to make the substantial investment for all your inspectors to have their own. I’ve seen plenty of situations in unrelated operations where staff were underproductive because someone wouldn’t shell out for the tools they needed.
Tyler
January 10, 2017, 4:47 pm
Question about the hot toilet – would plumbing it like that mean I would never have to experience a cold toilet seat again??
Reuben Saltzman
January 10, 2017, 4:59 pm
Tyler – unfortunately not. After the water has sat in the toilet bowl overnight, everything surely ends up cooling down to ambient room temperature 🙁
Brian C.
January 10, 2017, 9:33 pm
Possibly from a toilet anti-sweat (hot water) mixing valve, right? When I was younger and my dad was in construction, he told me these were standard installation to stop the bowl/tank from sweating. I honestly haven’t seen one in years though, so not sure if they’re even used anymore.
Reuben Saltzman
January 11, 2017, 5:05 am
Hi Brian,
The toilet was actually plumbed with hot water, full on. What made this one especially hot was the fact that the water heater was cranked up much higher than normal, making the water coming into the tank about 150 degrees.
Steamy!
Mark Parlee
January 11, 2017, 9:10 am
Great info Reuben, Thanks for sharing this
Dave Christopher
January 11, 2017, 11:39 am
Great article Reuben.
Gabe Sanders
January 14, 2017, 4:23 pm
Thanks Reuben. You’ve done a great job of showing us all how valuable your inspections are with a thermal imaging camera.
FLIR E6: the best infrared camera for home inspectors - Structure Tech Home Inspections Structure Tech Home Inspections
January 31, 2017, 5:03 am
[…] mentioned this camera several times in past blog posts (Seek Thermal review, FLIR ONE review, Infrared cameras and home inspections) but I’ve never taken the time to explain why this one has become the camera of choice for me […]
Wes Fahlenkamp
March 8, 2017, 9:23 am
Hey Reuben, great article – very helpful. While updating plumbing on an old duplex, I discovered a hot toilet also. They were literally flushing their money down the drain for who knows how many years.