A ground-fault circuit-interrupter (GFCI) is a life-safety device designed to help prevent electrocution. They’ve been around for over 50 years, and they’re required all over the place in new construction homes. Here’s a partial list of places where receptacles must be protected by a GFCI device:
- Bathrooms
- Garages and accessory buildings
- Outdoors
- Crawl spaces
- Basements (including finished basements)
- Kitchens
- Laundry areas
- Indoor damp and wet locations
Again, that’s just a partial list. If you have a receptacle located where there’s a good chance of getting electrocuted from a shock, you probably need GFCI protection.
What does GFCI “protected” mean?
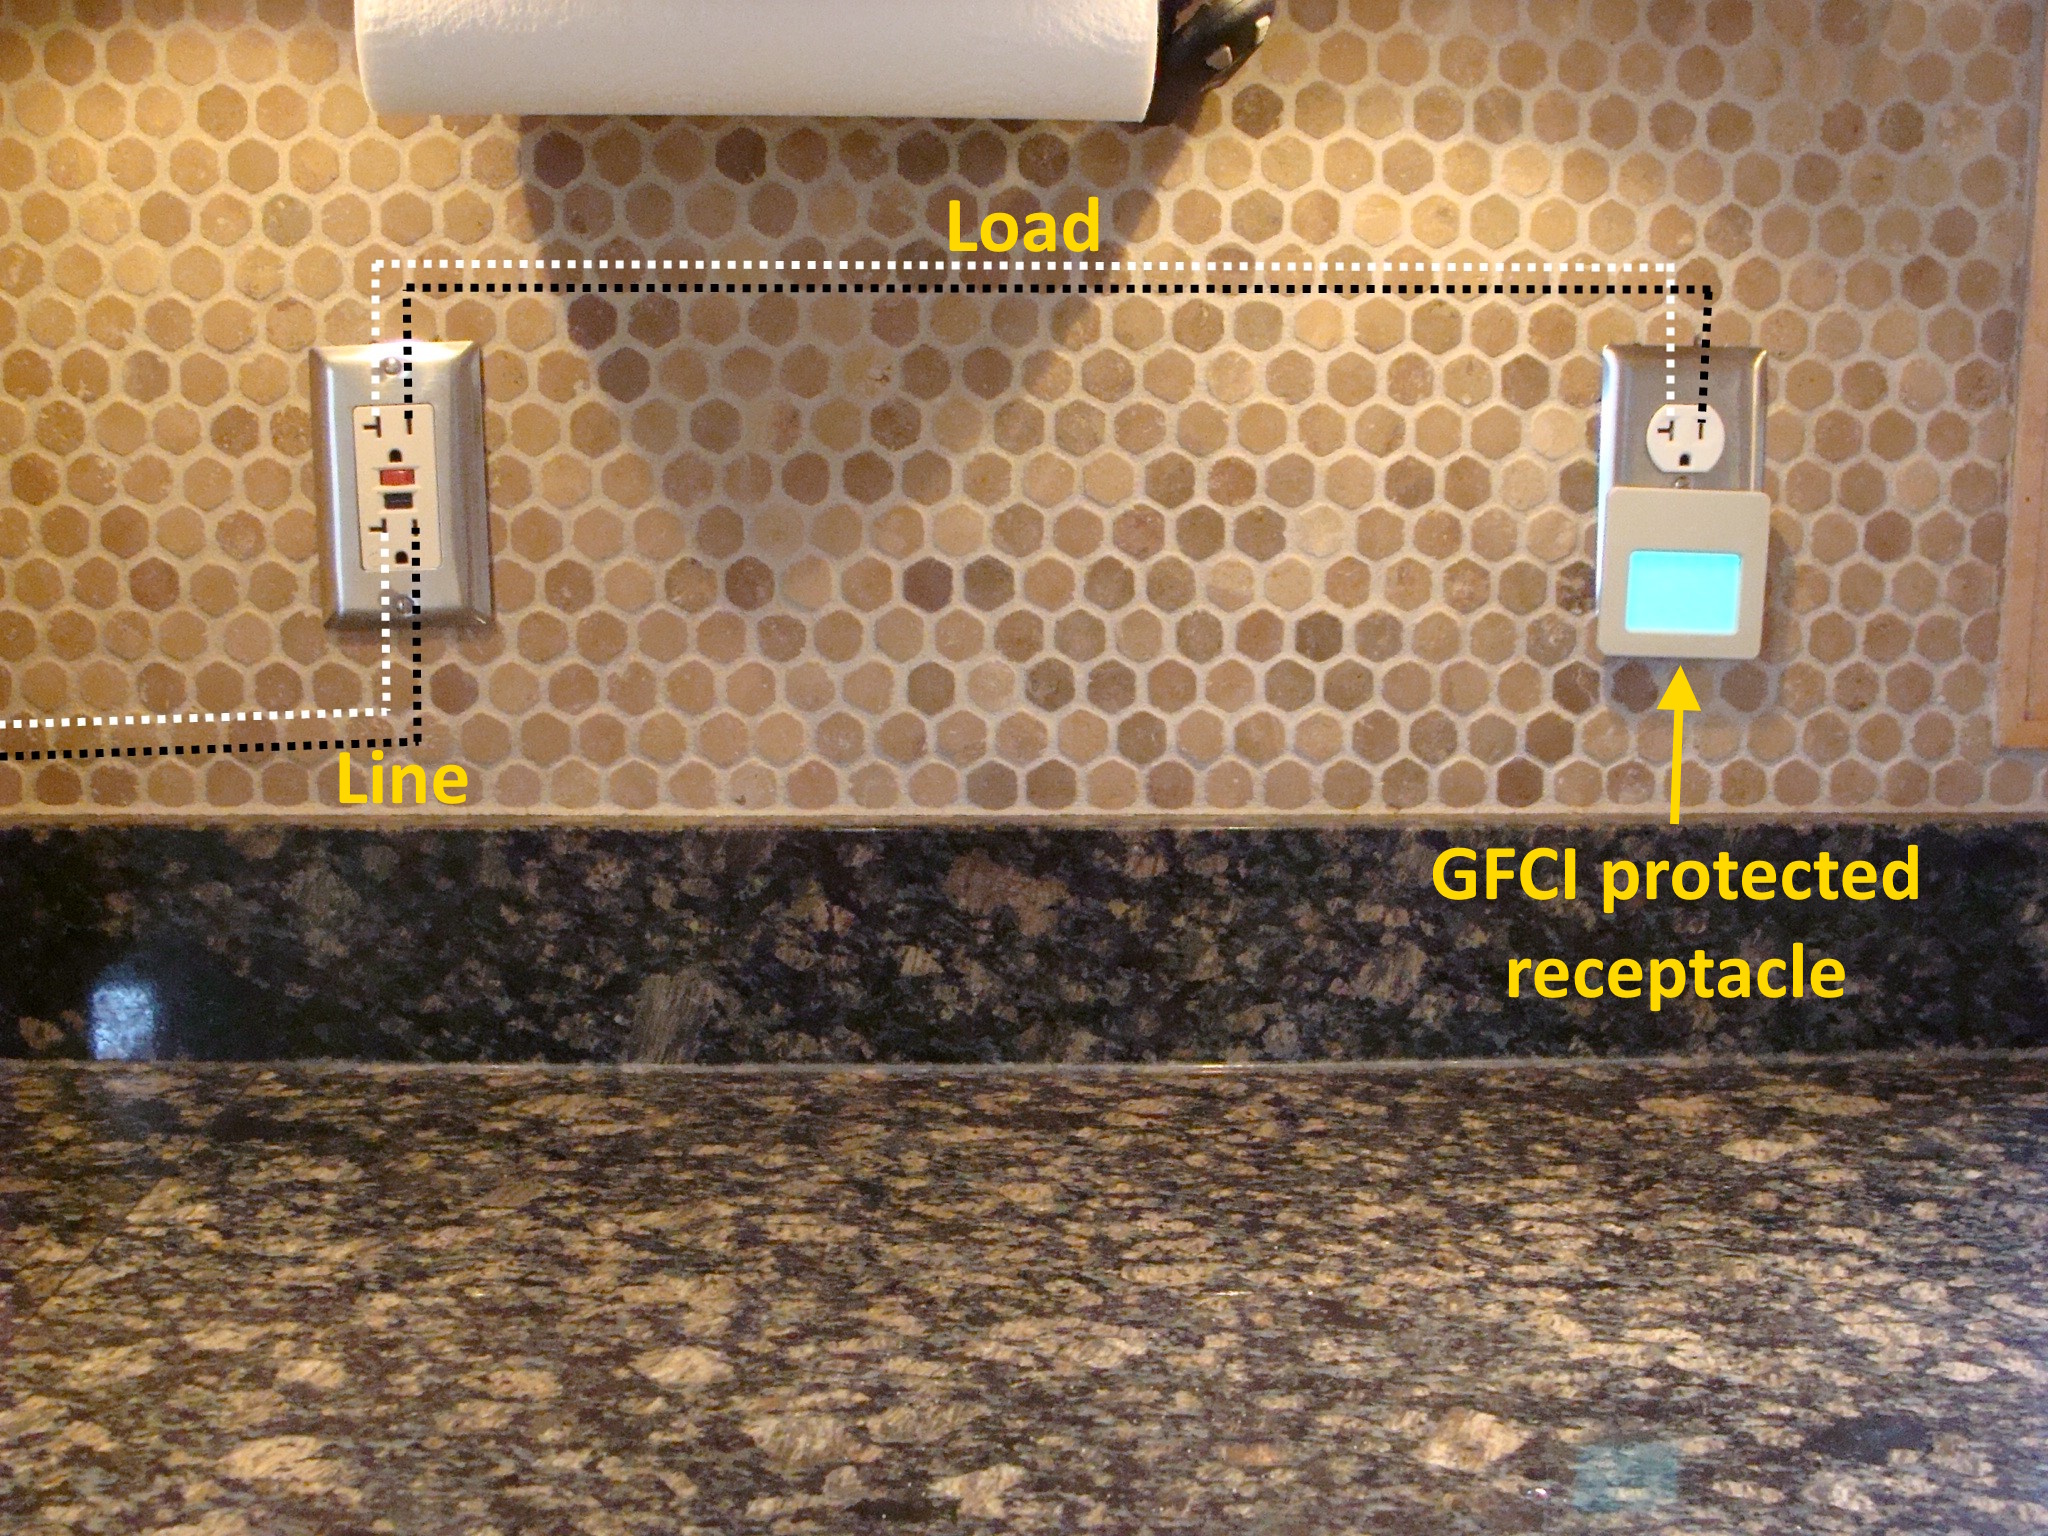
Any ordinary receptacle can be protected by a GFCI device. Just because you don’t see a GFCI device, this doesn’t mean you don’t have protection. If you look at any GFCI device, you’ll see there’s a “line” and a “load” side. You bring the power into the receptacle on the line side. If you want to protect other outlets downstream from the GFCI device, you wire them off the load side.
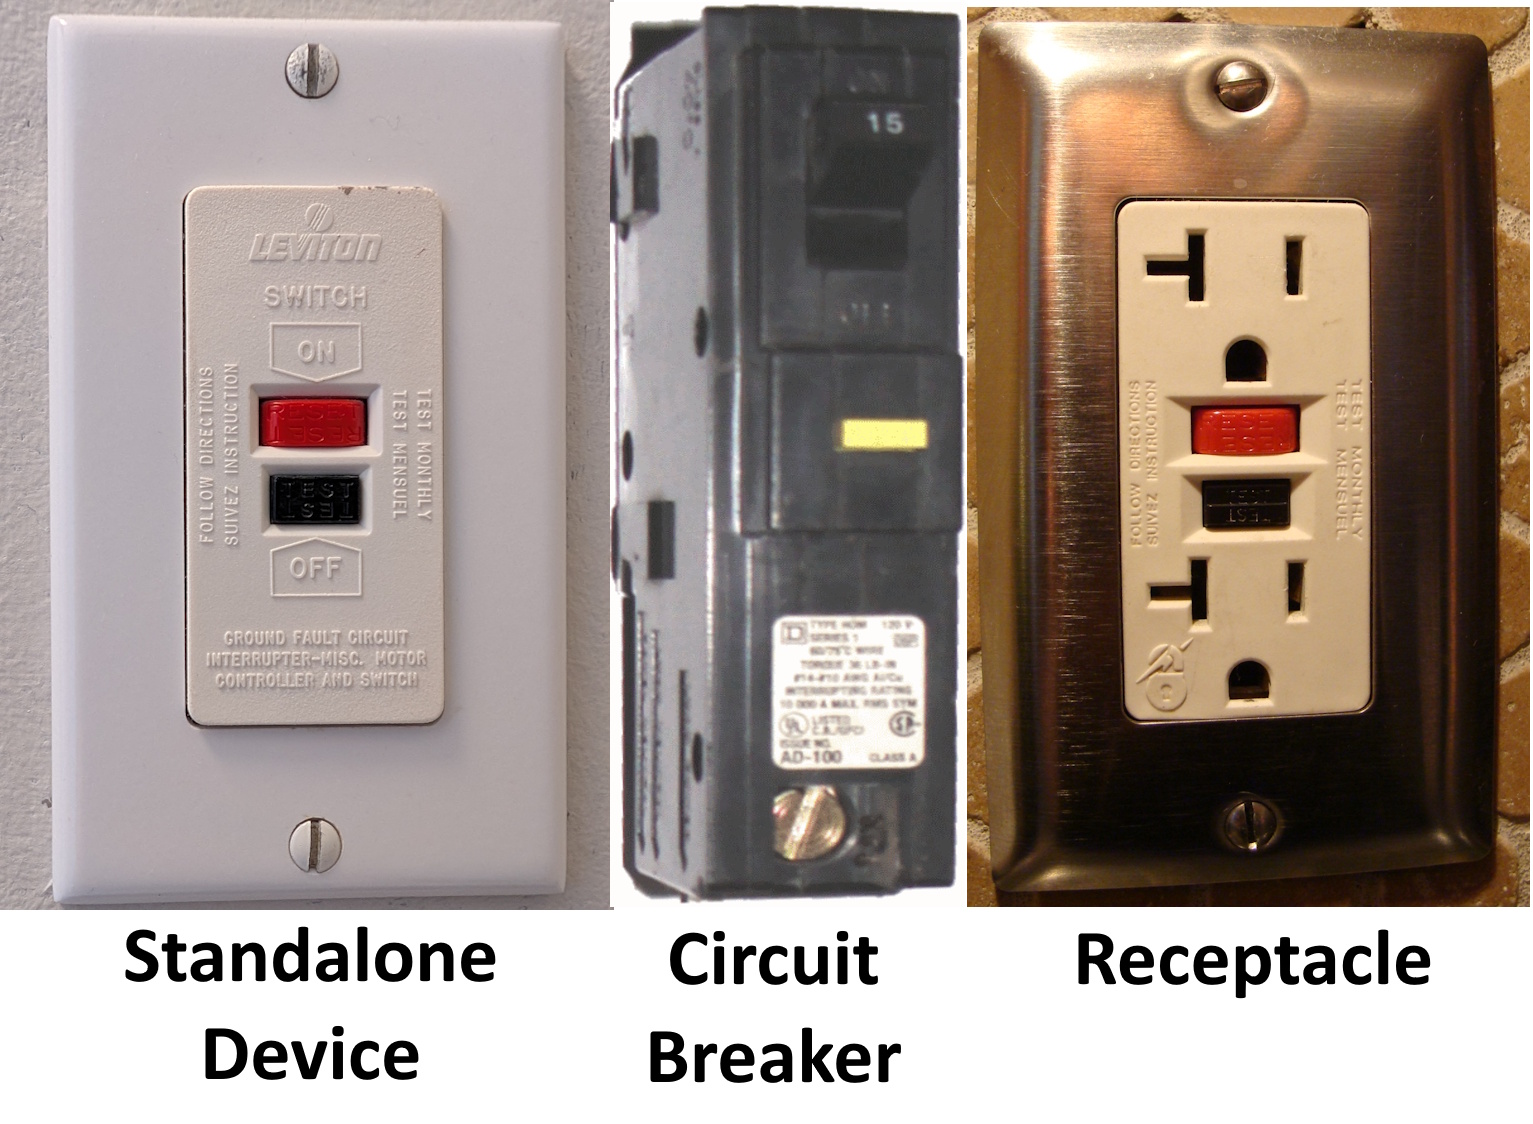
A GFCI device might be a standalone device, a circuit breaker, or a GFCI receptacle.
So how do you know if a standard receptacle is protected by one of these devices? Hang on, let’s come back to that. First, let’s talk about testing a GFCI device.
GFCI devices should be tested every 30 days.
No joke. GFCI manufacturers all say you’re supposed to test your GFCI devices every 30 days. I think it’s downright crazy to expect homeowners to do this monthly… but still. There it is. So let’s get down to the specifics of testing.
GFCI test procedures explained.
For every GFCI receptacle in your home, the only manufacturer-approved test is to use the built-in test button. I like to plug something into the receptacle, preferably an outlet tester, to verify power. If you don’t have one, you can simply use a lamp, nightlight, or something similar. Next, press the test button on the receptacle. This should immediately cut power, indicating your device is working properly. Next, press the device’s reset button. This should restore the power. Easy-peasy.
If you have a standalone GFCI device, you probably have a whirlpool tub. Every standalone GFCI device I’ve ever encountered was there to protect the whirlpool tub receptacle. This GFCI device is frequently hidden behind clothes in a bedroom closet. To test this, fill your tub with water, turn on the whirlpool, then press the test button on your device. The whirlpool should immediately turn off. After pressing the reset button, the whirlpool will usually turn back on, but not always. Some need to be manually turned back on.
If you have a GFCI circuit breaker, you need to determine what it protects. If you’re lucky or you have a newer home, your panel will be properly labeled. For everyone else, good luck. Many homes built during the 1980s have a GFCI circuit breaker protecting the garage and bathroom receptacles. More often than not, the super-unhelpful label on the panel says “GFI”. Gee, thanks. So anyway, once you’ve determined what it protects, you press the test button on the circuit breaker, then verify you’ve killed the power to the receptacles that should be protected. Then go back to the circuit breaker and turn it off all the way, then back on to restore power.
How to verify GFCI protection for non-GFCI receptacles.
This is where it gets complicated. Let’s say you have a non-GFCI receptacle at the exterior of your house, and you want to verify it’s GFCI-protected. The simplest way to do this is to use a GFCI outlet tester, which you can purchase from any home improvement store for about $10. My personal favorite is the Triplett ET100.
You plug the tester into the receptacle, verify power, and listen very carefully while you press the “test” button on the tester. This should cut power to the receptacle if it’s GFCI-protected. And if you’re very lucky, you’ll hear the popping sound of a remote GFCI device tripping. Now you need to search the home to find the tripped GFCI device and reset it. I’ve spent countless hours of my home inspection career searching for tripped GFCI devices by using this procedure.
Tip to home inspectors: avoid using the test button on your GFCI tester. Only do it when you have to. If some dope needlessly installed a bunch of GFCI devices on the same circuit, you’ll trip them all at the same time, and the only way to reset them will be to do it in the correct order, and you need to find them all. Ask me how I know.
But this method isn’t perfect. GFCI protection can also be used in place of grounded receptacles in some instances. This means you might have an ungrounded, GFCI-protected, three-prong outlet.
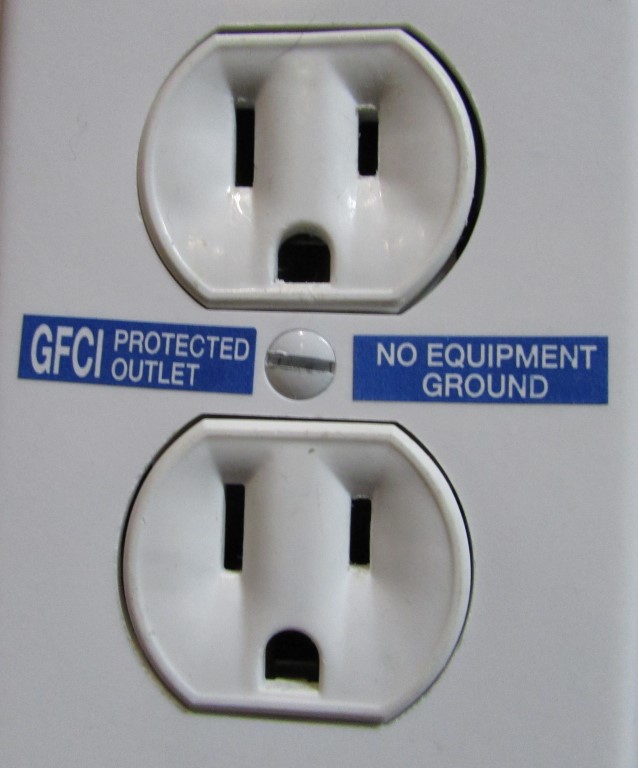
A GFCI tester used at these receptacles will not trip the GFCI device because it needs a proper ground to work properly. In these cases, you need to manually hunt down the GFCI device, trip it, then go to the receptacle in question and verify power has been cut.
What if the test fails?
If you do any of these tests and the power doesn’t get cut, you have a bad GFCI device that needs to be replaced. GFCI receptacles cost around $10 – $20 each, while GFCI circuit breakers are in the $50 – $75 range. This is about a 5-minute project for a qualified person.
Brian
March 3, 2026, 7:42 pm
I learned the hard way early on to not test those outdoor receptacles until you have access to the house or garage – tripped the garage outlet once which powered the door motor and that was the way in to the house for the inspection. Live and learn, and hope that GFCI reset isn’t behind the refrigerator. Lol.
Reuben Saltzman
March 4, 2026, 12:09 pm
Great point, Brian. I’ve learned that lesson the hard way too.
Christopher
March 4, 2026, 10:37 pm
It can be a bit of a pain, but I physically trip each GFCI after first verifying correct polarity and wiring at each receptacle using my personal favorite tester (the Gerber from Menards). It fits nicely into exterior metal receptacle covers that don’t open fully, where many testers won’t fit. As I move around testing receptacles, I also count each visible GFCI device with a “TEST” button. Then I go back and manually trip each one and verify loss of power at the downstream outlets.
Yes, it takes more time, but I believe it provides a better service. As Reuben said, if “some dope” installs multiple downstream GFCIs, this approach helps prevent having to play the “find the correct reset location” game afterward if you use the “easy button” on top for the tester.
Reuben Saltzman
March 5, 2026, 8:28 am
Christopher – you get it! Thank you for chiming in. Both here and on Facebook (insert gigantic eyeroll).