I love recessed lights, but even the best ones create a ridiculous amount of heat in attics, which can lead to ice dams. Until I started performing infrared inspections in attics, I never quite grasped how much heat recessed lights contributed to attics, but now my eyes are wide open. The main problem I find with recessed lights is that they’re not insulated well enough; on a recent home inspection in Maple Grove, I found a home with forty-six recessed lights sticking up in to the attic, along with some wicked ice dams on the roof.
A standard recessed light will stick up in to the attic about seven inches. If an attic has fourteen inches of loose fill fiberglass insulation, how much insulation does that leave on top of the recessed light? Hang on, let me get my calculator…
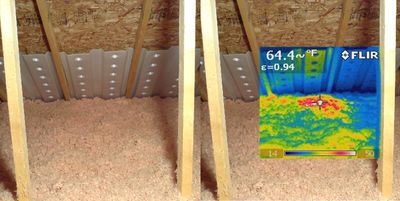
At any rate, there’s far less insulation above recessed lights than anywhere else in the attic, and these are the areas that get the hottest, so they should really have more insulation than anywhere else in the attic. Unfortunately, that never happens. The combination of minimal insulation and hot light fixtures shows up clear as day using an infrared camera.
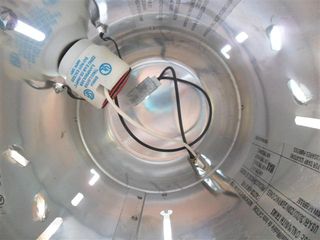
The images above show how much heat is leaking through the insulation above an IC rated, airtight recessed light with a 65-watt incandescent bulb. IC rated means that it’s safe to have insulation directly in contact with the light, but it’s not synonymous with airtight. You can usually tell if a recessed light is airtight just by looking inside it; if there are a bunch of holes inside the housing, it probably isn’t airtight.
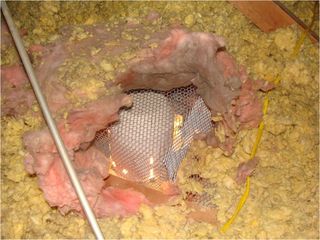
If you can see light pouring through on the attic side, it’s definitely not airtight. All of these little holes in the housing are passageways for heated air to escape in to the attic; they’re called attic bypasses.
Having said all this, I don’t think recessed lights are truly ‘evil’, but they sure can cause a lot of problems, and there seems to be very little understanding of this in the building trades. Here’s what you can do to prevent problems:
If you plan to install recessed lights that are going to protrude in to your attic, make sure they’re airtight, IC-rated lights. After the lights are installed, be sure to double down on the amount of insulation above the lights; you’re gonna need it.
If you already have airtight recessed lights in your home, you probably need way more insulation installed on top of them. This is usually quite simple to do, but without an infrared camera, it might take a little time to locate all the lights.
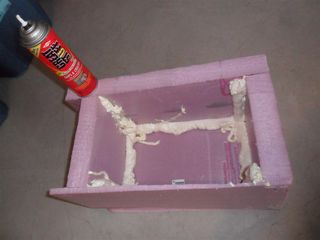
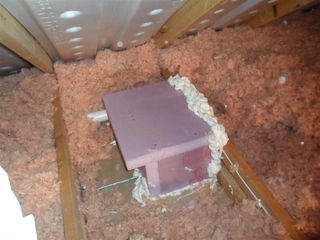
If you already have non-airtight recessed lights sticking up in to your attic, don’t worry; there’s a fix for this. Simply construct an airtight box out of rigid foam insulation, and ‘glue’ it together with spray foam.
Now place this airtight box over the offending recessed light in your attic, and use a bunch more expanding foam to seal it up and make it completely airtight. Not only will this prevent air leakage from around the light, but it will dramatically increase the insulation level above the light. While the box pictured below is the ugliest box I’ve ever seen (I built it), it’s still very effective at preventing heat loss.
If constructing and installing insulated boxes throughout your attic seems like too much work, you could always replace any standard incandescent light bulbs with compact fluorescent lights or LEDs; they produce far less heat, they’re easy to install, and you’ll start saving money on your electricity bills.
Reuben Saltzman, Structure Tech Home Inspections – Email – Maple Grove Home Inspections

